
Is Your Conference Schedule Hurting Your Event?
Organizing a conference is no small task. From coordinating speakers to managing attendee registrations, every detail matters. However, one of the most overlooked yet crucial elements is the schedule. A poorly designed schedule can lead to confusion, frustration, and even missed sessions—negatively impacting the experience for both speakers and attendees.
If your current conference schedule suffers from any of the following issues, it’s time for a change:
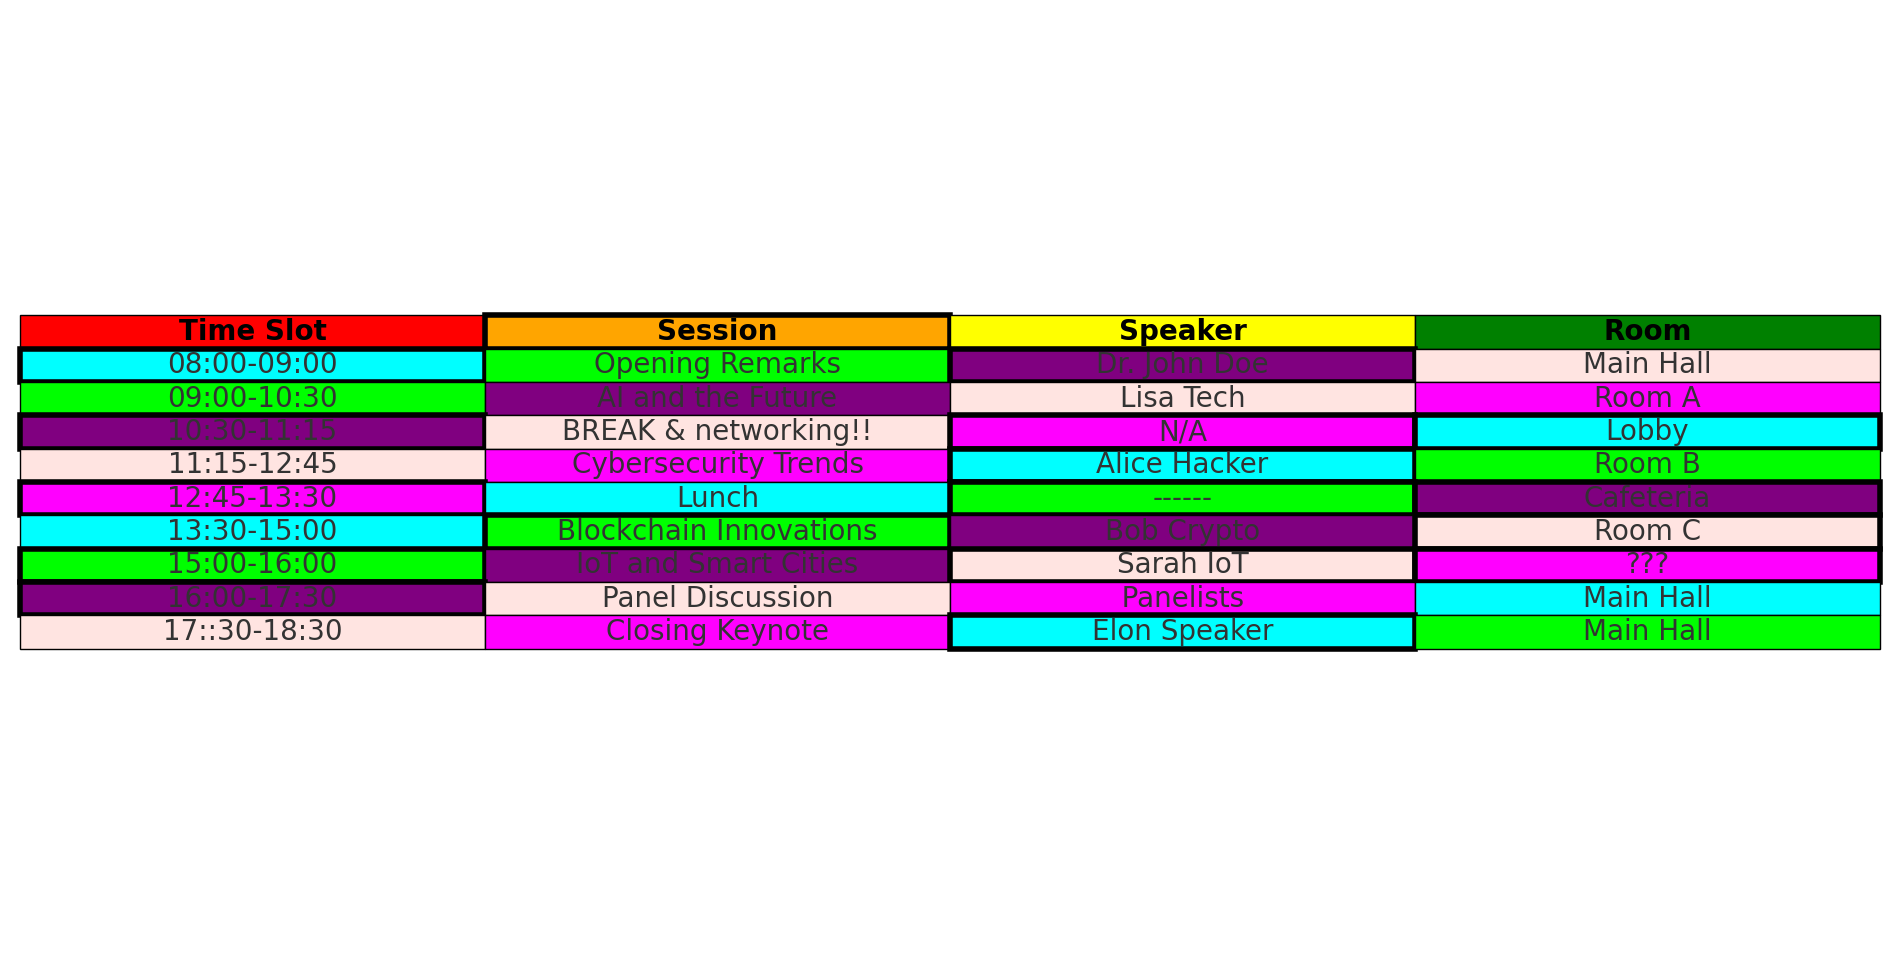
❌ Difficult to Read & Navigate – Attendees struggle to find relevant sessions, leading to a chaotic experience.
❌ Poor UI/UX Design – Clunky layouts, unappealing colors, and inconsistent fonts make it harder to follow.
❌ Hard to Update – Requires manual edits in code, making last-minute changes time-consuming and error-prone.
❌ Developer-Dependent – Only developers can modify the schedule, limiting flexibility and responsiveness.
If this sounds familiar, don’t worry—there’s a better way.
Introducing Planby Now: The No-Code Solution for Conference Scheduling
With Planby Now, you can create and manage a professional, easy-to-use conference schedule without writing a single line of code. Whether you’re an event organizer, marketer, or speaker, you can take full control of your schedule and provide attendees with a seamless, engaging experience.
→ Link to NOW CONF TECH DEMO → Check
Why Choose Planby Now**?**
✅ No-Code, No Hassle – Easily build and customize your schedule with an intuitive drag-and-drop interface.
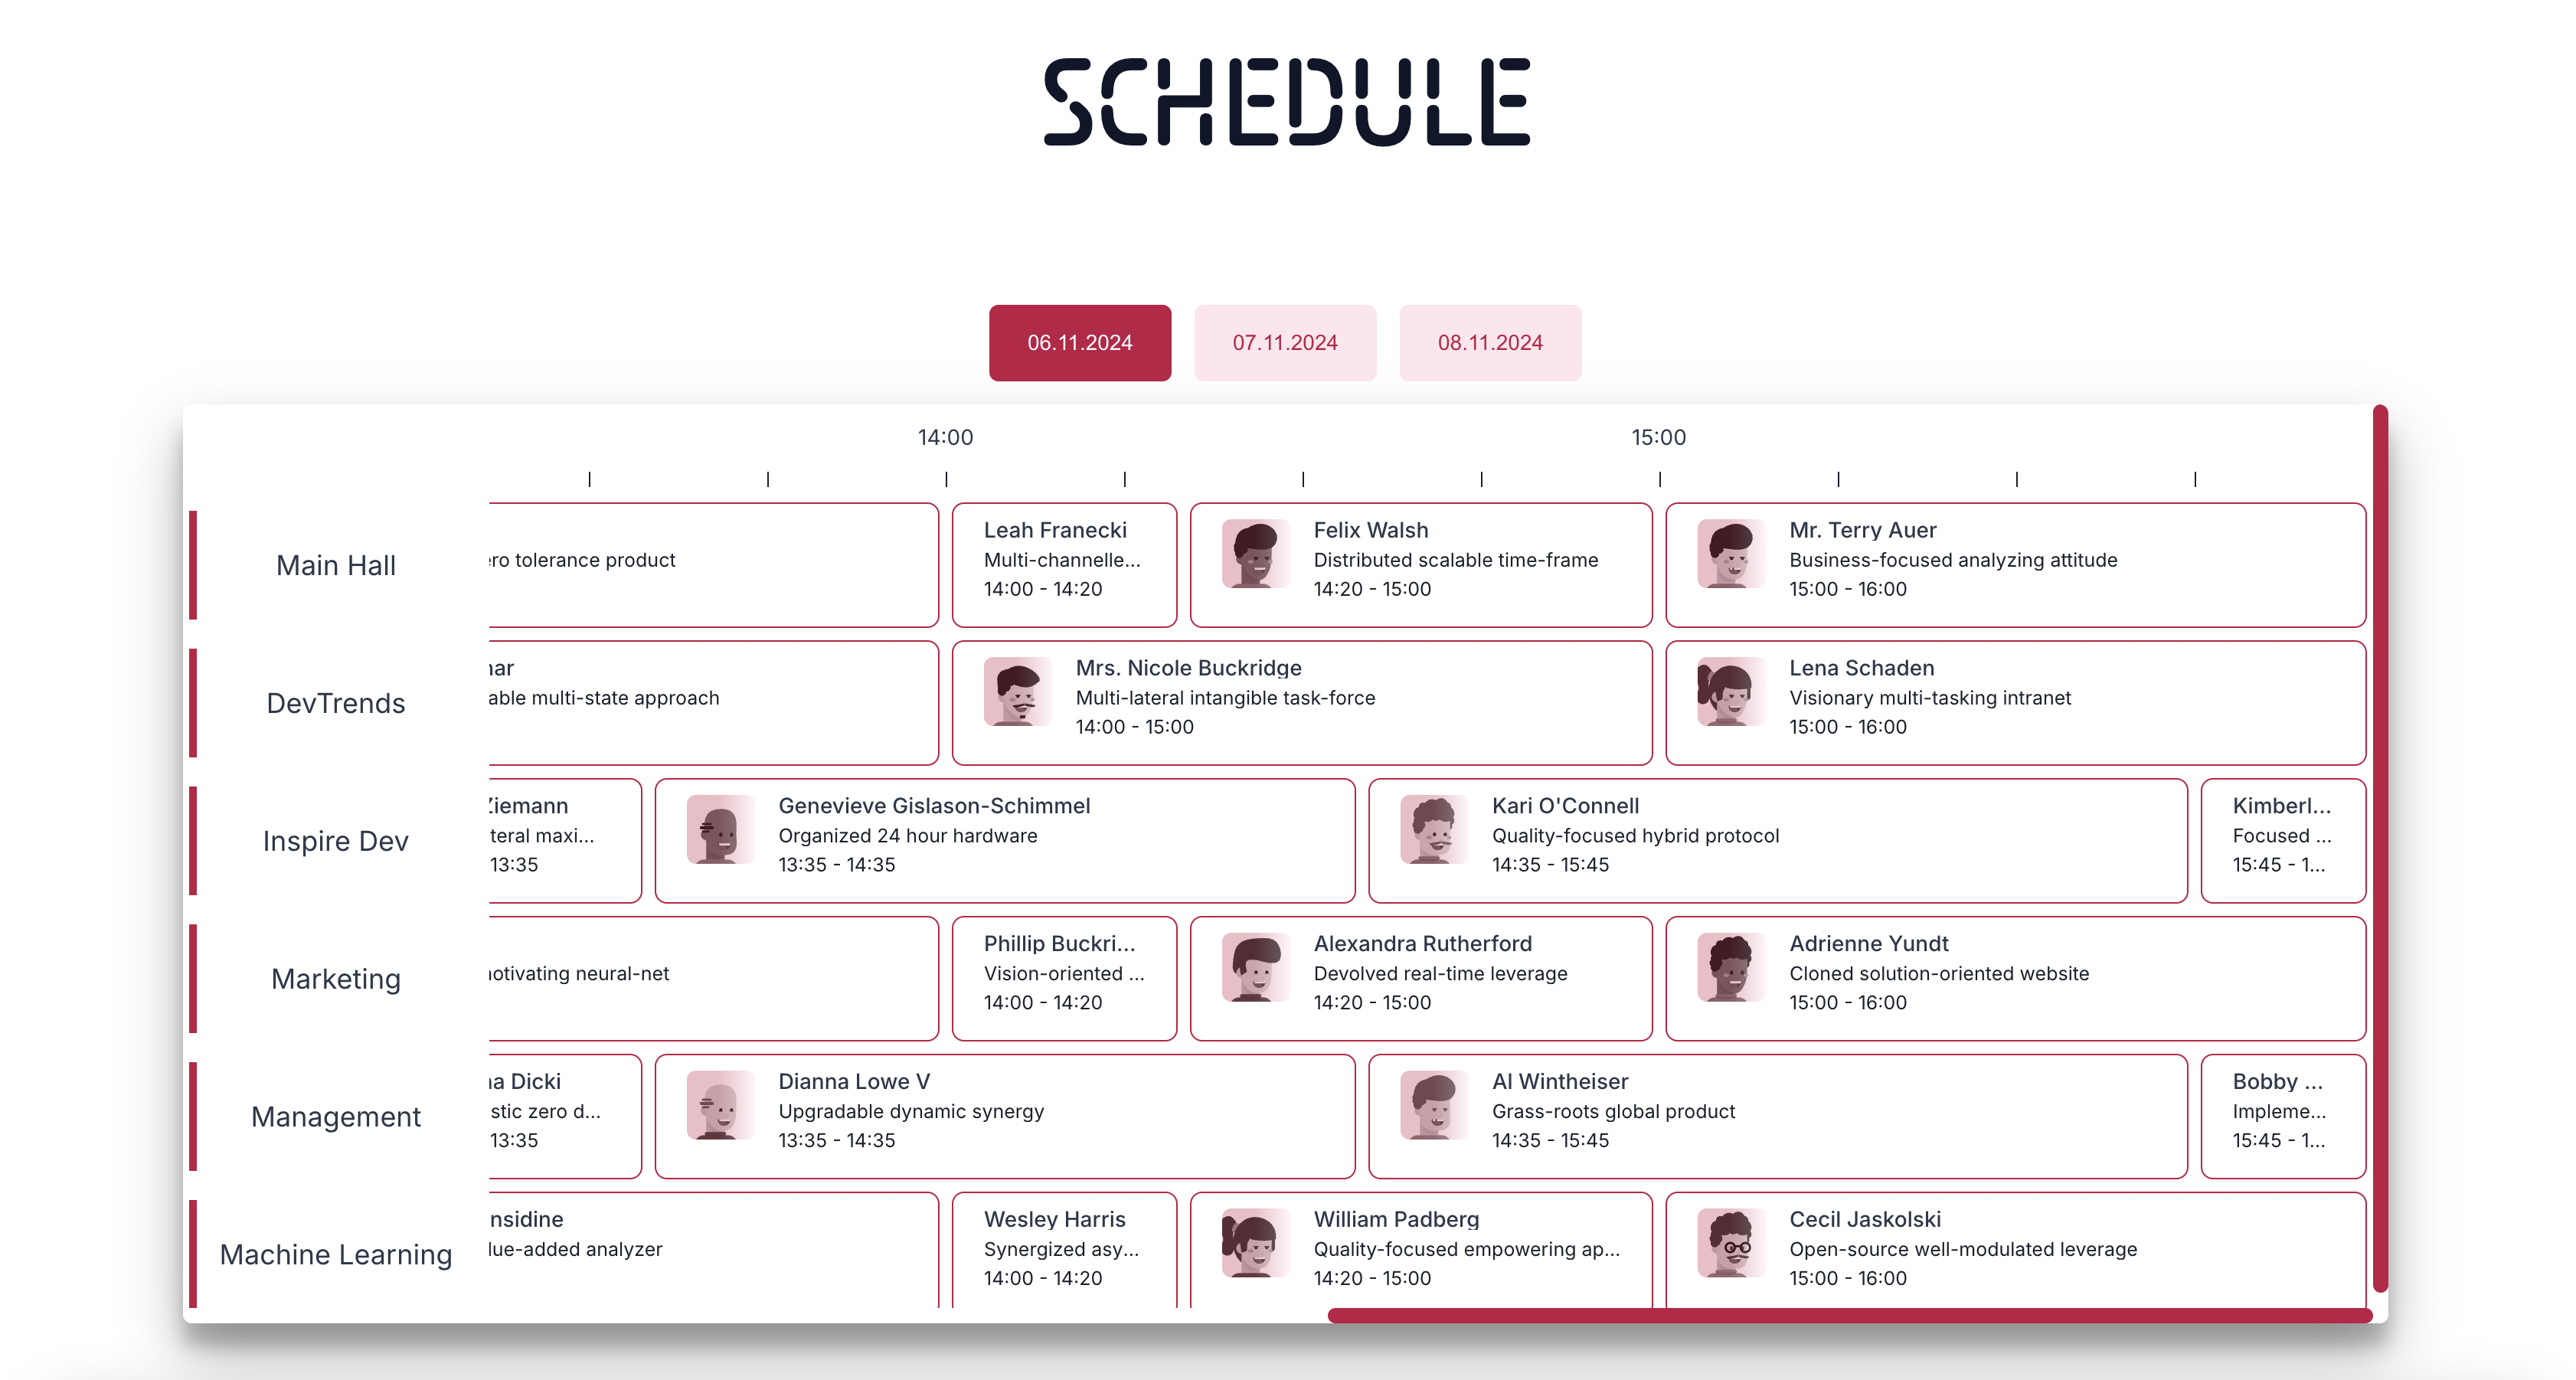
✅ User-Friendly Design – Clean, visually appealing layouts ensure attendees find the sessions they’re interested in.
✅ Fully Customizable – Tailor the look and feel to match your event branding with just a few clicks.
✅ Real-Time Updates – Make instant changes without waiting on developers, keeping your schedule accurate and up to date.
✅ Seamless Website Integration – Embed your schedule directly into your event website or share it as a standalone link.
How It Works
1️⃣ Sign Up & Create – Set up your event and add sessions, speakers, and time slots effortlessly.
2️⃣ Customize & Brand – Adjust colors, fonts, and layout to align with your event’s style.
3️⃣ Embed & Share – Publish your schedule on your website or share a public link with attendees.
4️⃣ Update Anytime – Modify sessions on the go without disrupting the user experience.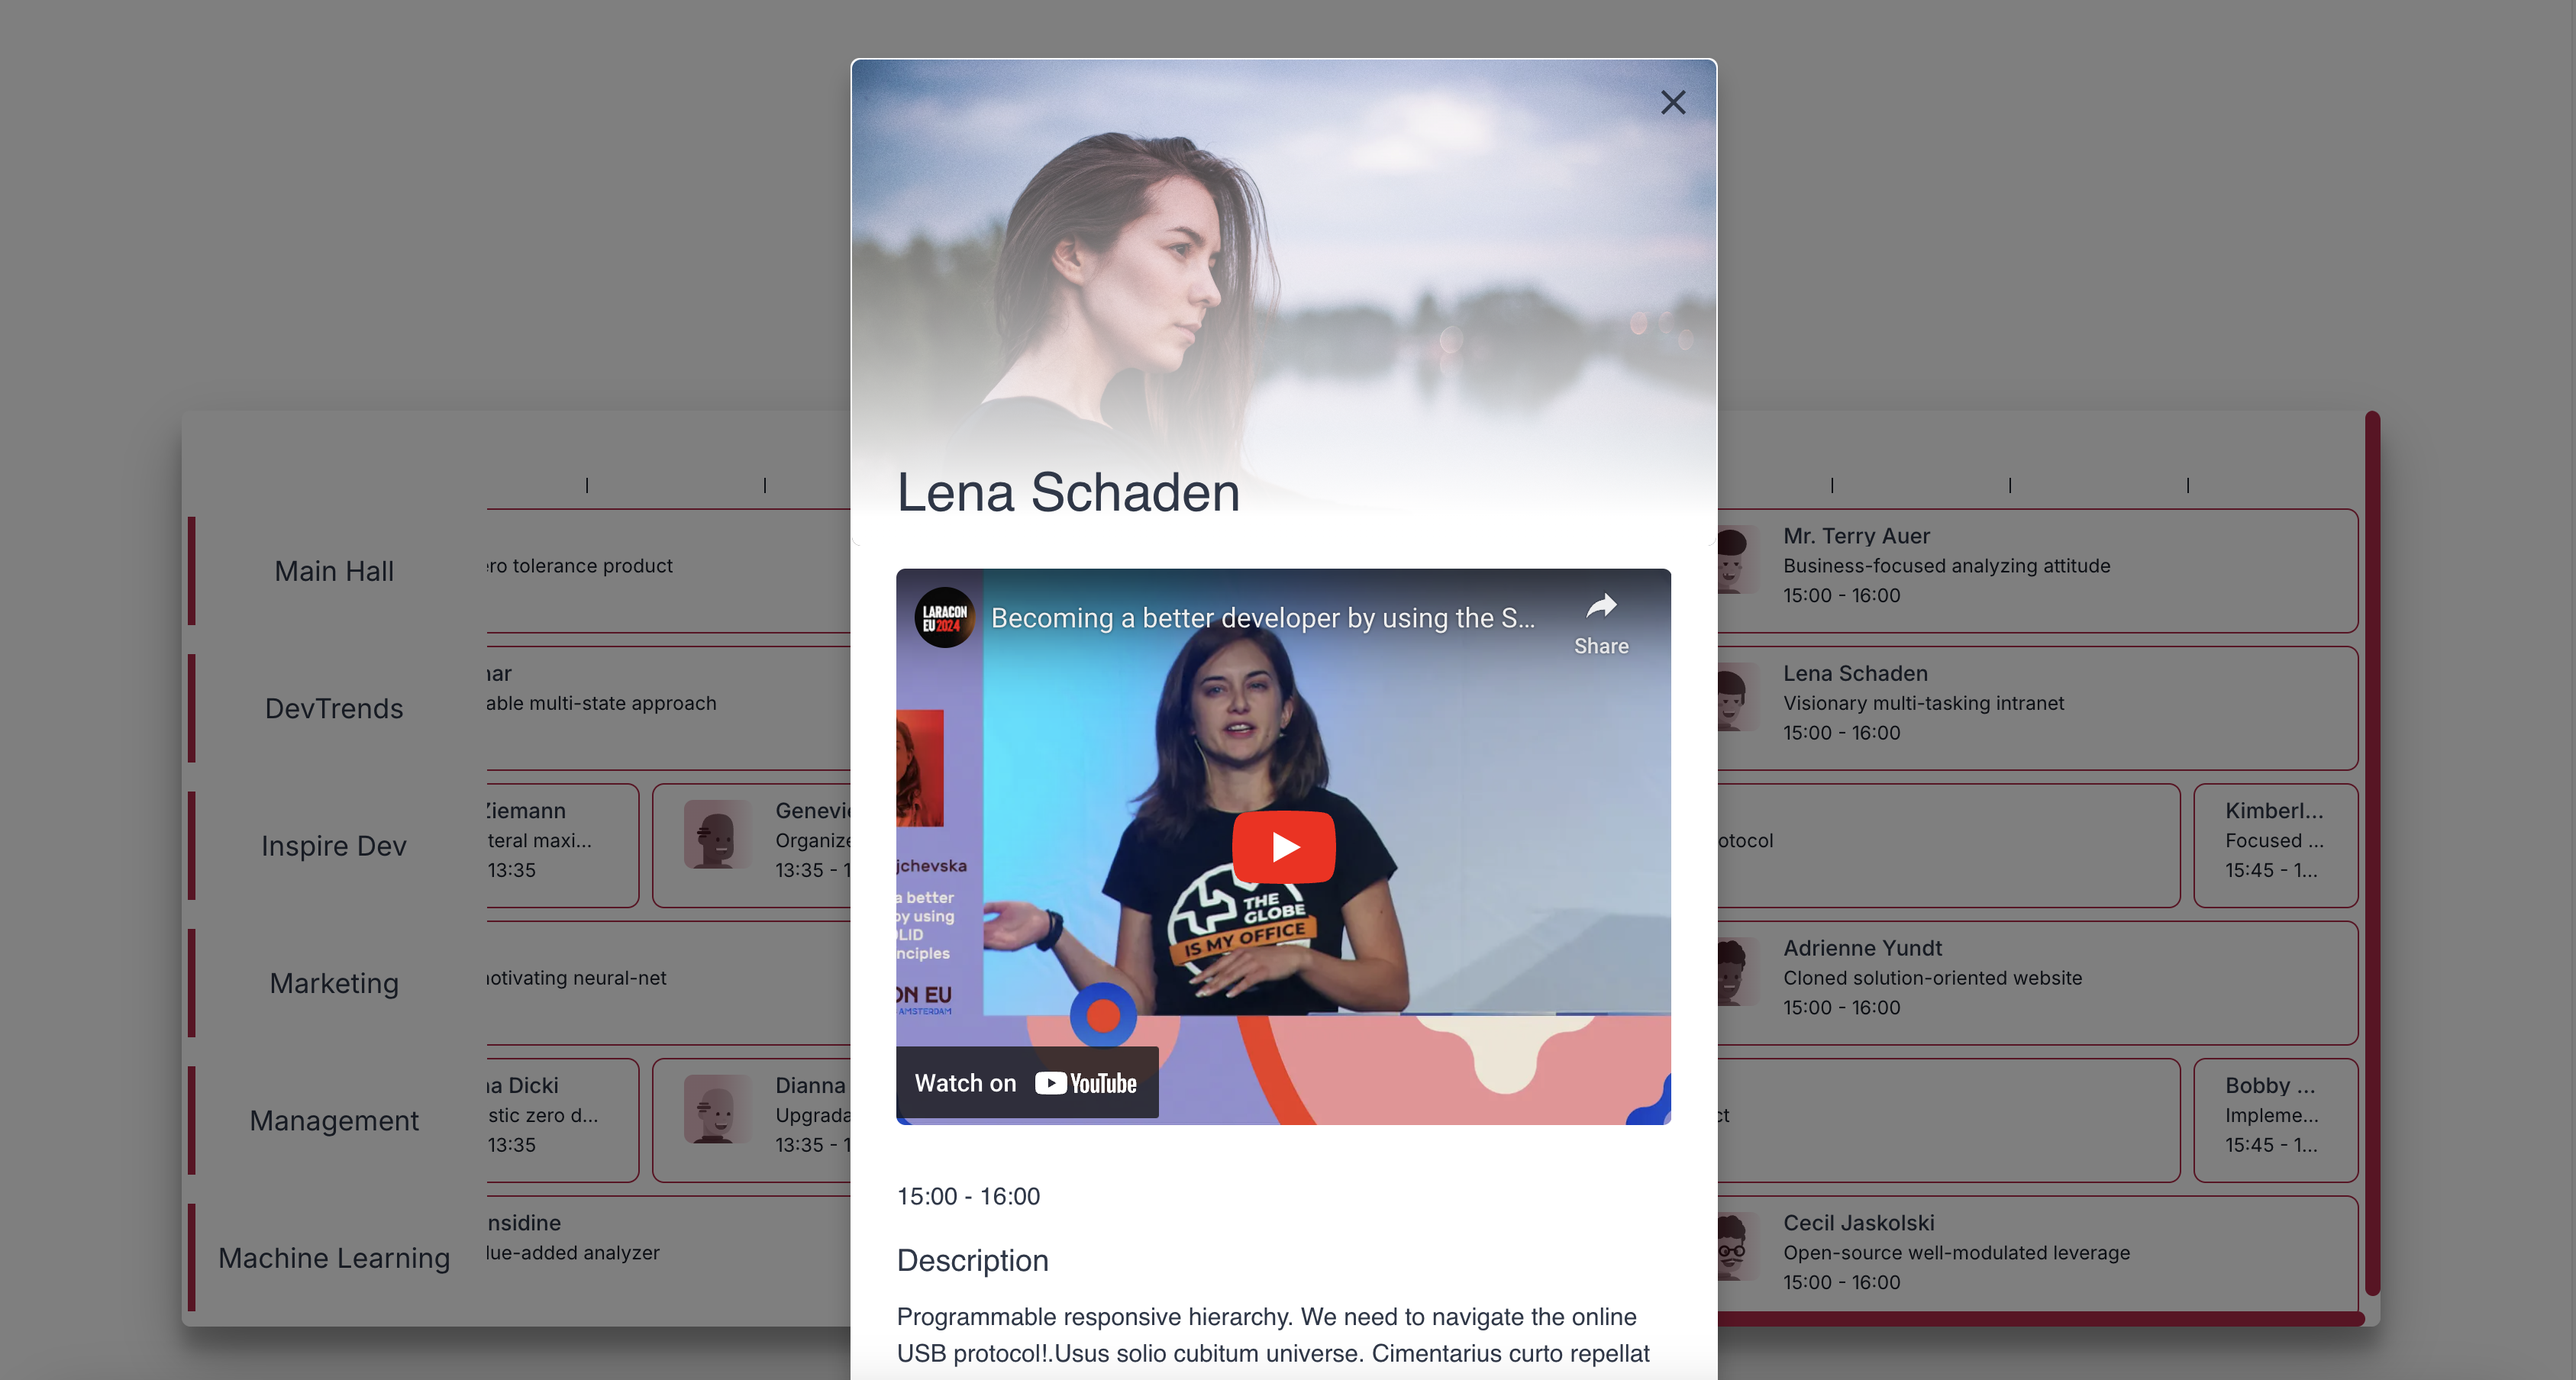
Make Your Conference a Success
A great event starts with a well-organized schedule. By switching to Planby Now, you can eliminate confusion, enhance the attendee experience, and reduce the stress of managing changes.
Ready to transform your conference schedule? Try Planby Now today and take your event planning to the next level! 🚀
Step-by-Step Tutorial, do it in less than 5 minutes!
To make it even easier, we’ve put together a detailed tutorial on how to set up your conference schedule using Planby Now. Follow our step-by-step guide and get started today!
Follow this step-by-step guide to build and customize your application using Planby Now:\
Download the example channels CSV file from -> Link
Download the example elements CSV file from -> Link.
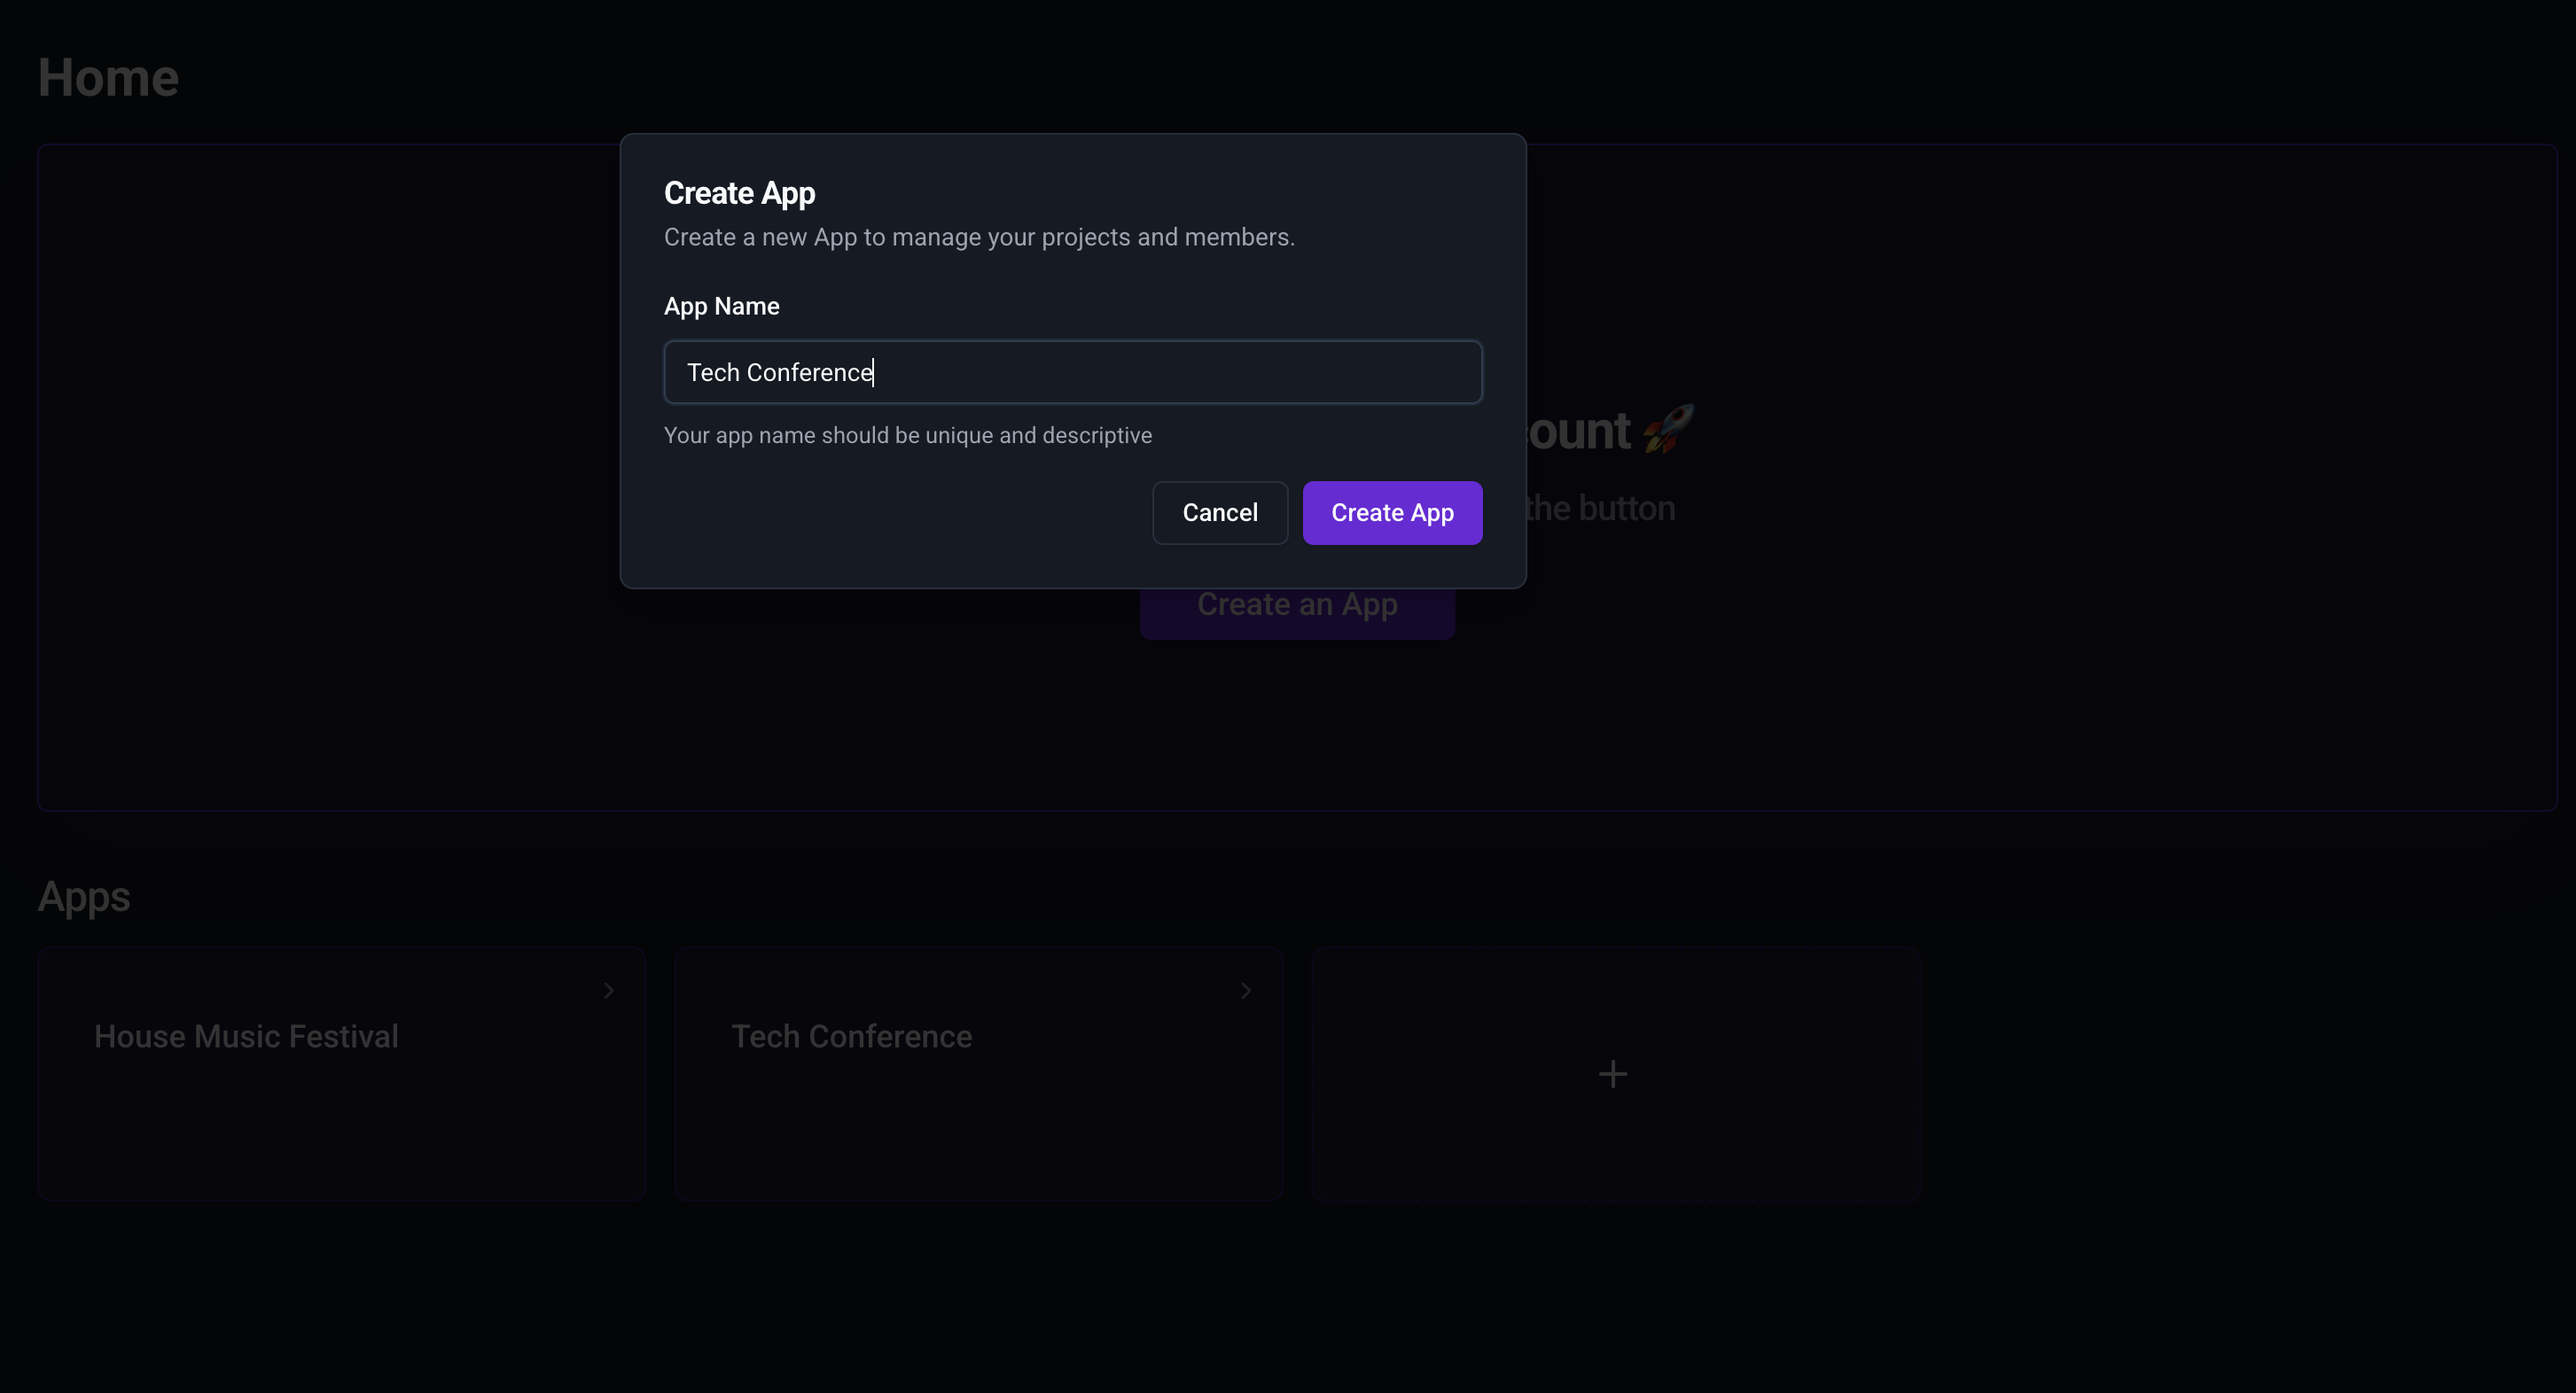
Step 1: Create an Application
Go to the Home Page.
Click Create an App and provide a name for your application.
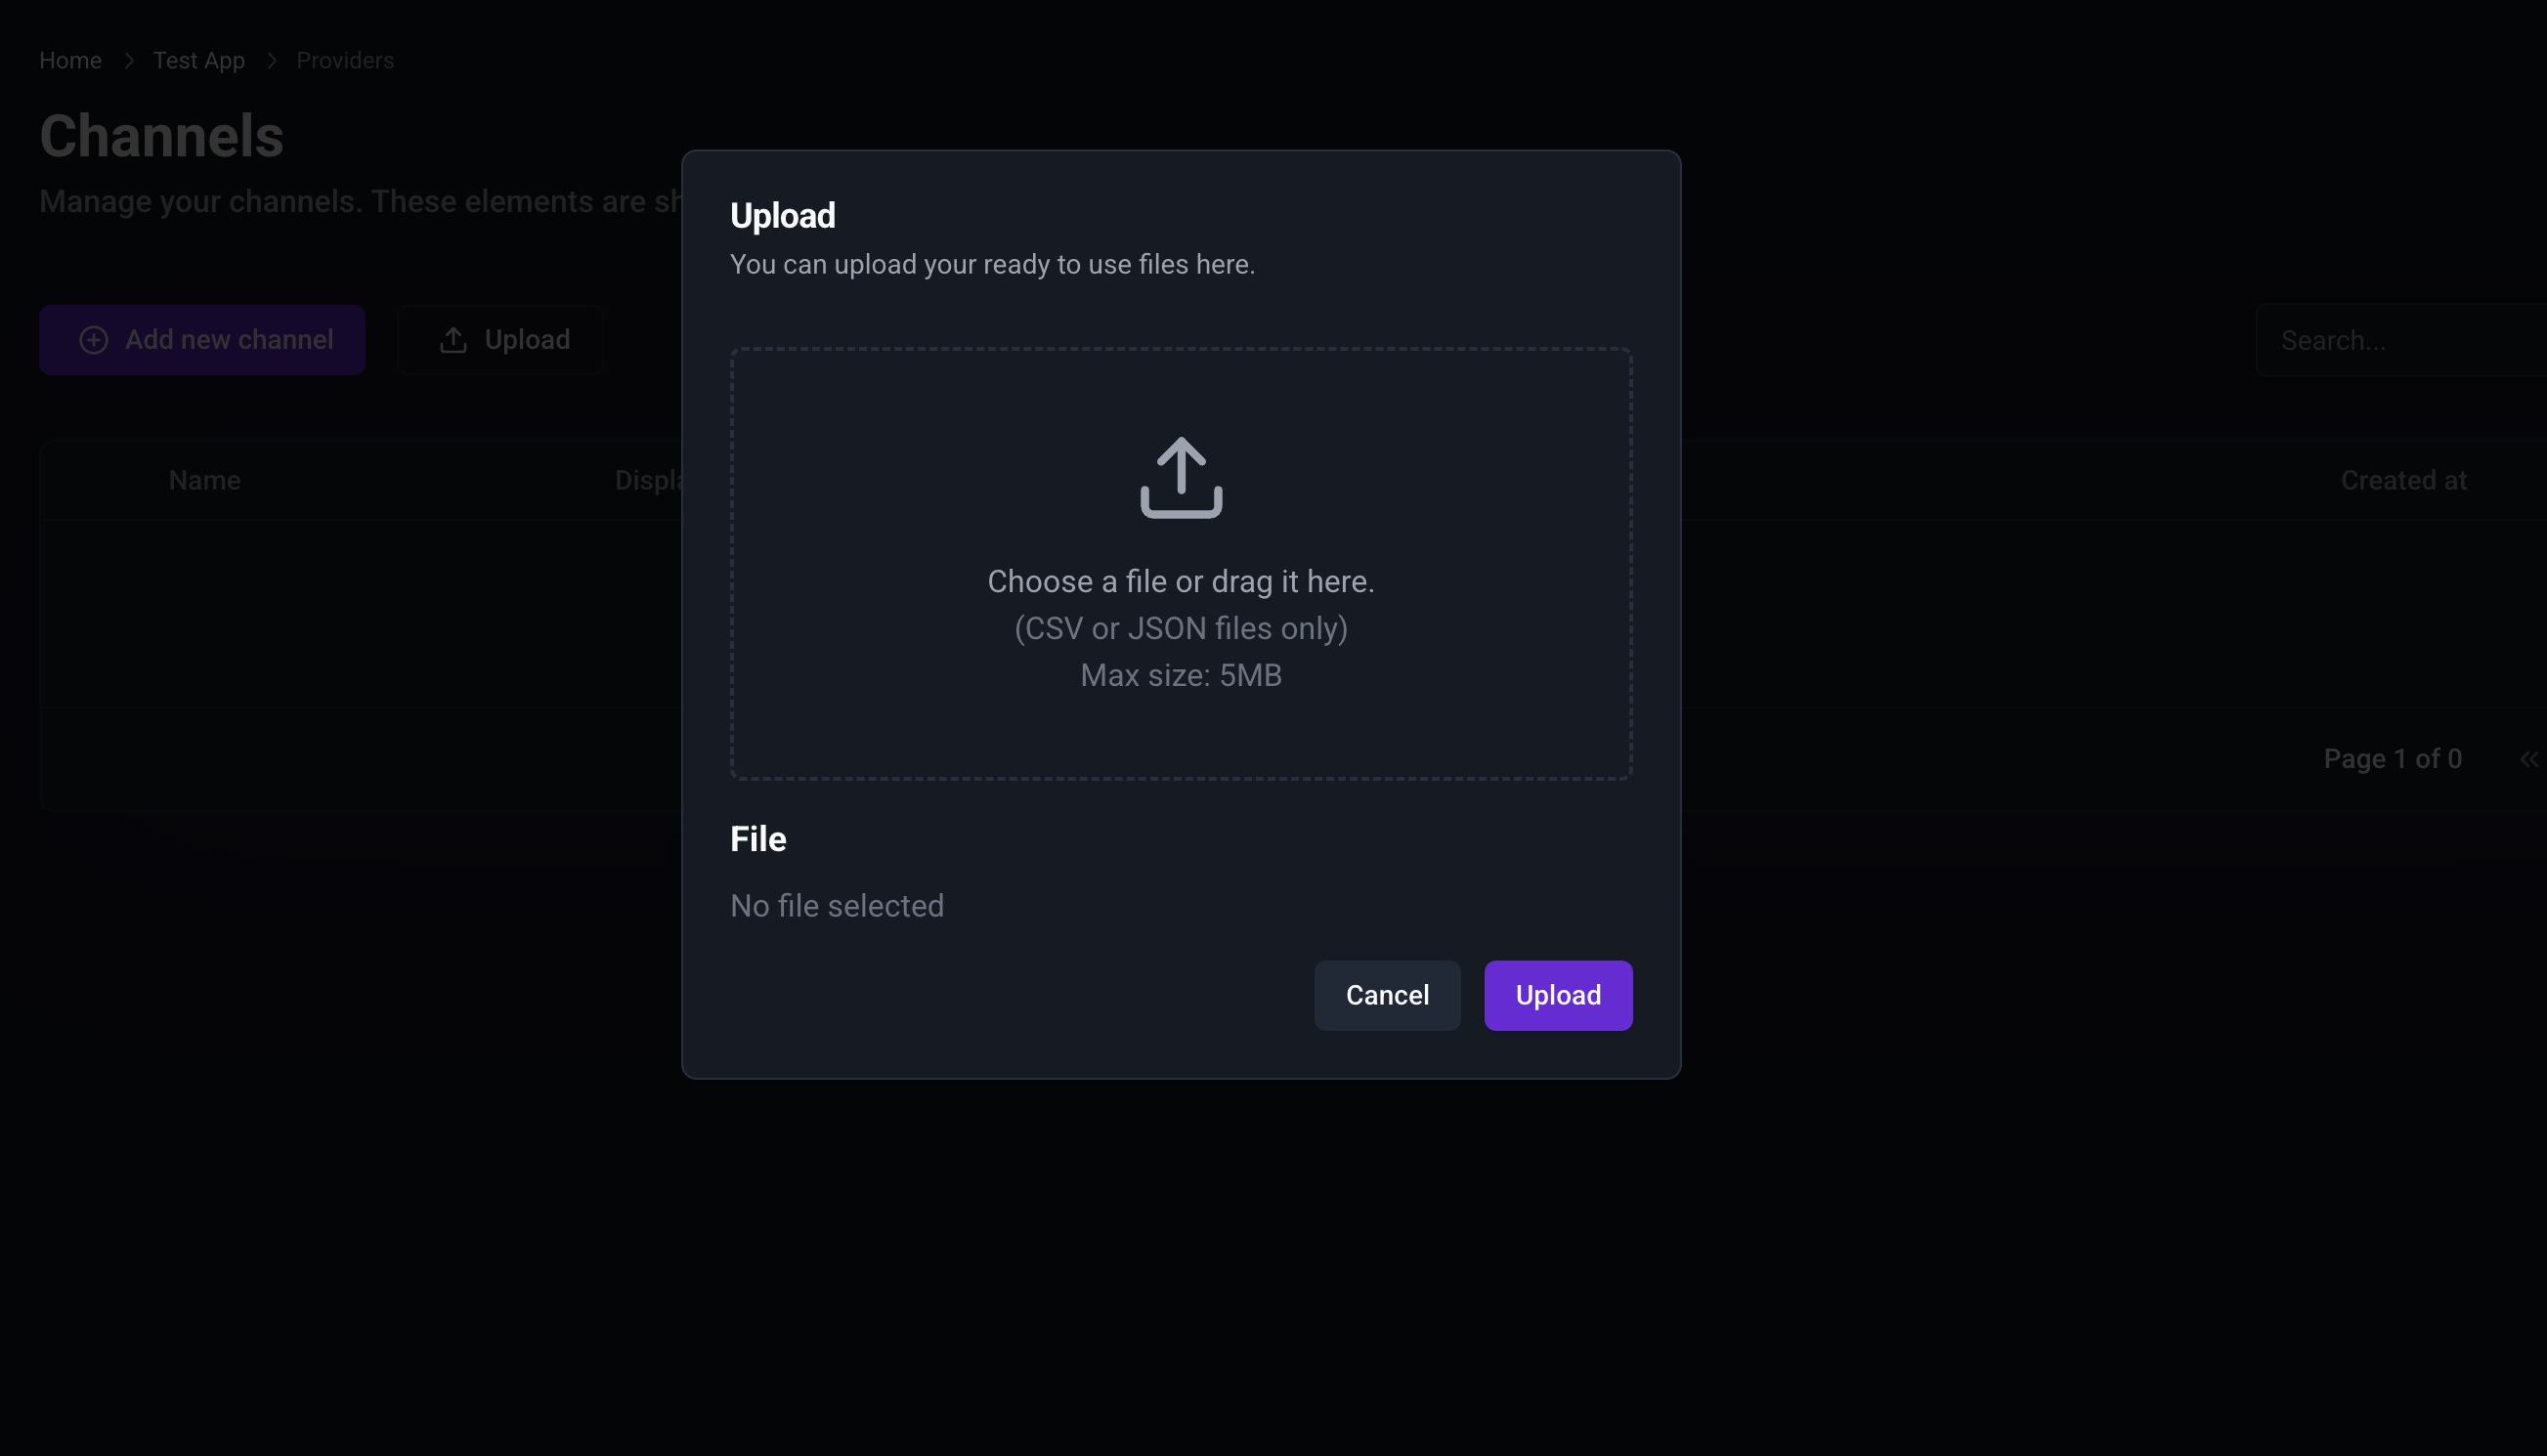
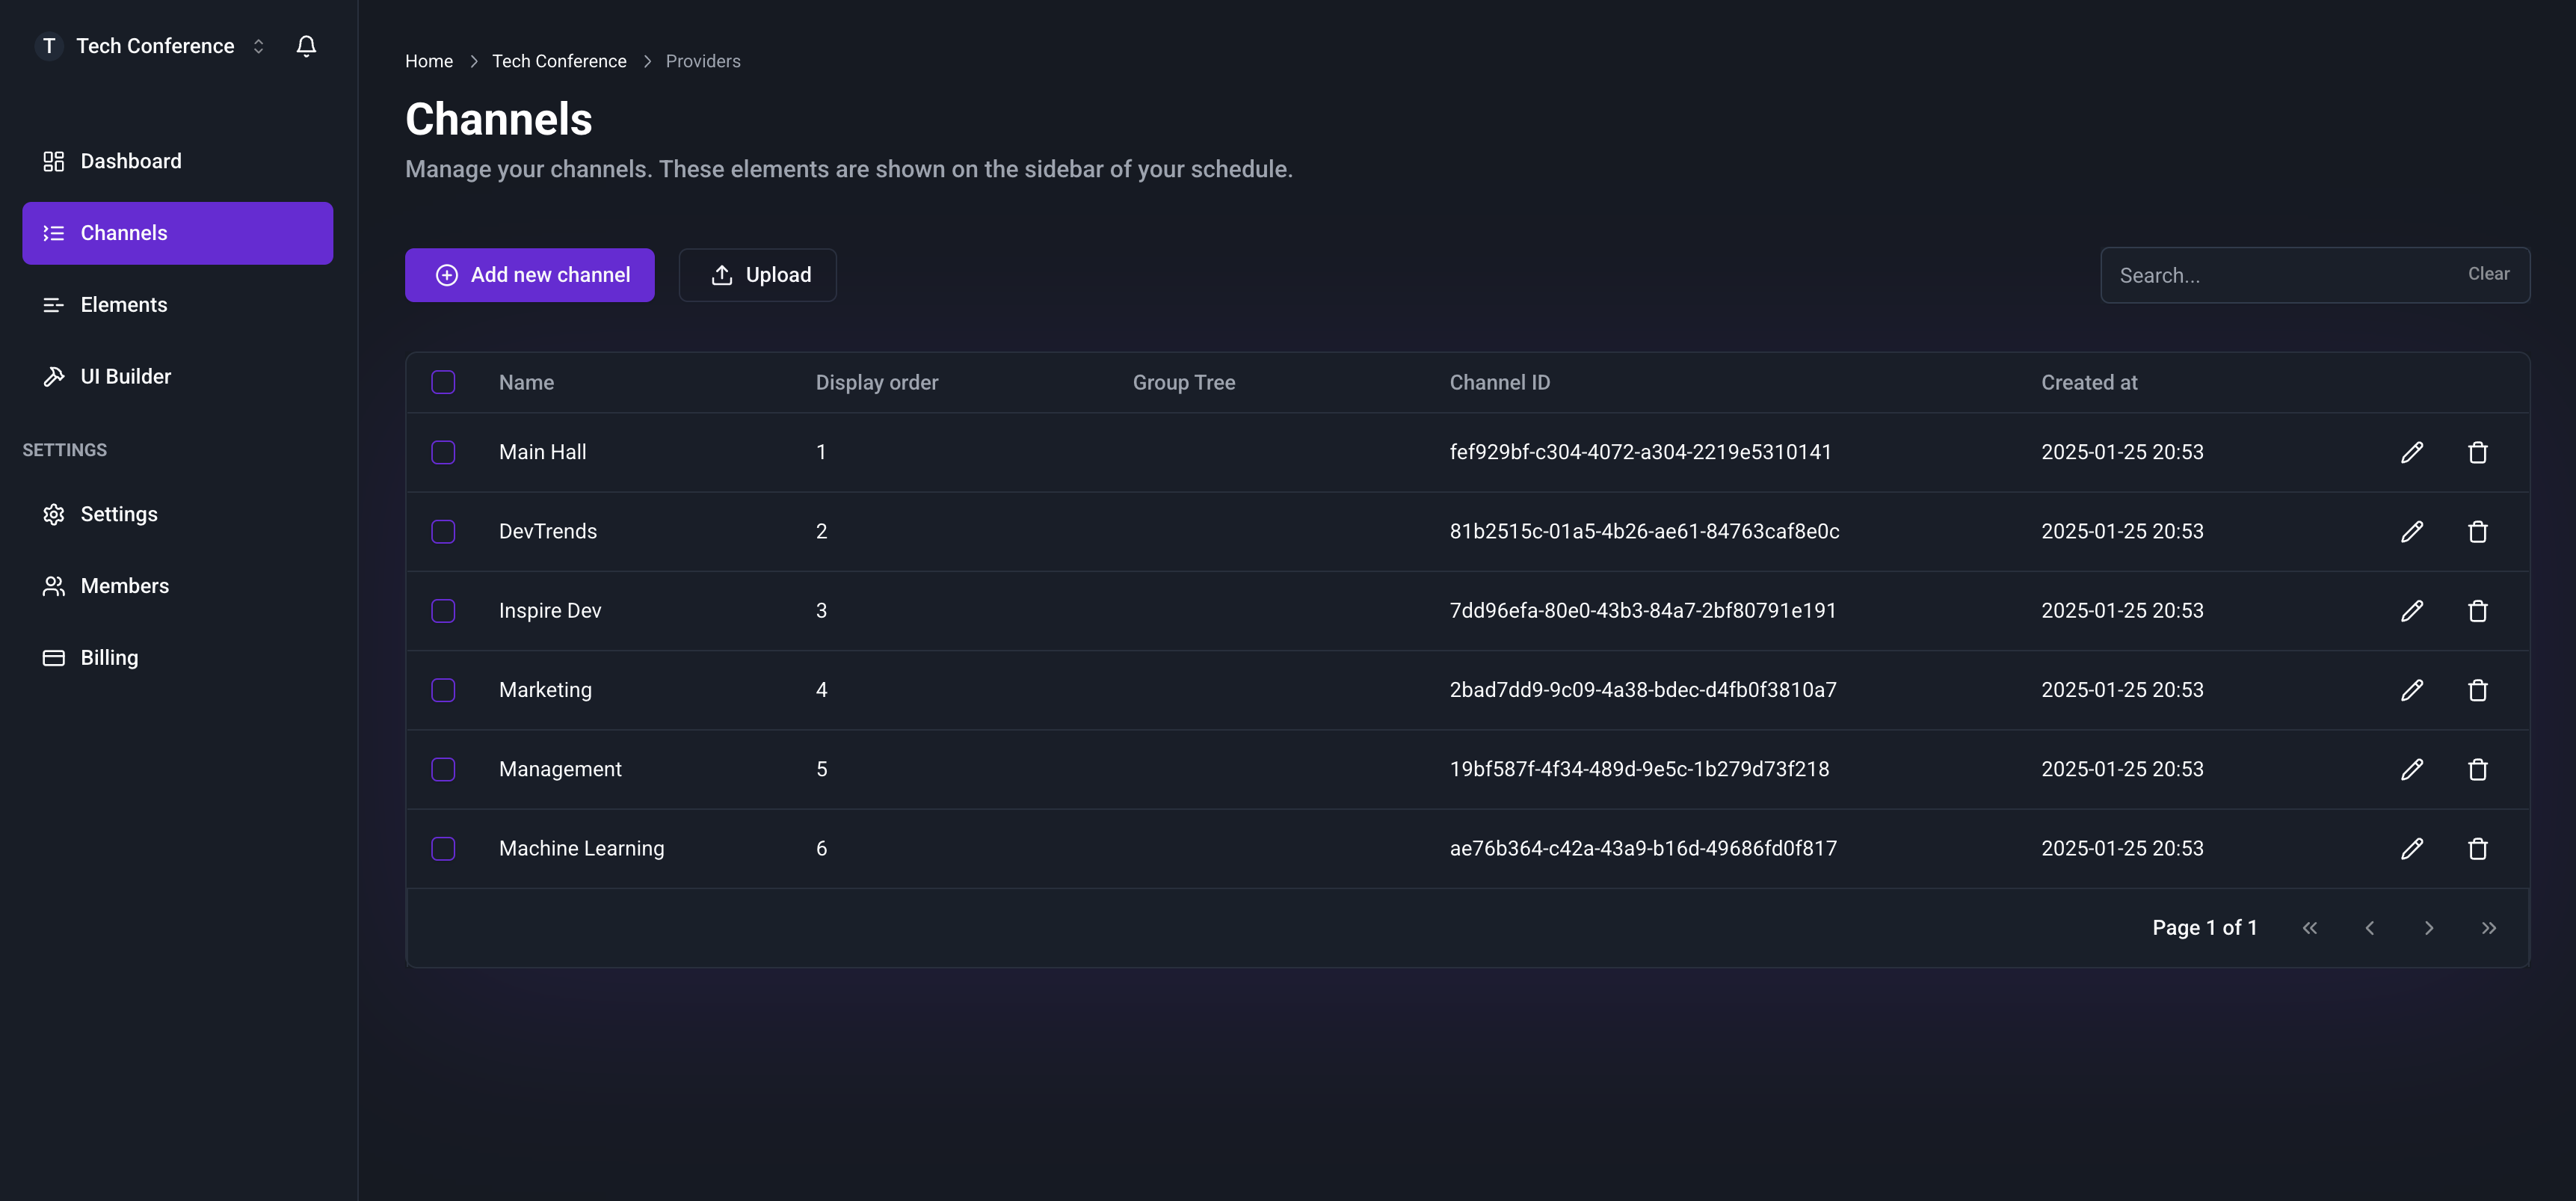
Step 2: Upload Data in the Channels Tab
Navigate to the Channels tab.
Upload your data using the provided uploader.
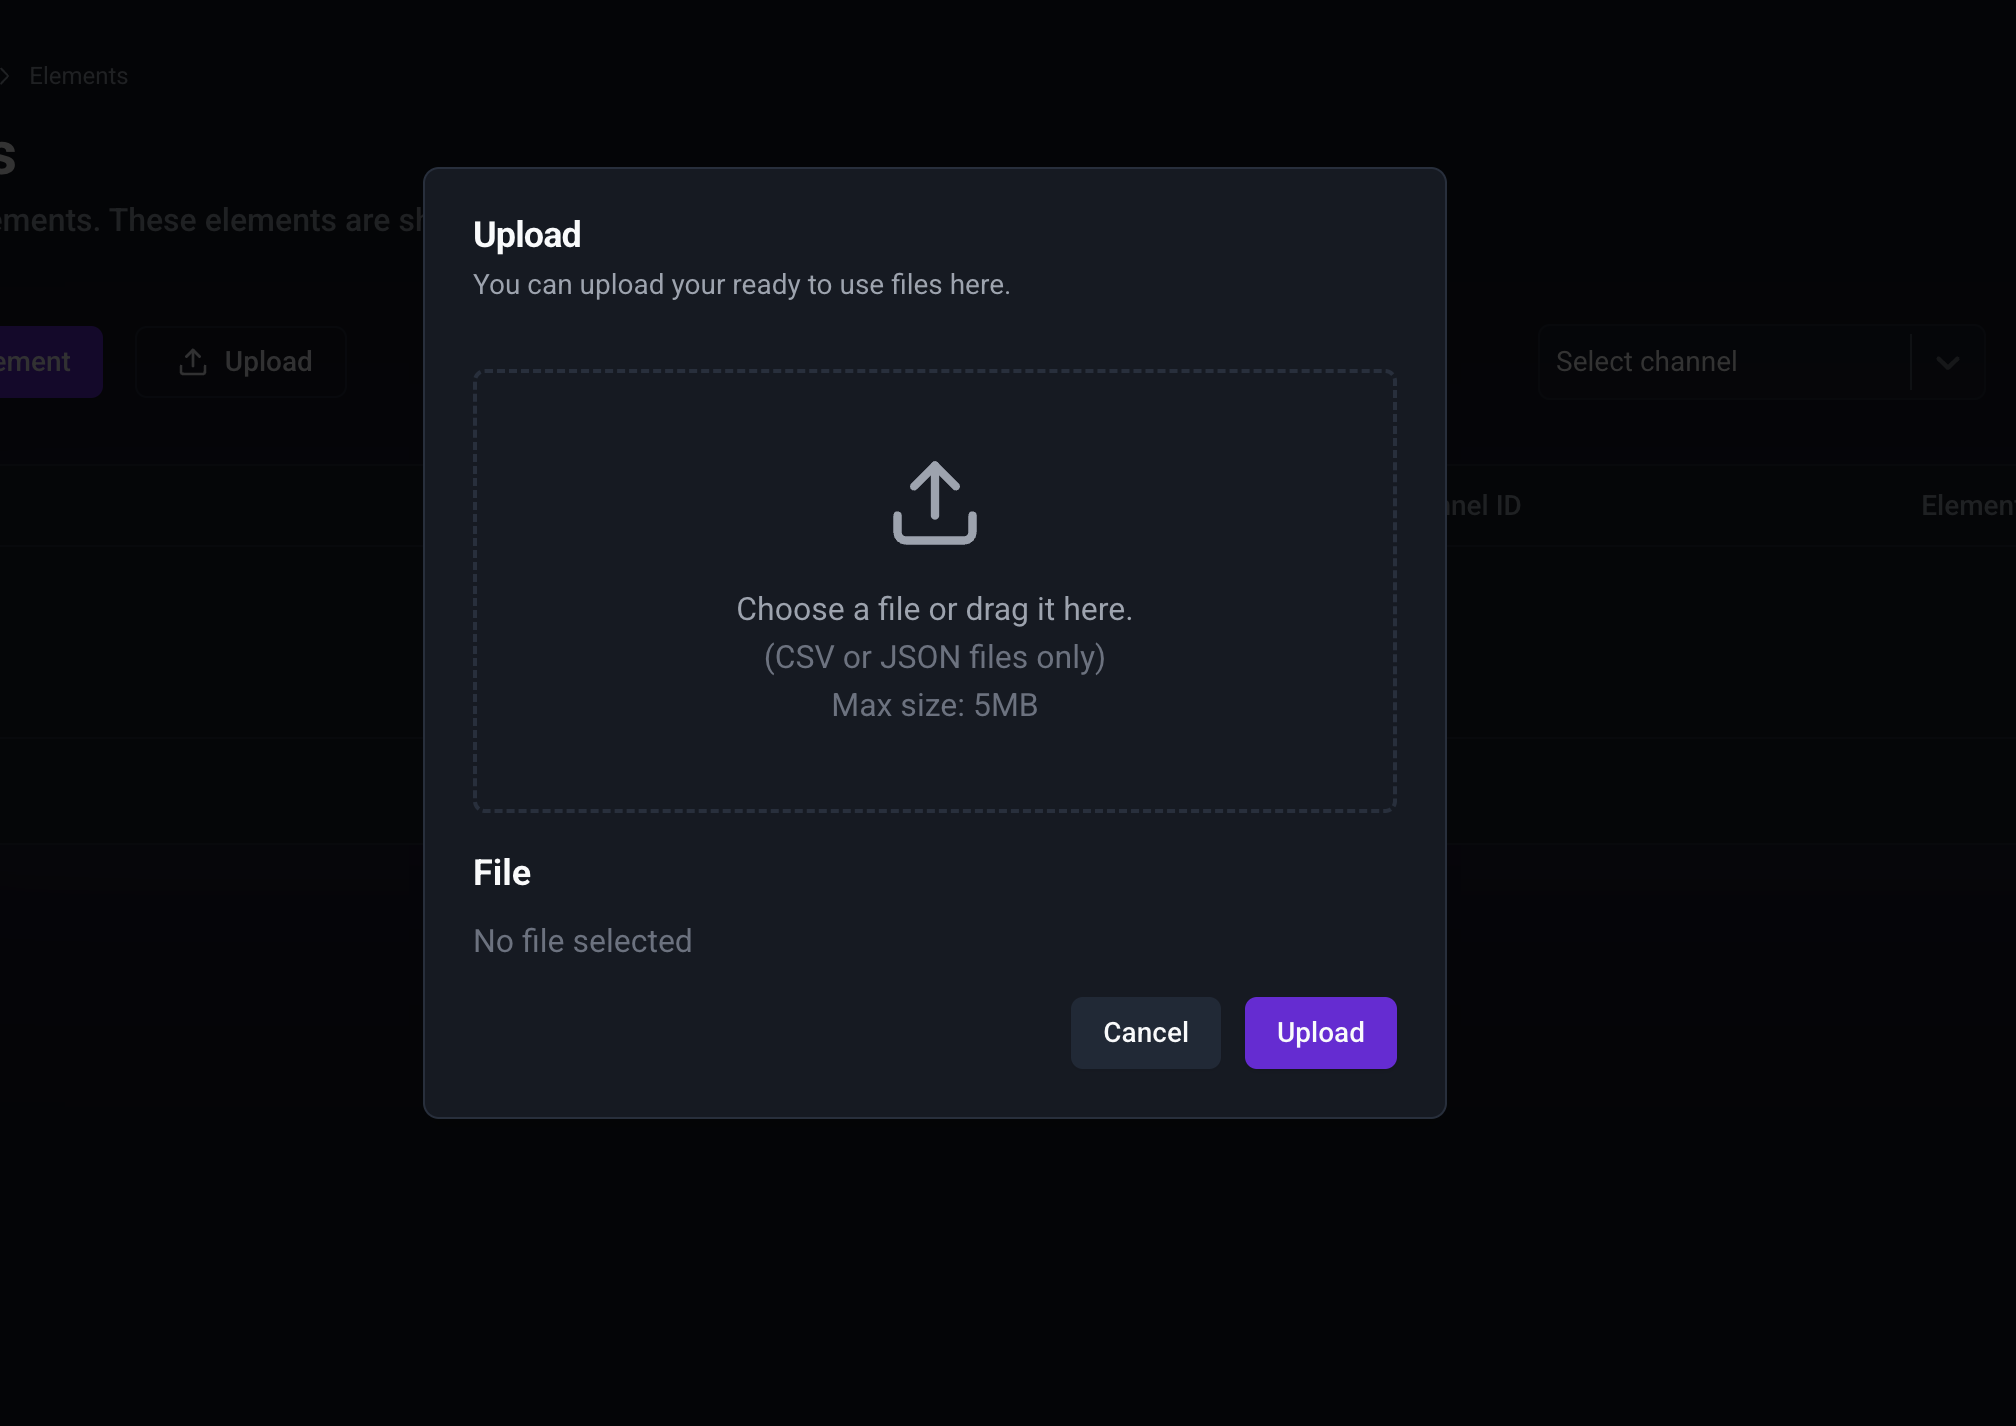
Step 3: Upload Data in the Elements Tab
- Go to the Elements tab.
- Upload your data similarly to how you did in the Channels tab from this link.

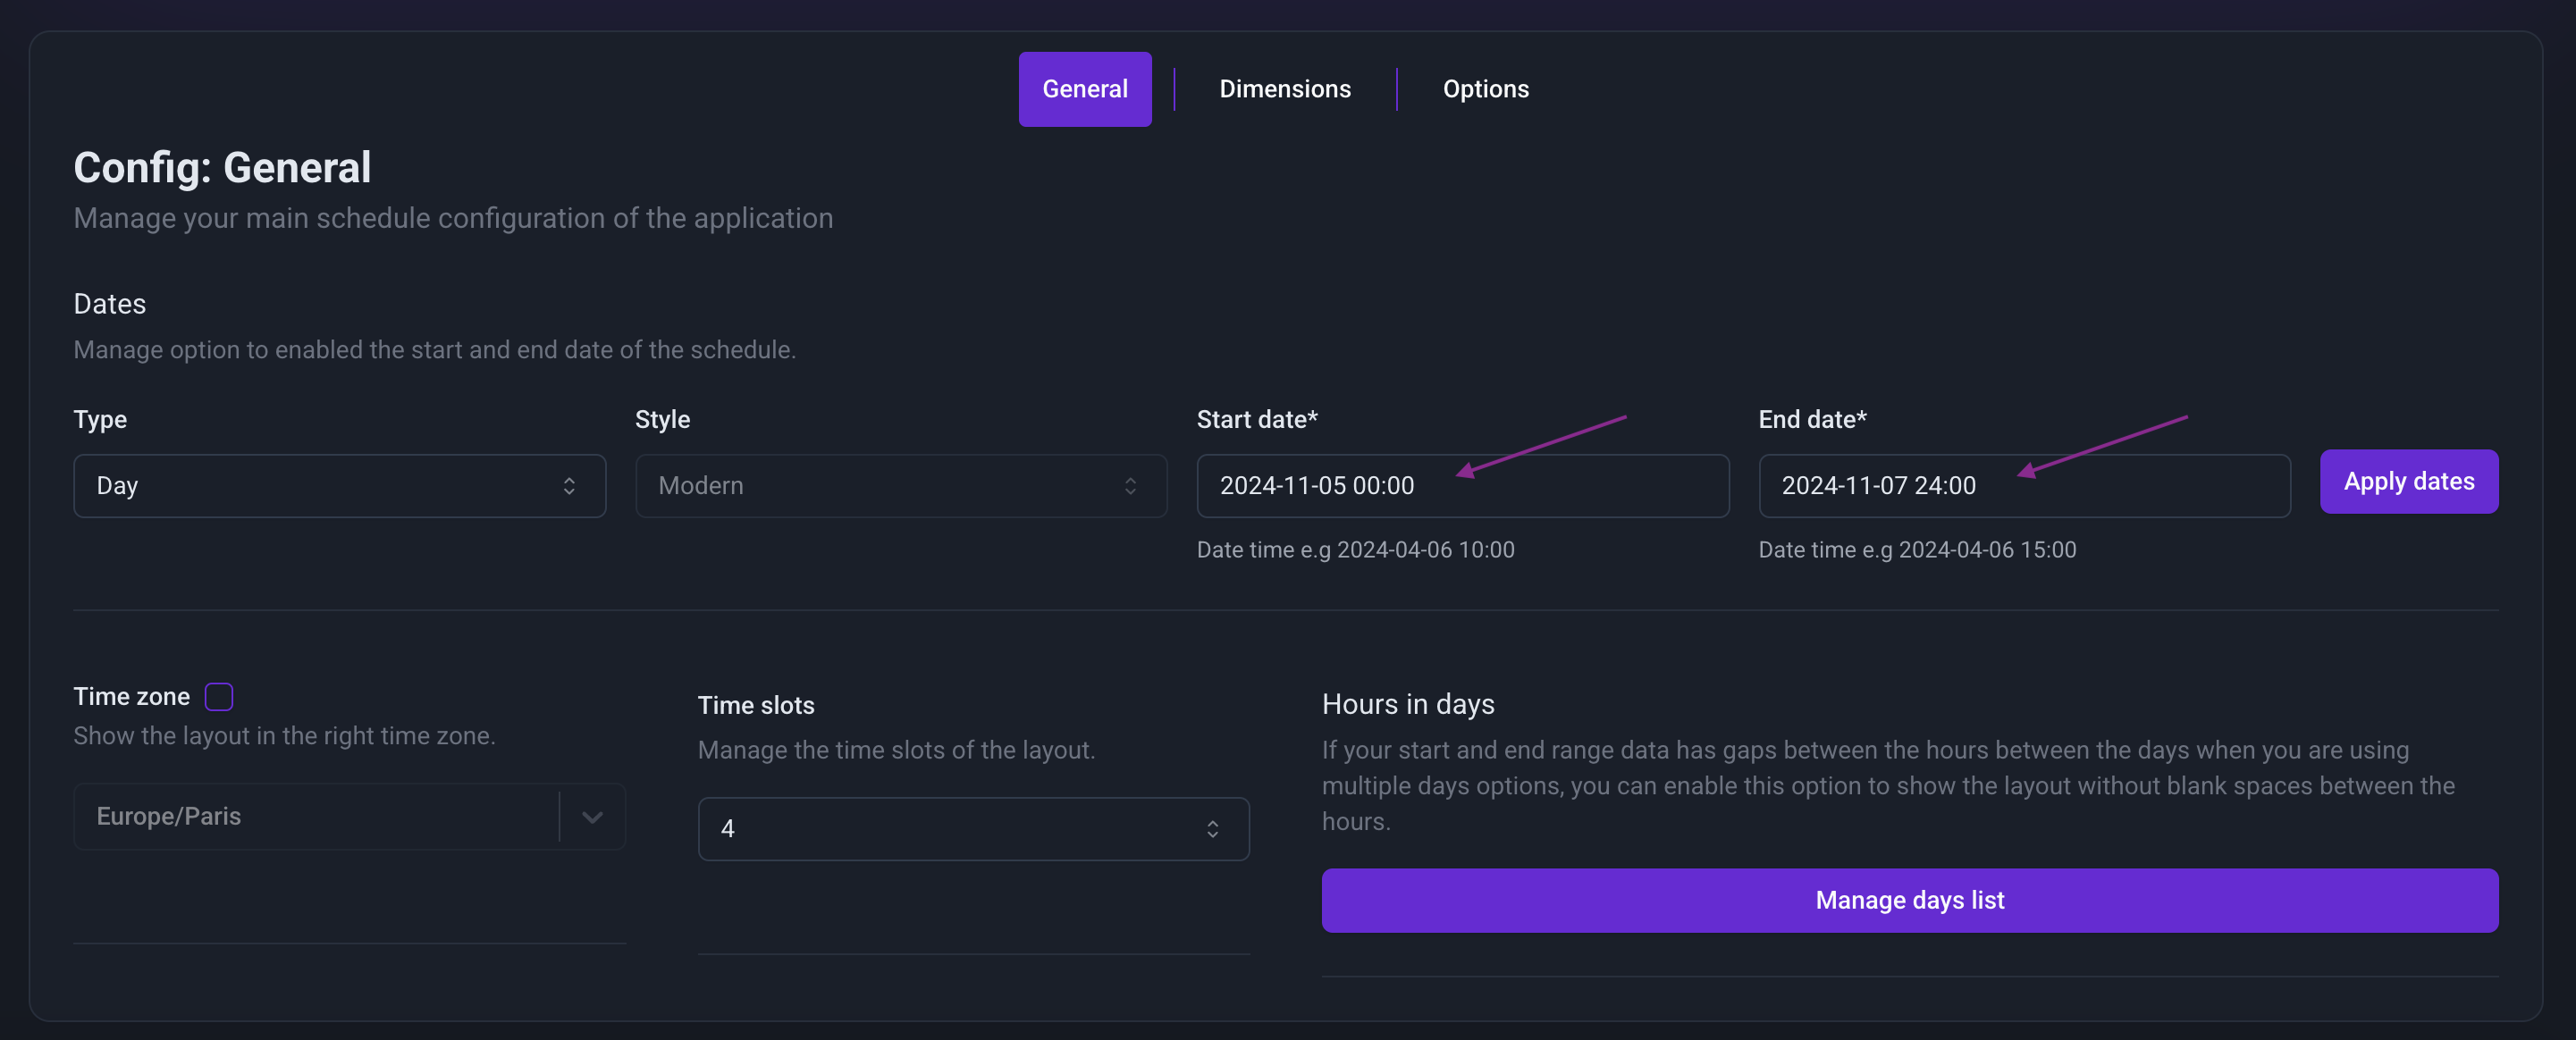
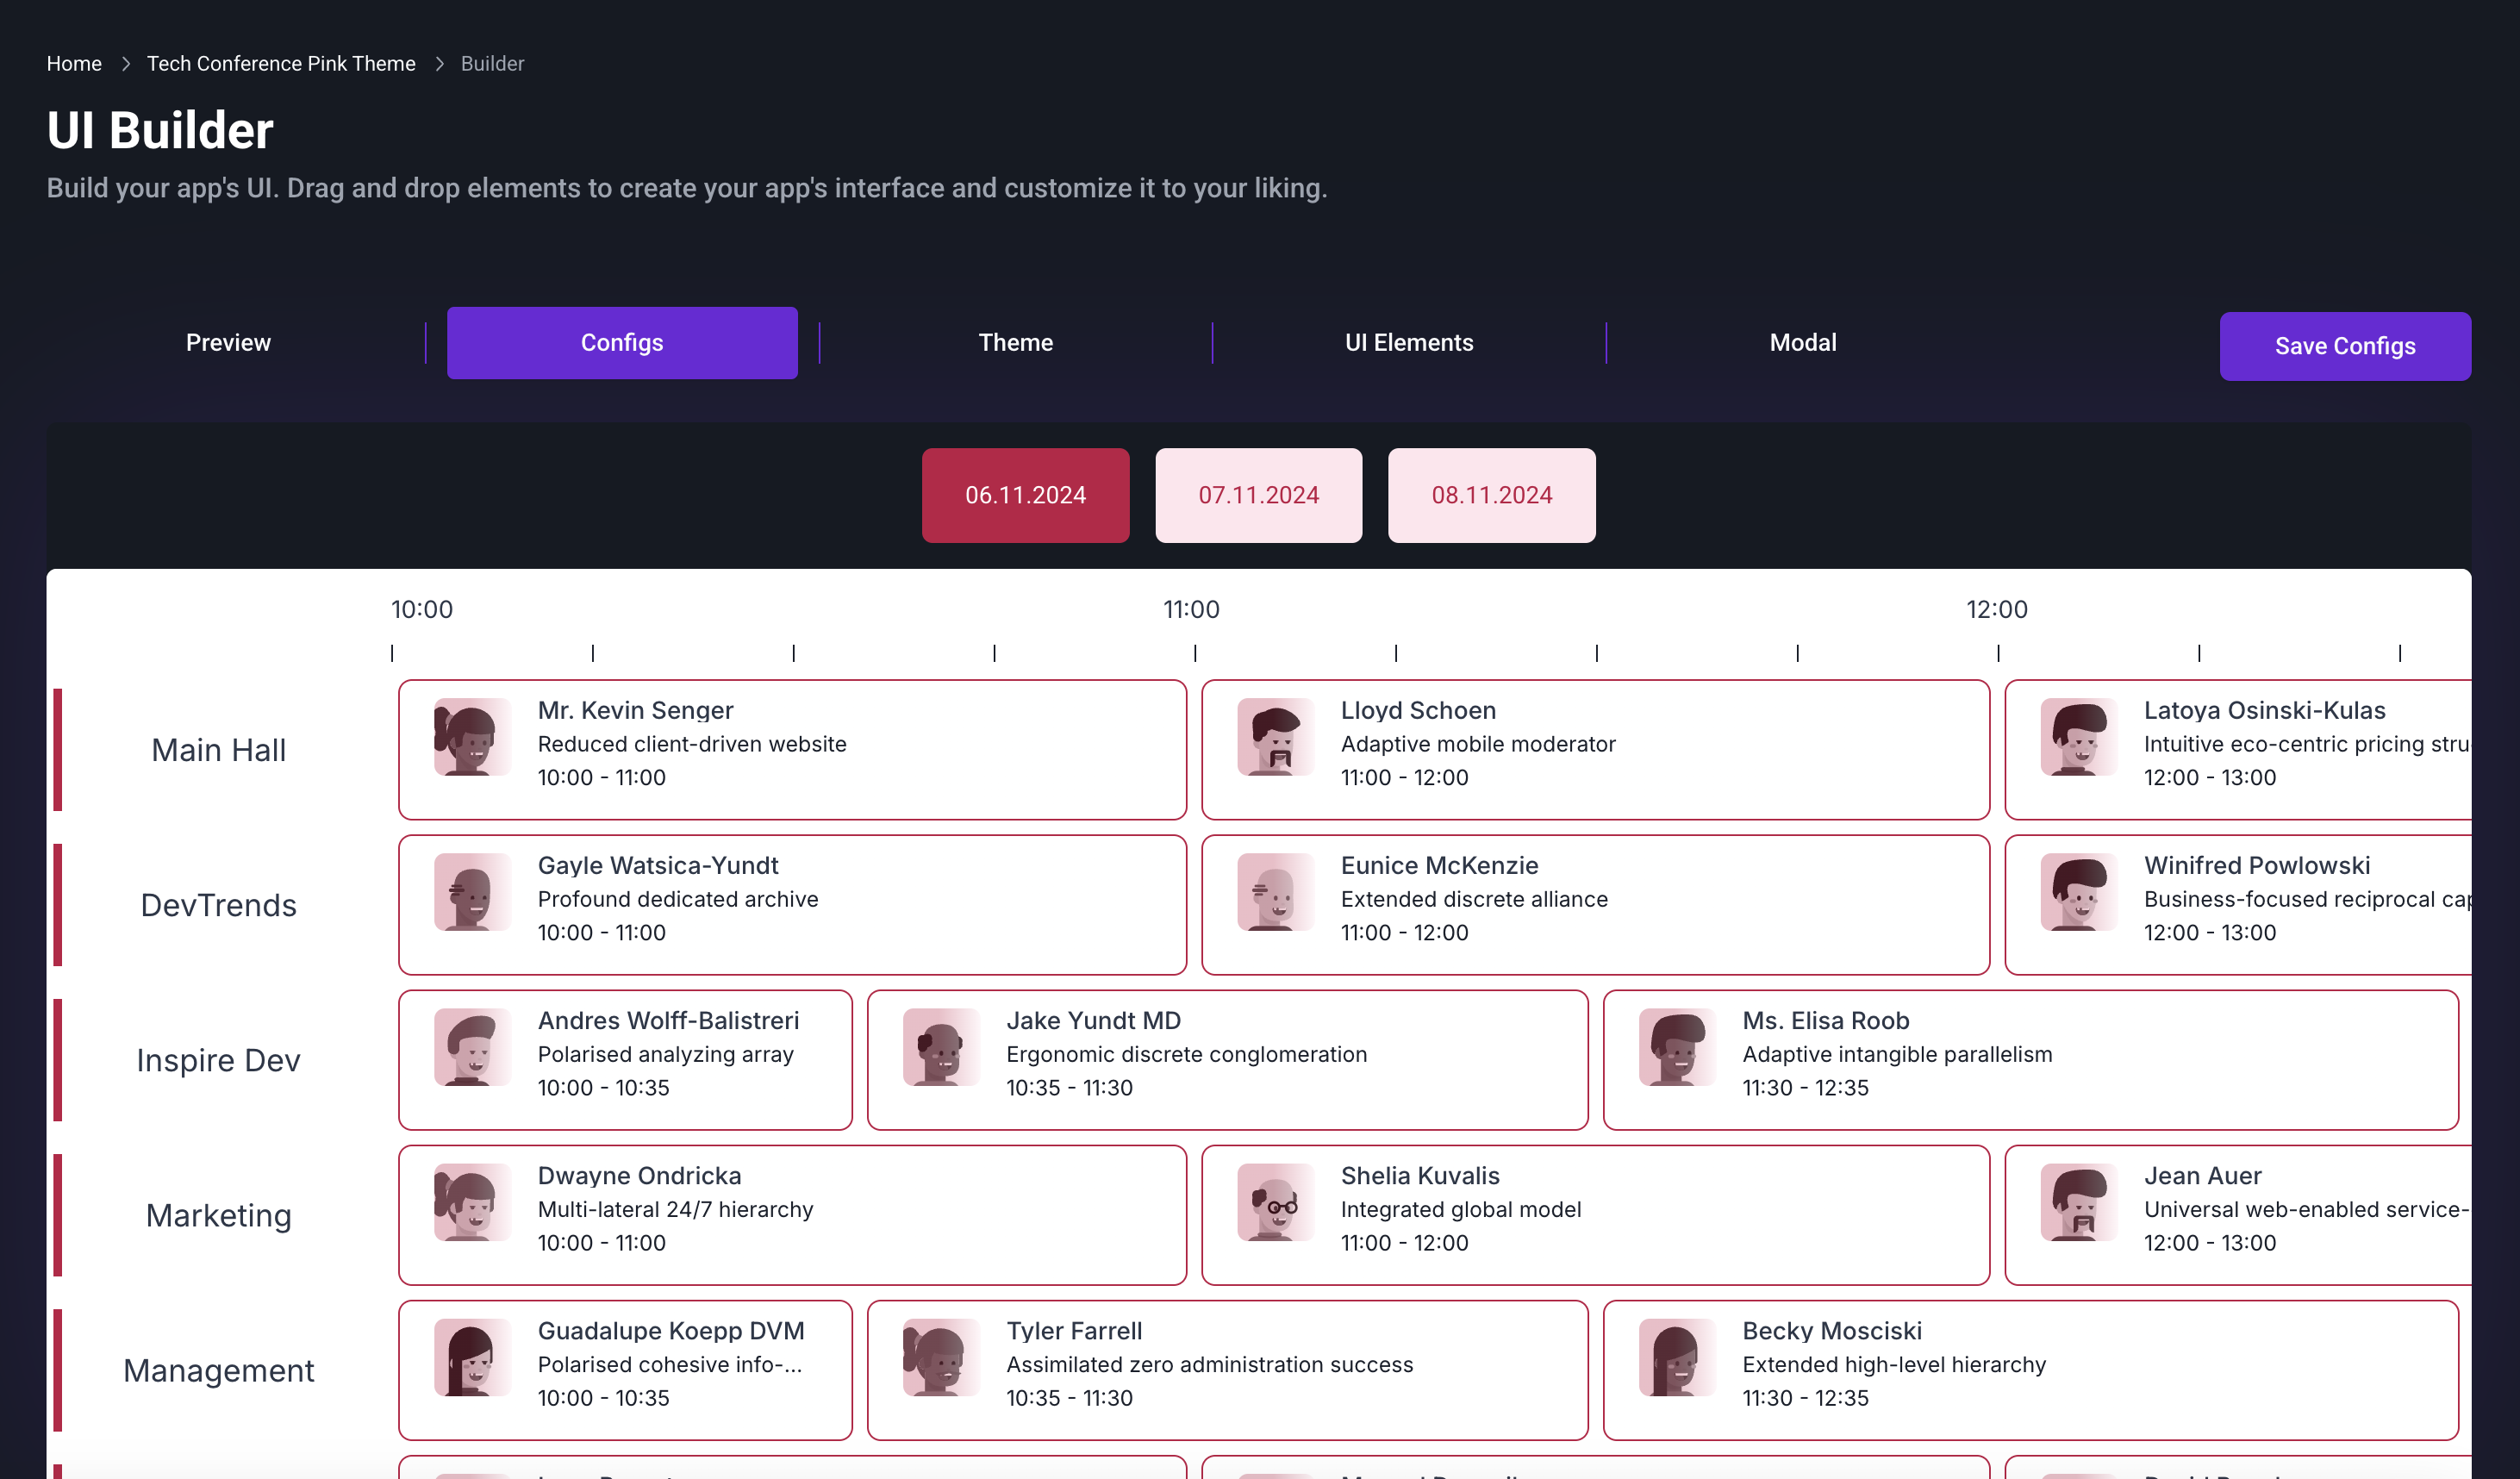
Step 4: Configure Dates in the Builder Tab
- Open the Builder tab.
- Enter your Start Date and End Date in the appropriate fields to initialize your application.
![]()

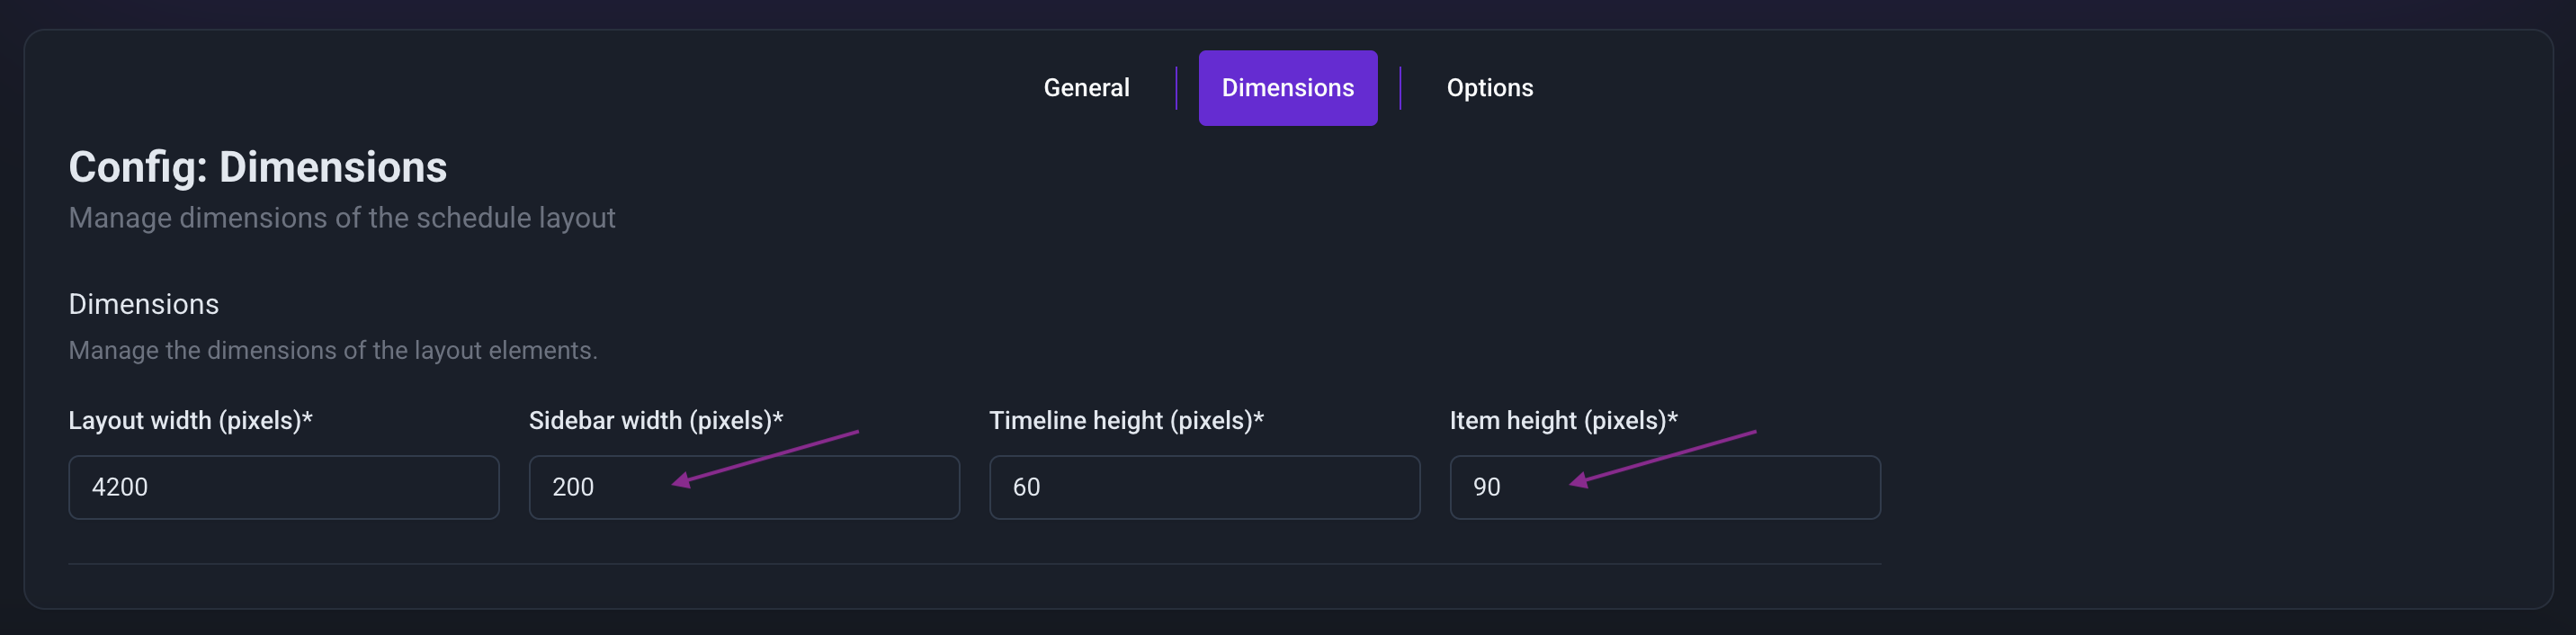
Step 5: Adjust Dimensions in the Dimensions Tab
- Navigate to the Dimensions tab.
- Change the sidebar width to 200px.
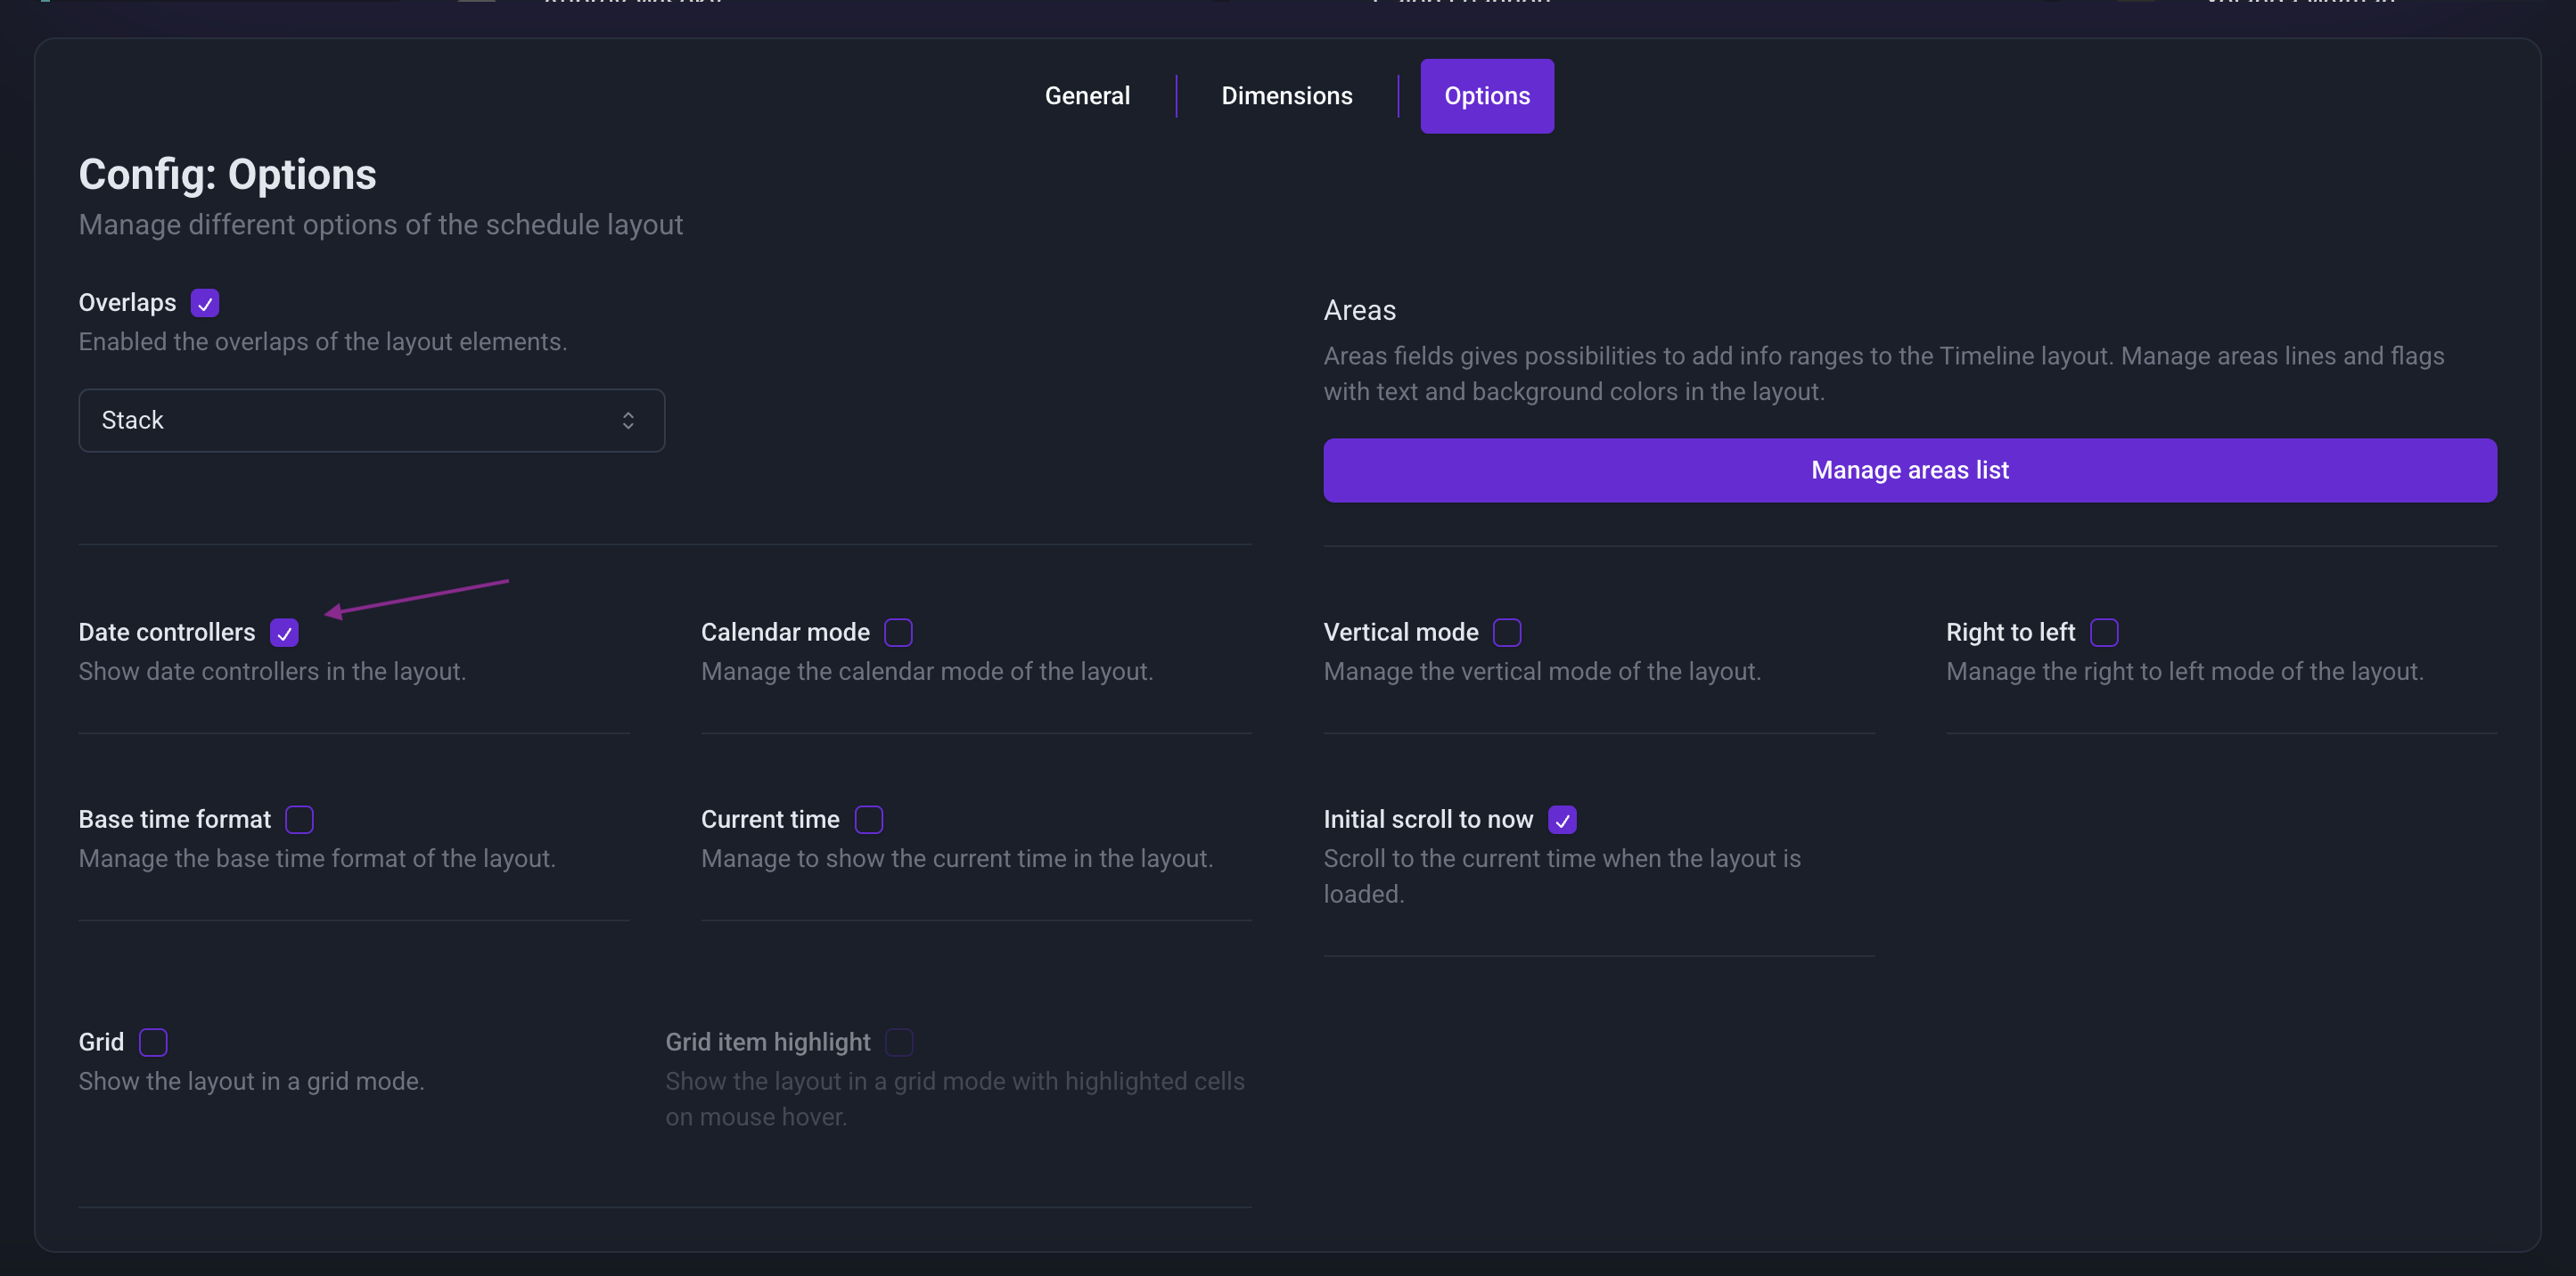
Step 6: Enabled date button control in the Options Tab
- Navigate to the Options tab.
- Enable the "Date controllers" option.
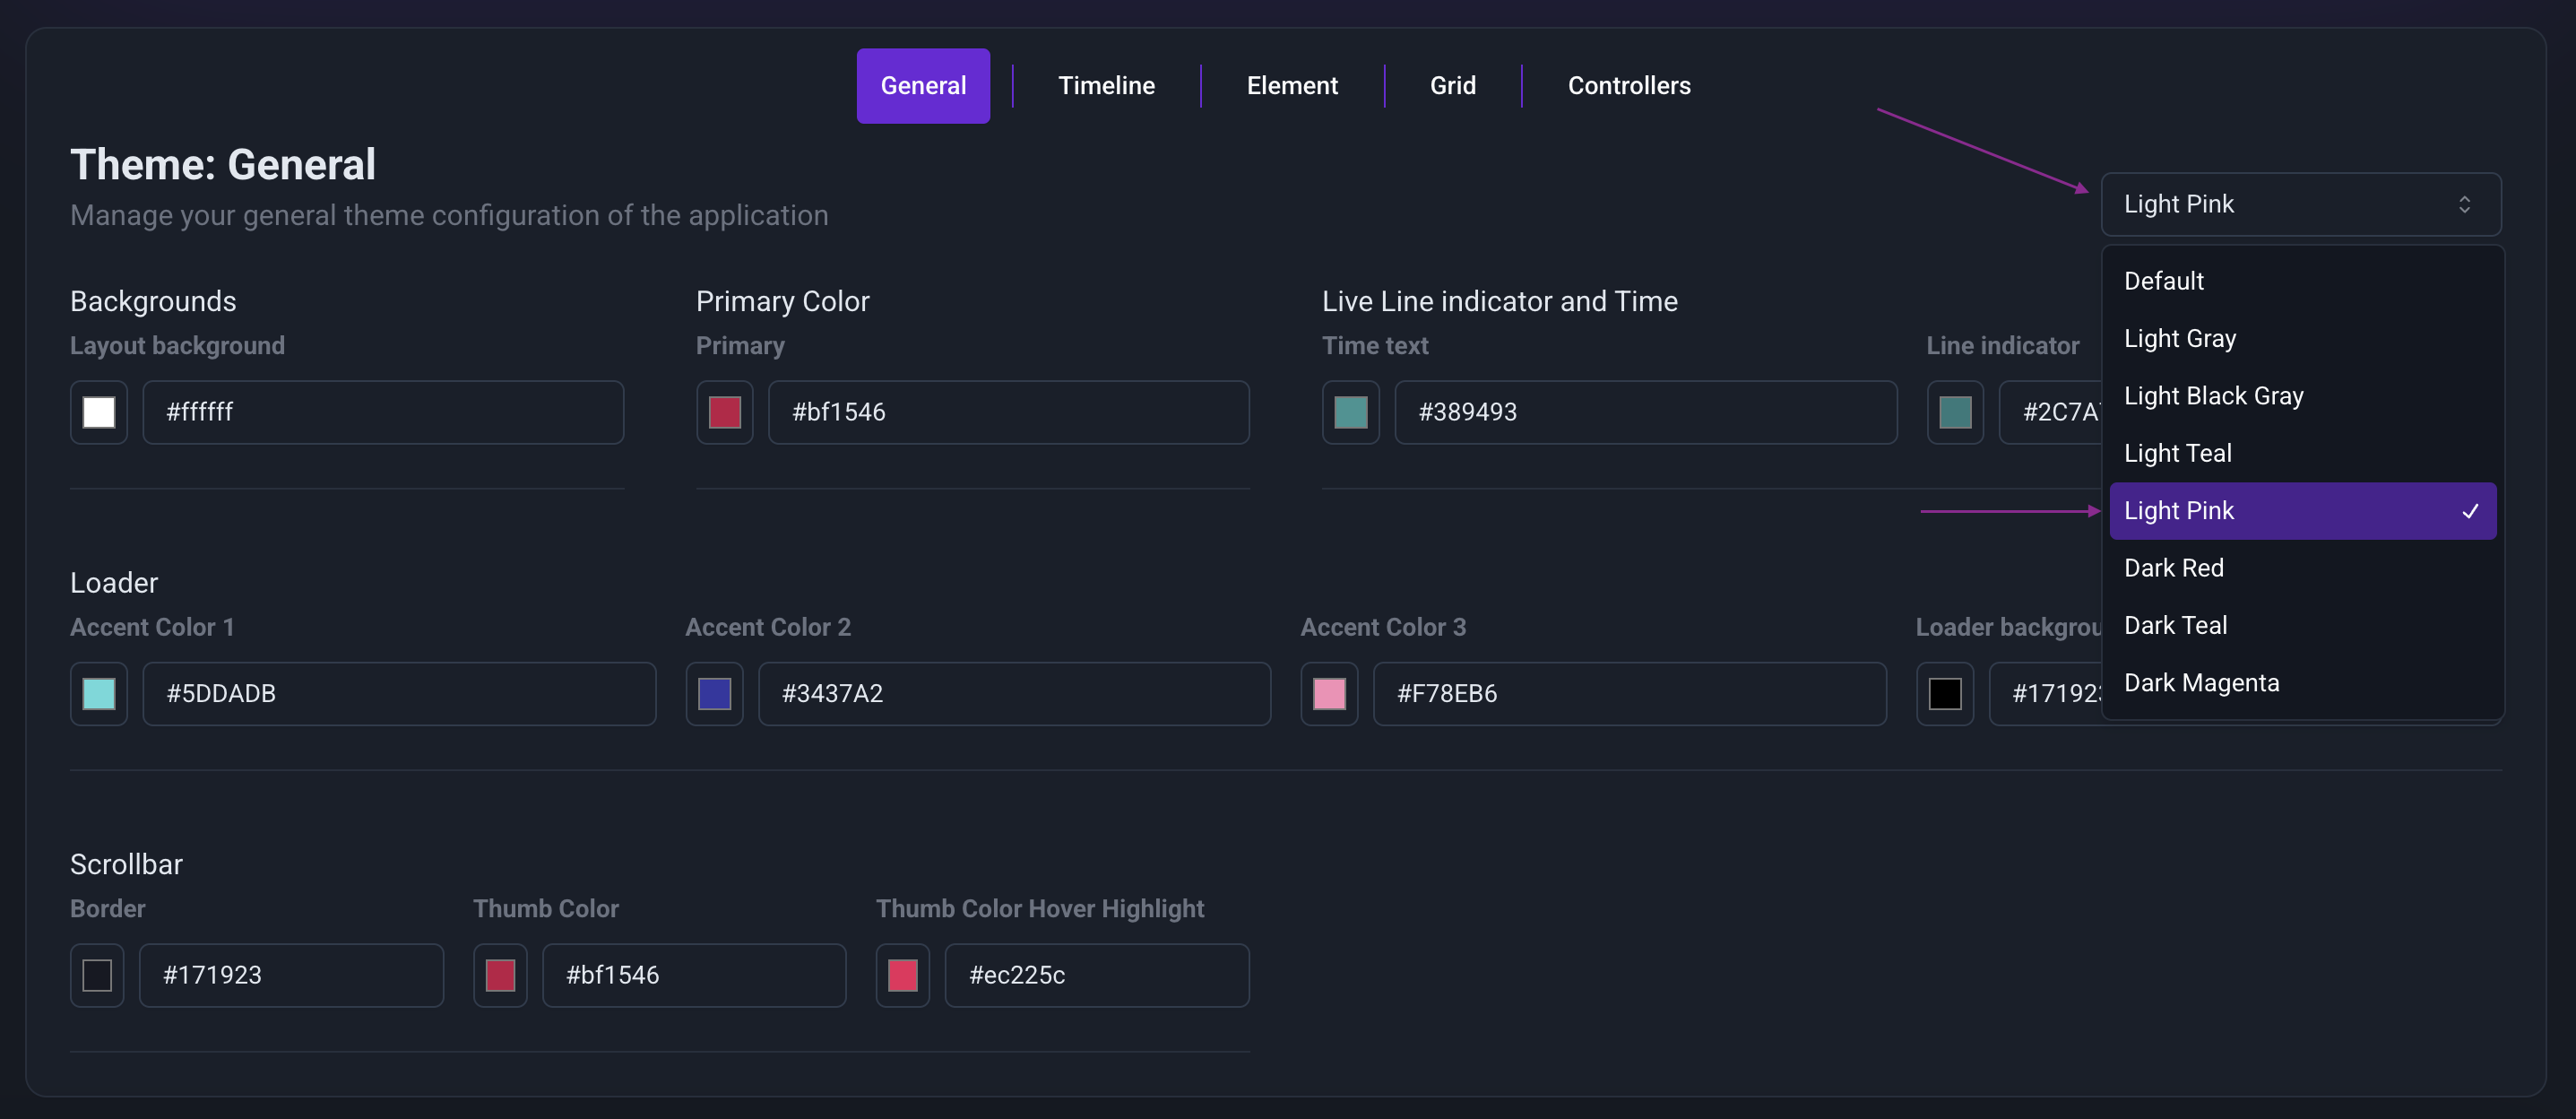
Step 7: Customize Theme in the Theme Tab
- Open the Theme tab.
- Select the pre-built theme named Magenta to apply it to your application.
Step 8: Modify UI Elements in the UI Elements Tab
- Go to the UI Elements tab.
- Click the "Show text in channel" tile and disable the "Show image in channel" option.

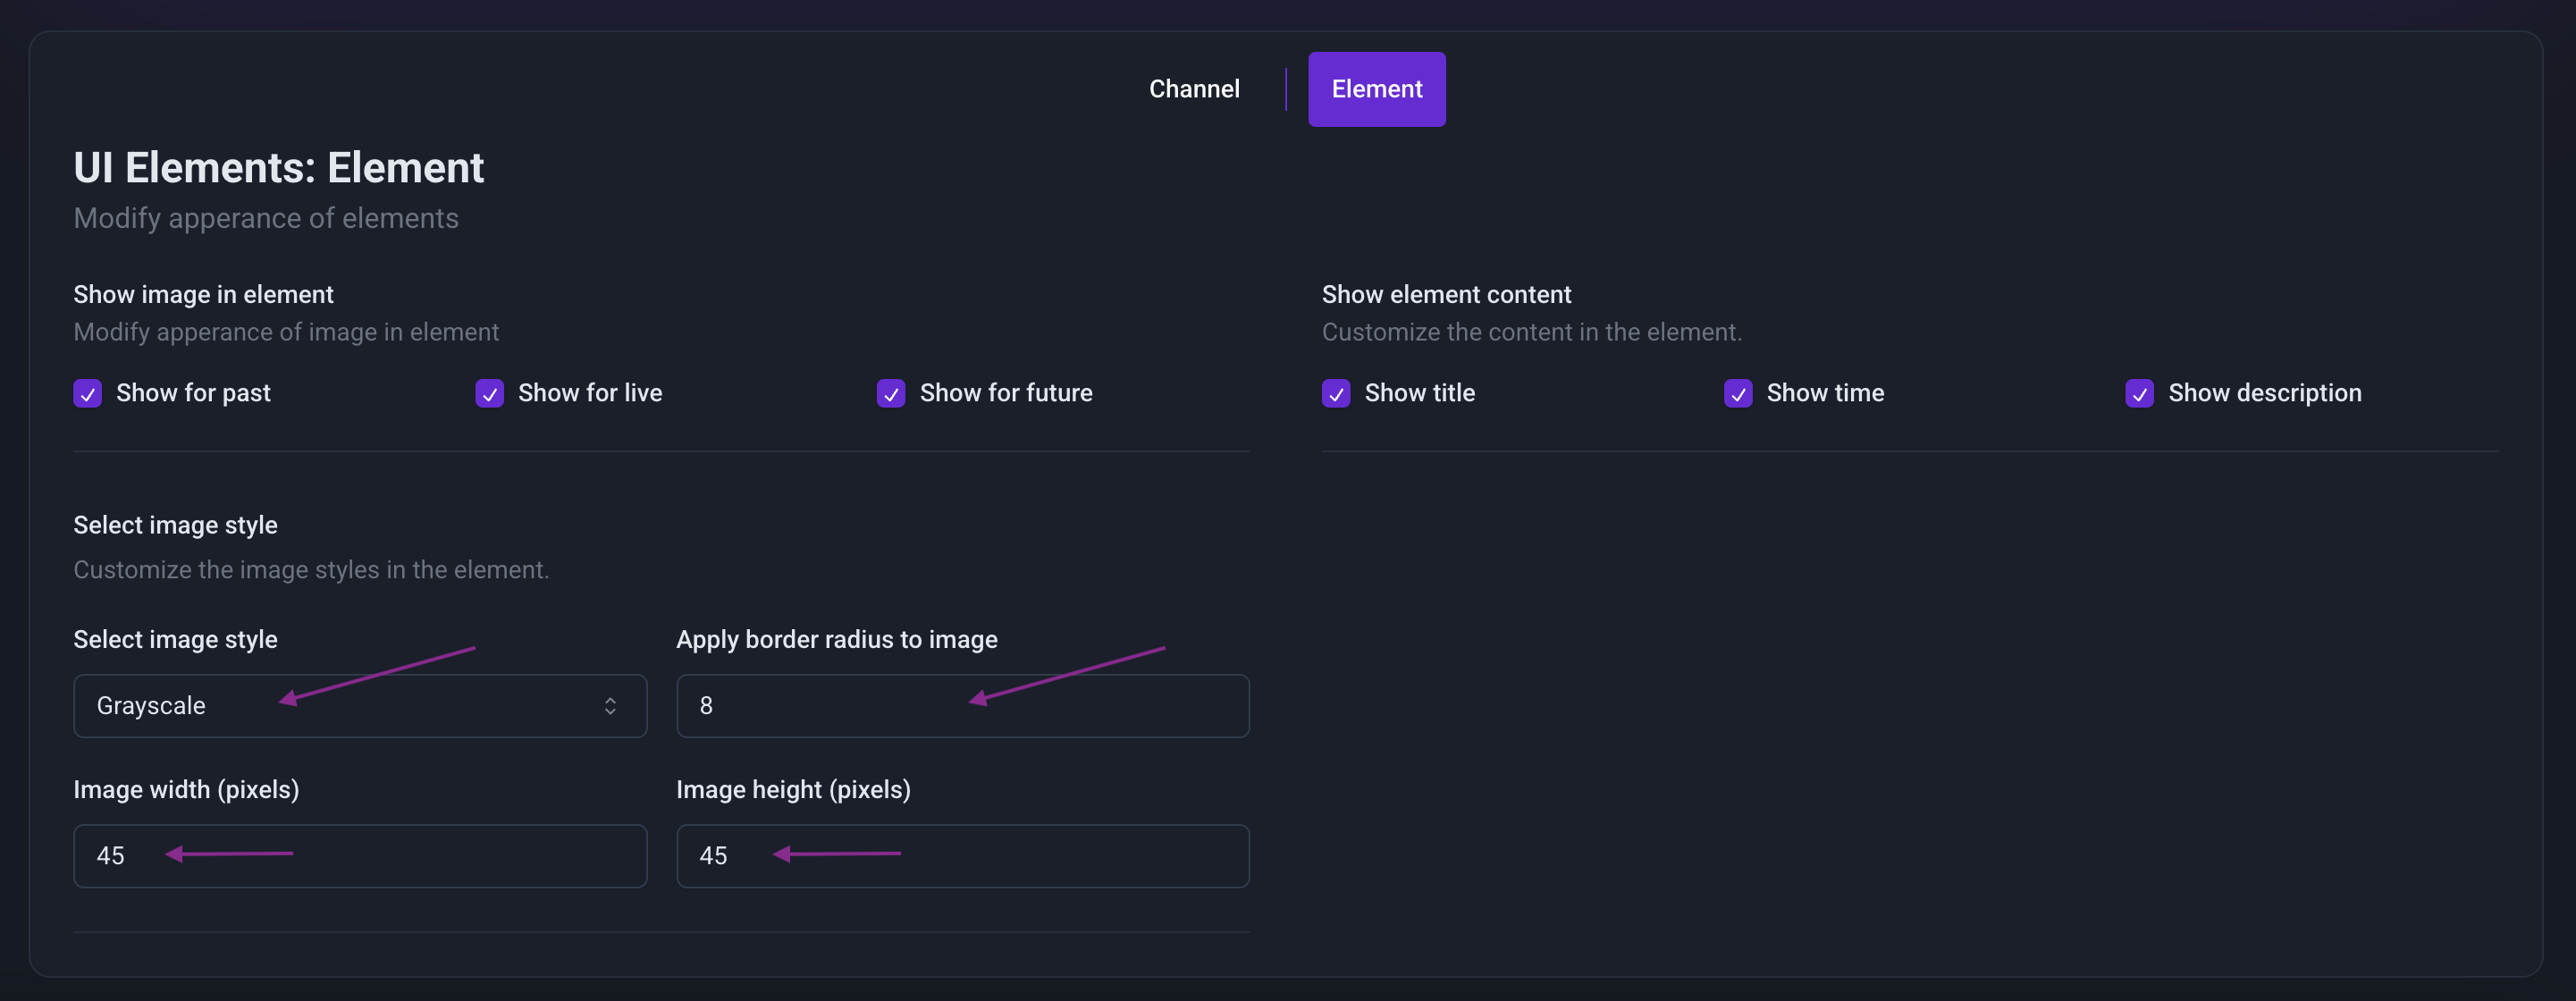
Step 9: Customize Elements in the Elements Tab
- Return to the Elements tab.
- Enable "Show image in element" for all variants.
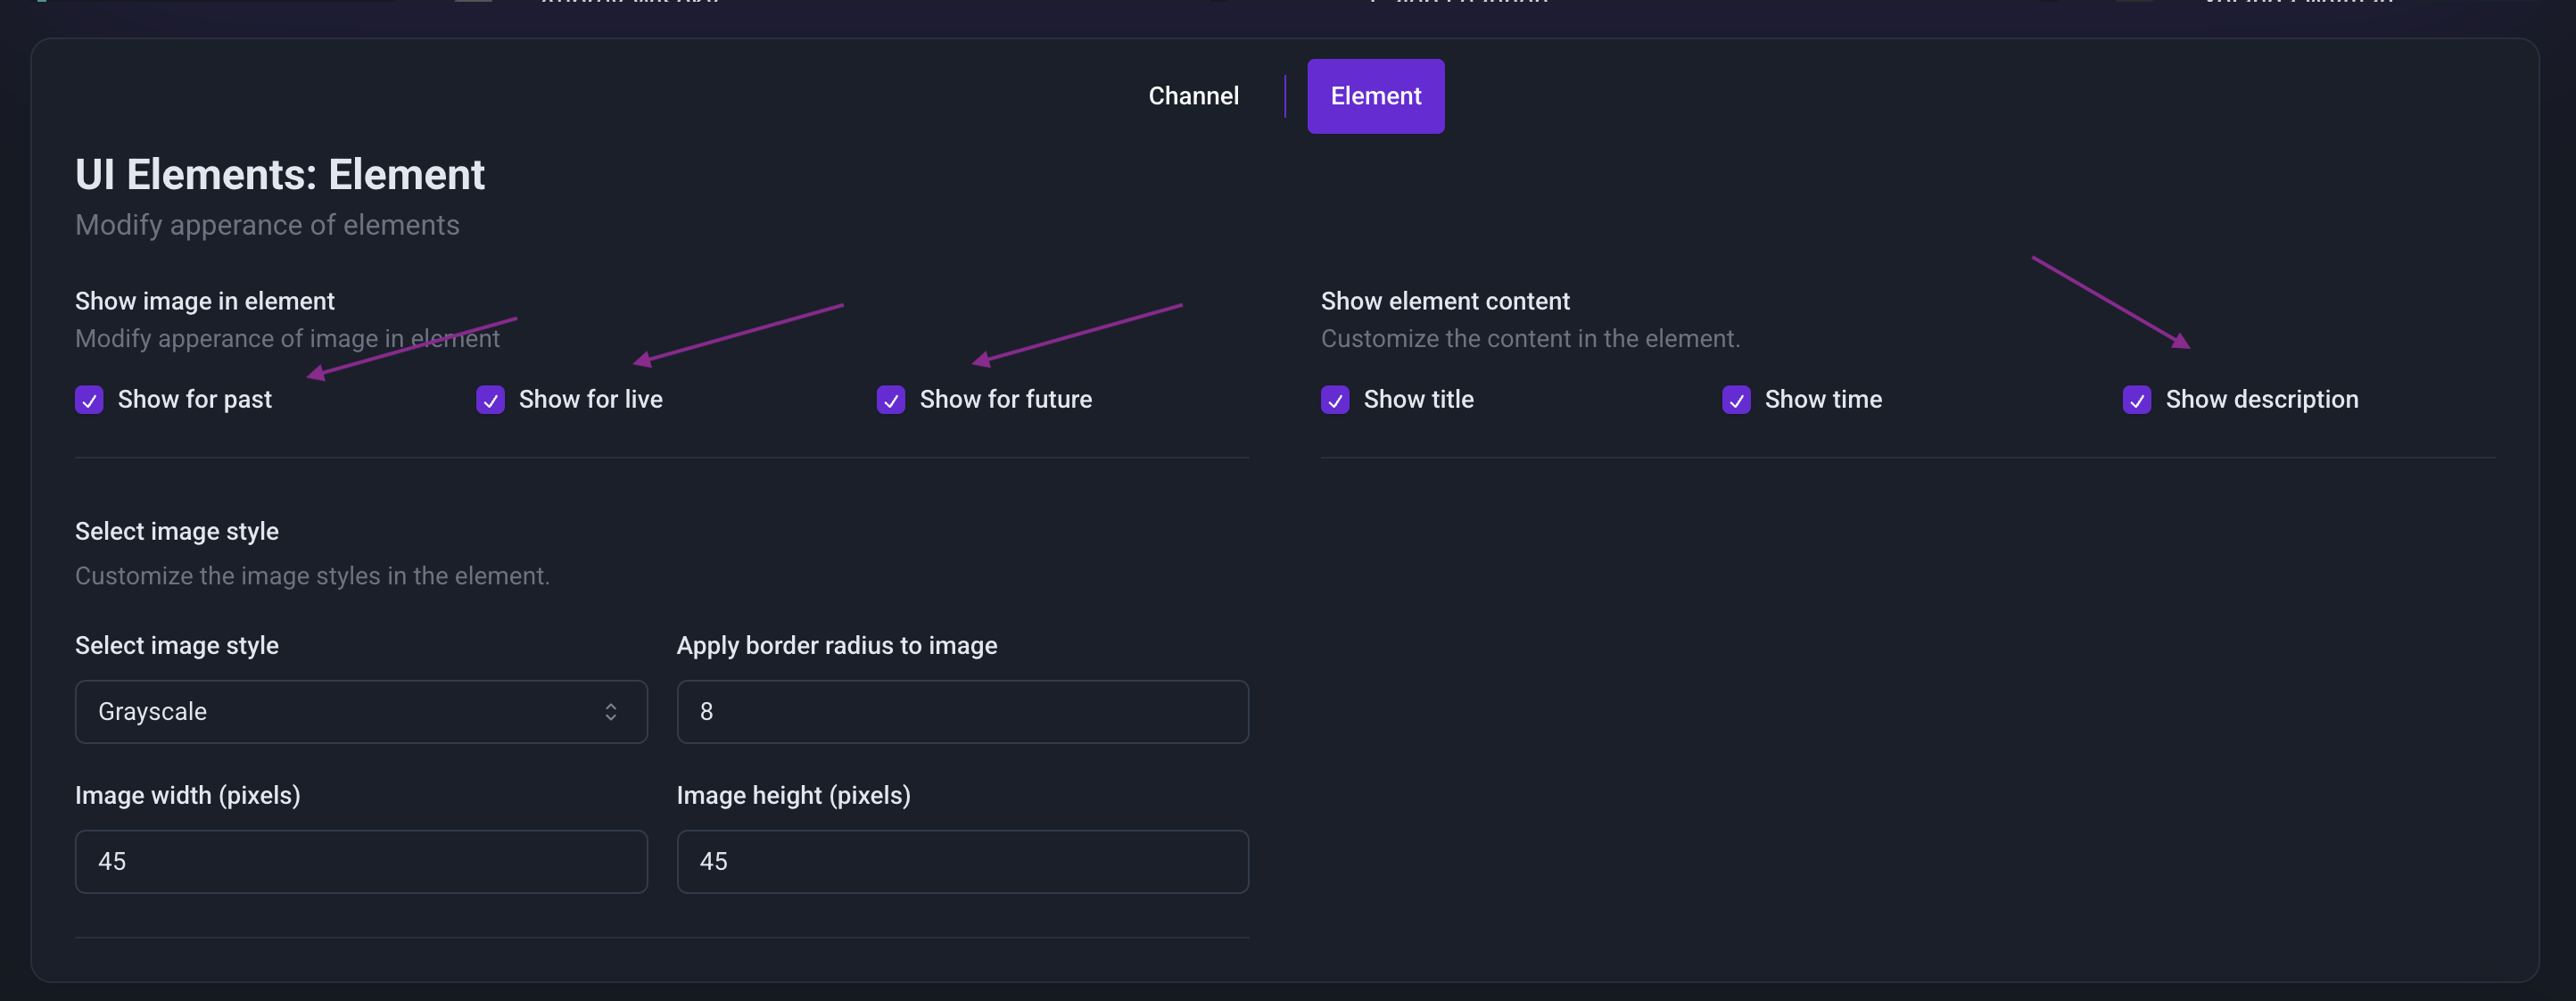
- Adjust image properties:
- Set the image height to 40px and width to 40px.
- Change the border radius to 50 for a rounded appearance.
- Select the Gradient option for the image style.
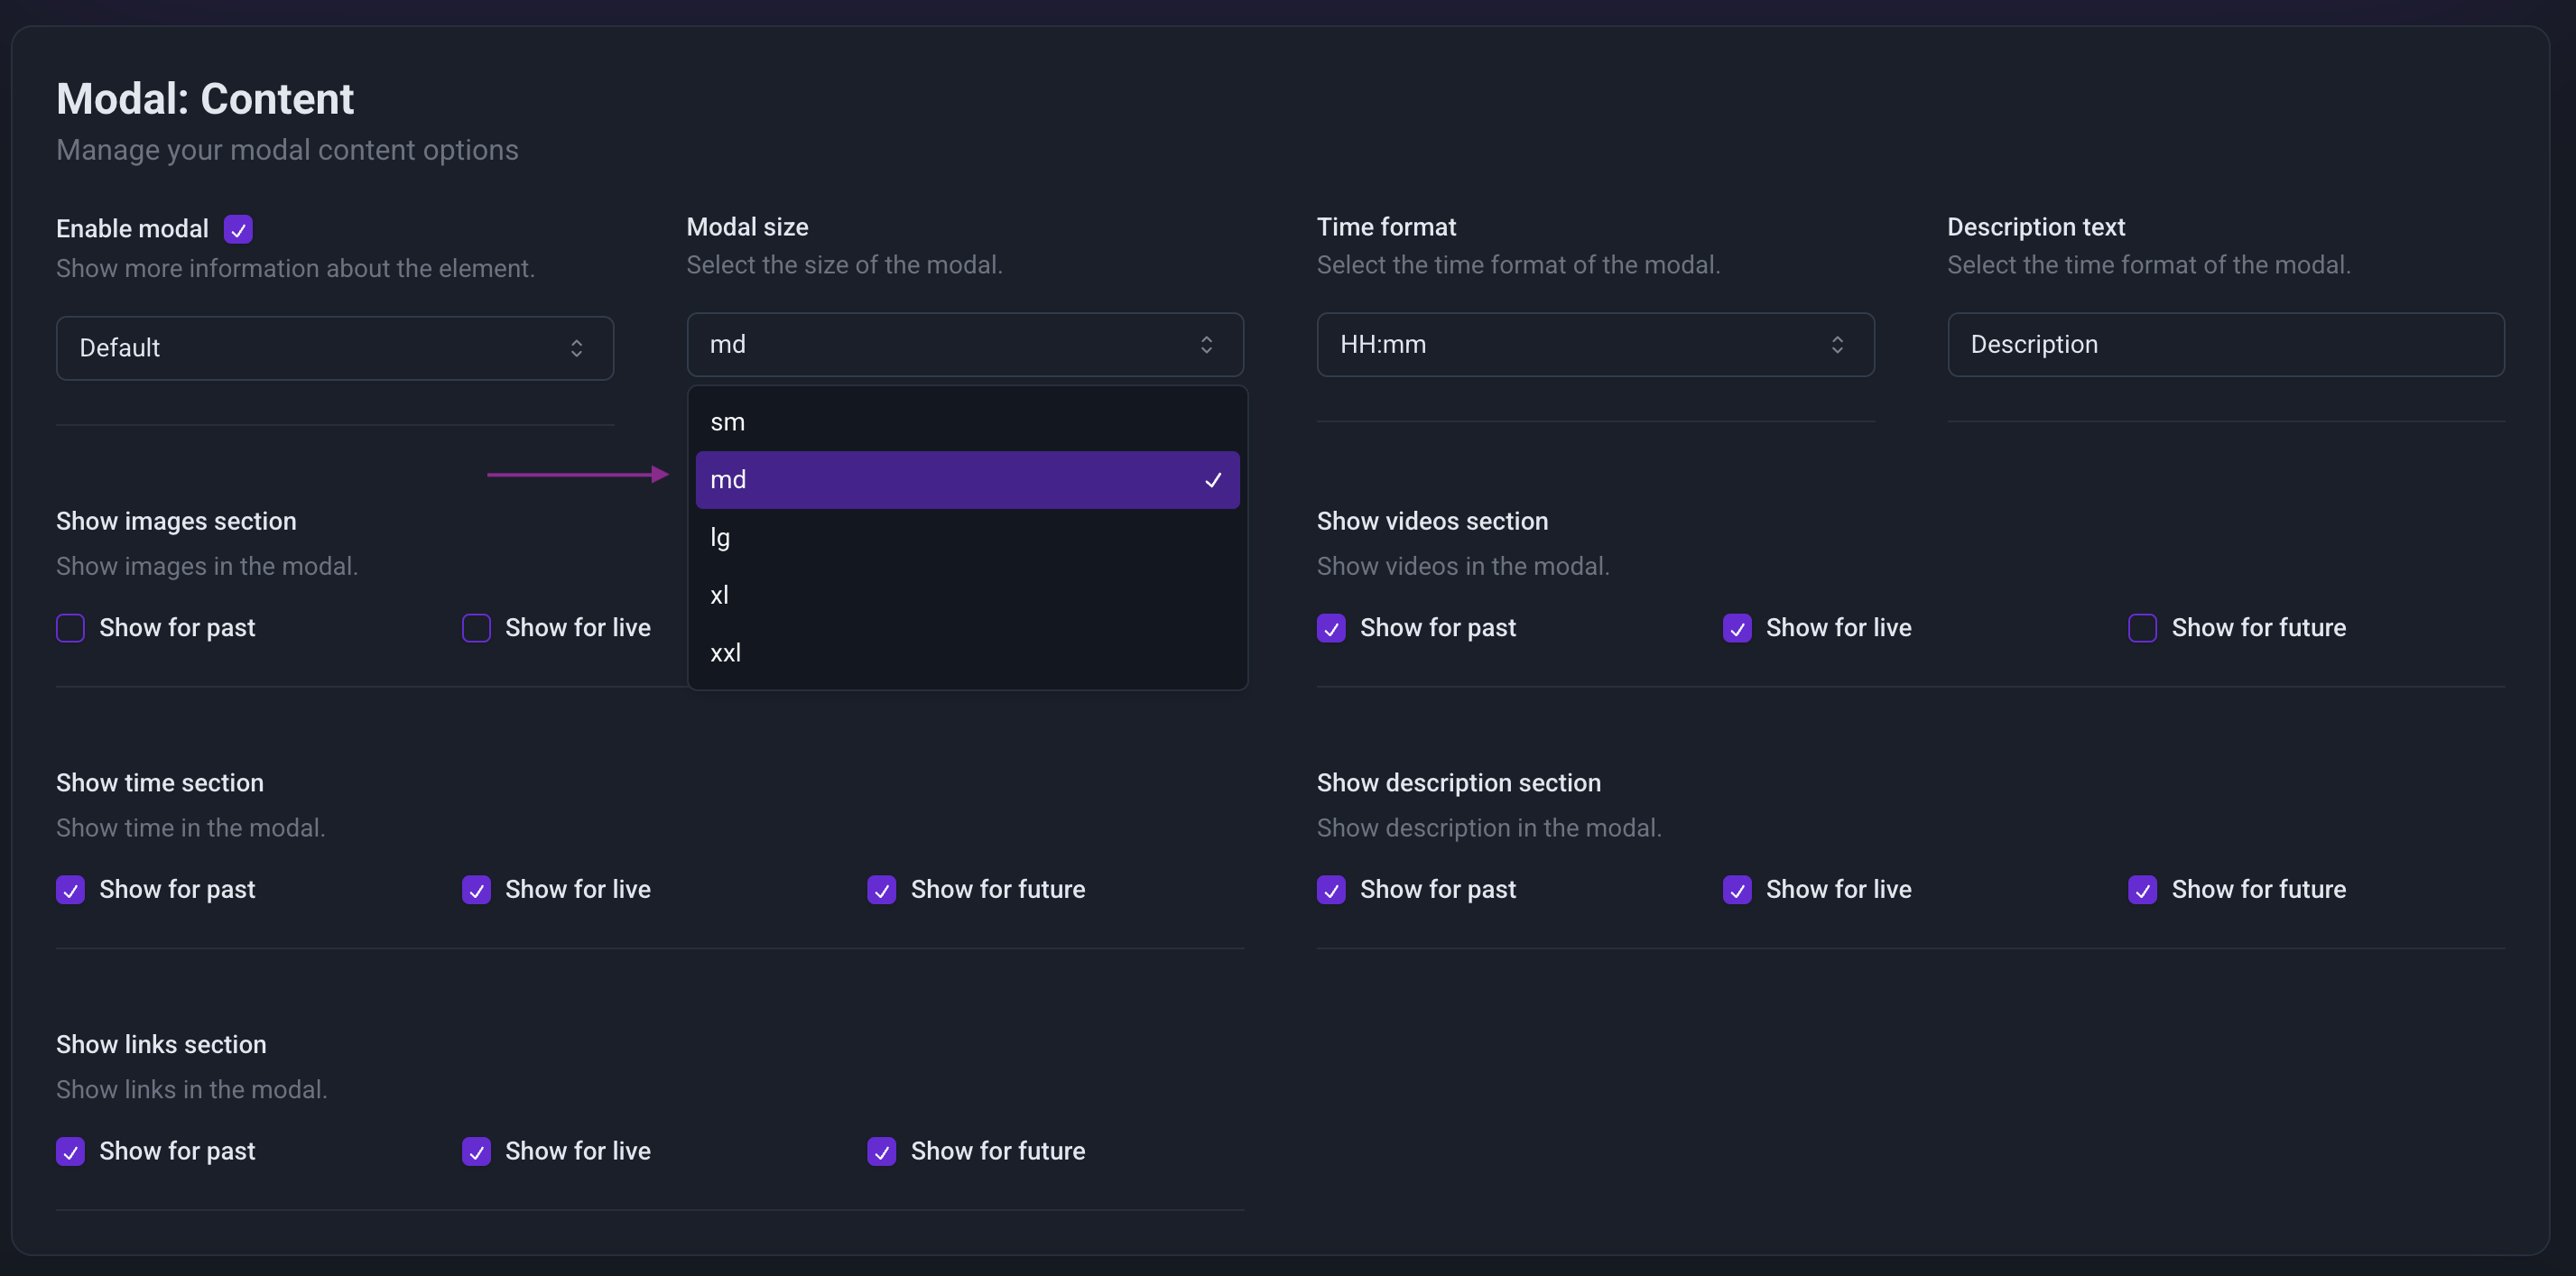
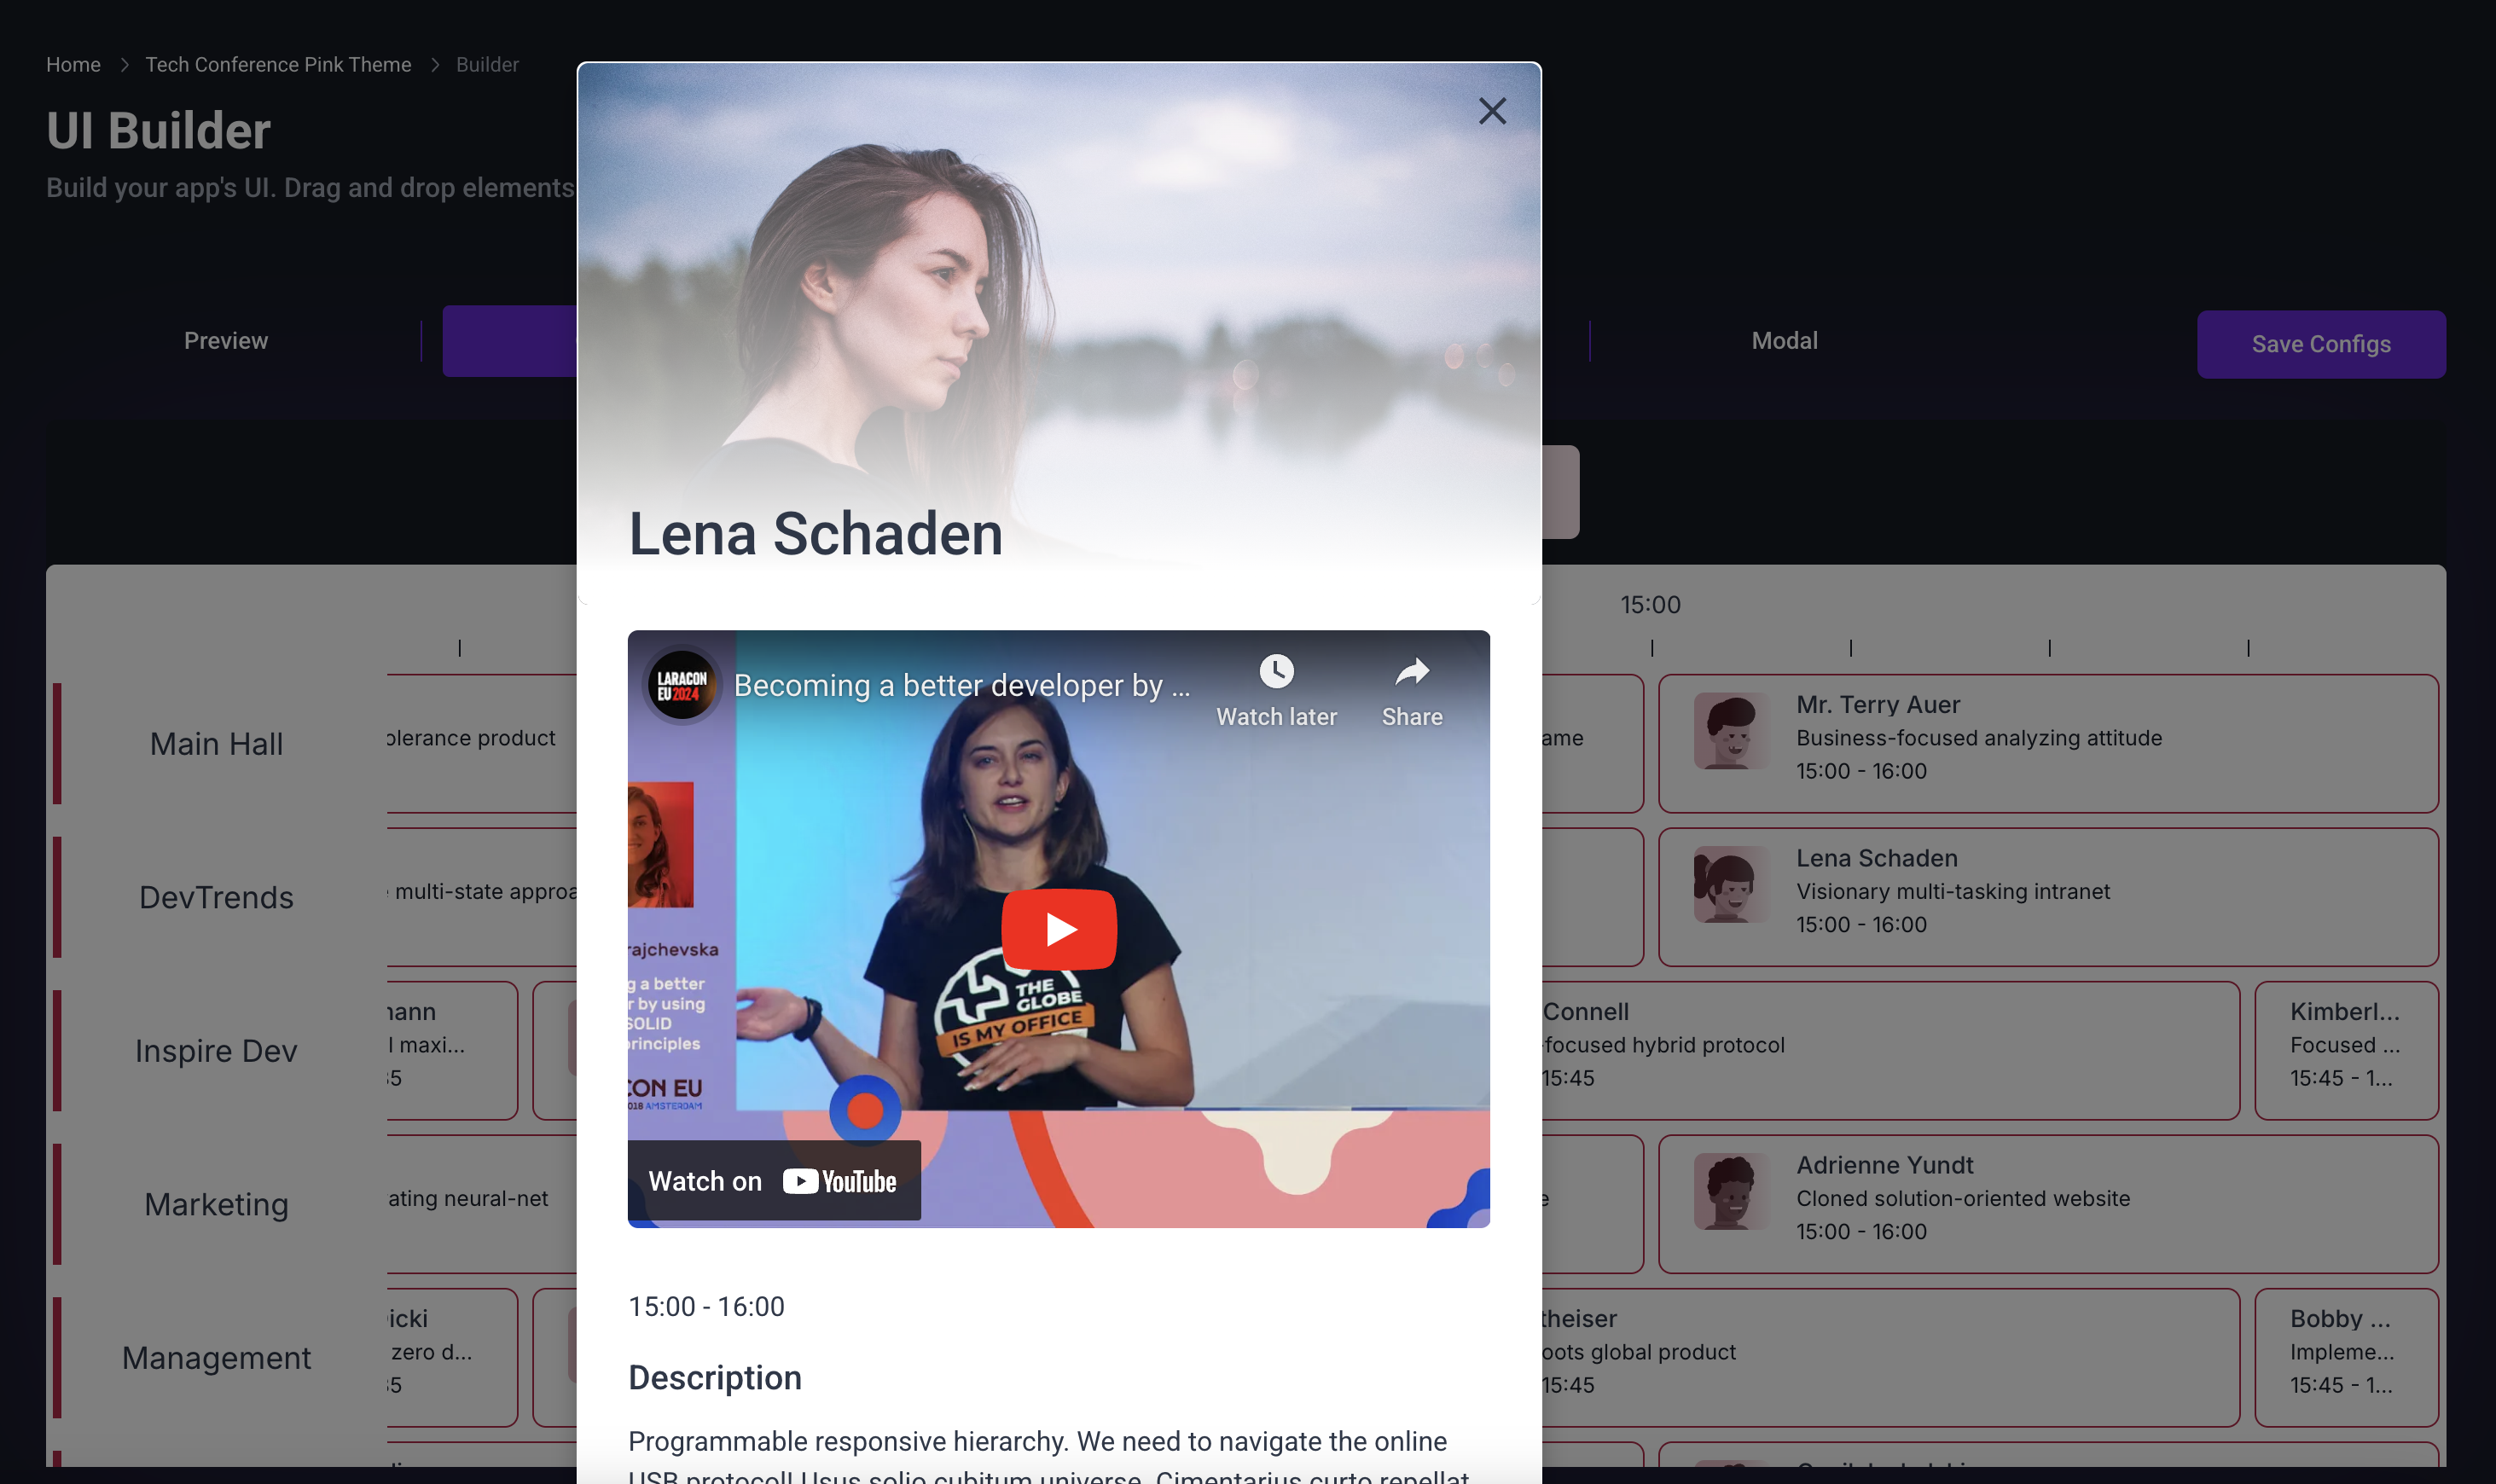
Step 10: Enable and Configure Modal in the Modal Tab
- Go to the Modal tab.
- Enable the modal by clicking the "Enable Modal" option.
- Enable the "Show images section" for all modal variants.
- Set the modal size to md (medium).
Publish Your Application
Follow this step-by-step guide to embed your application into your Framer project:
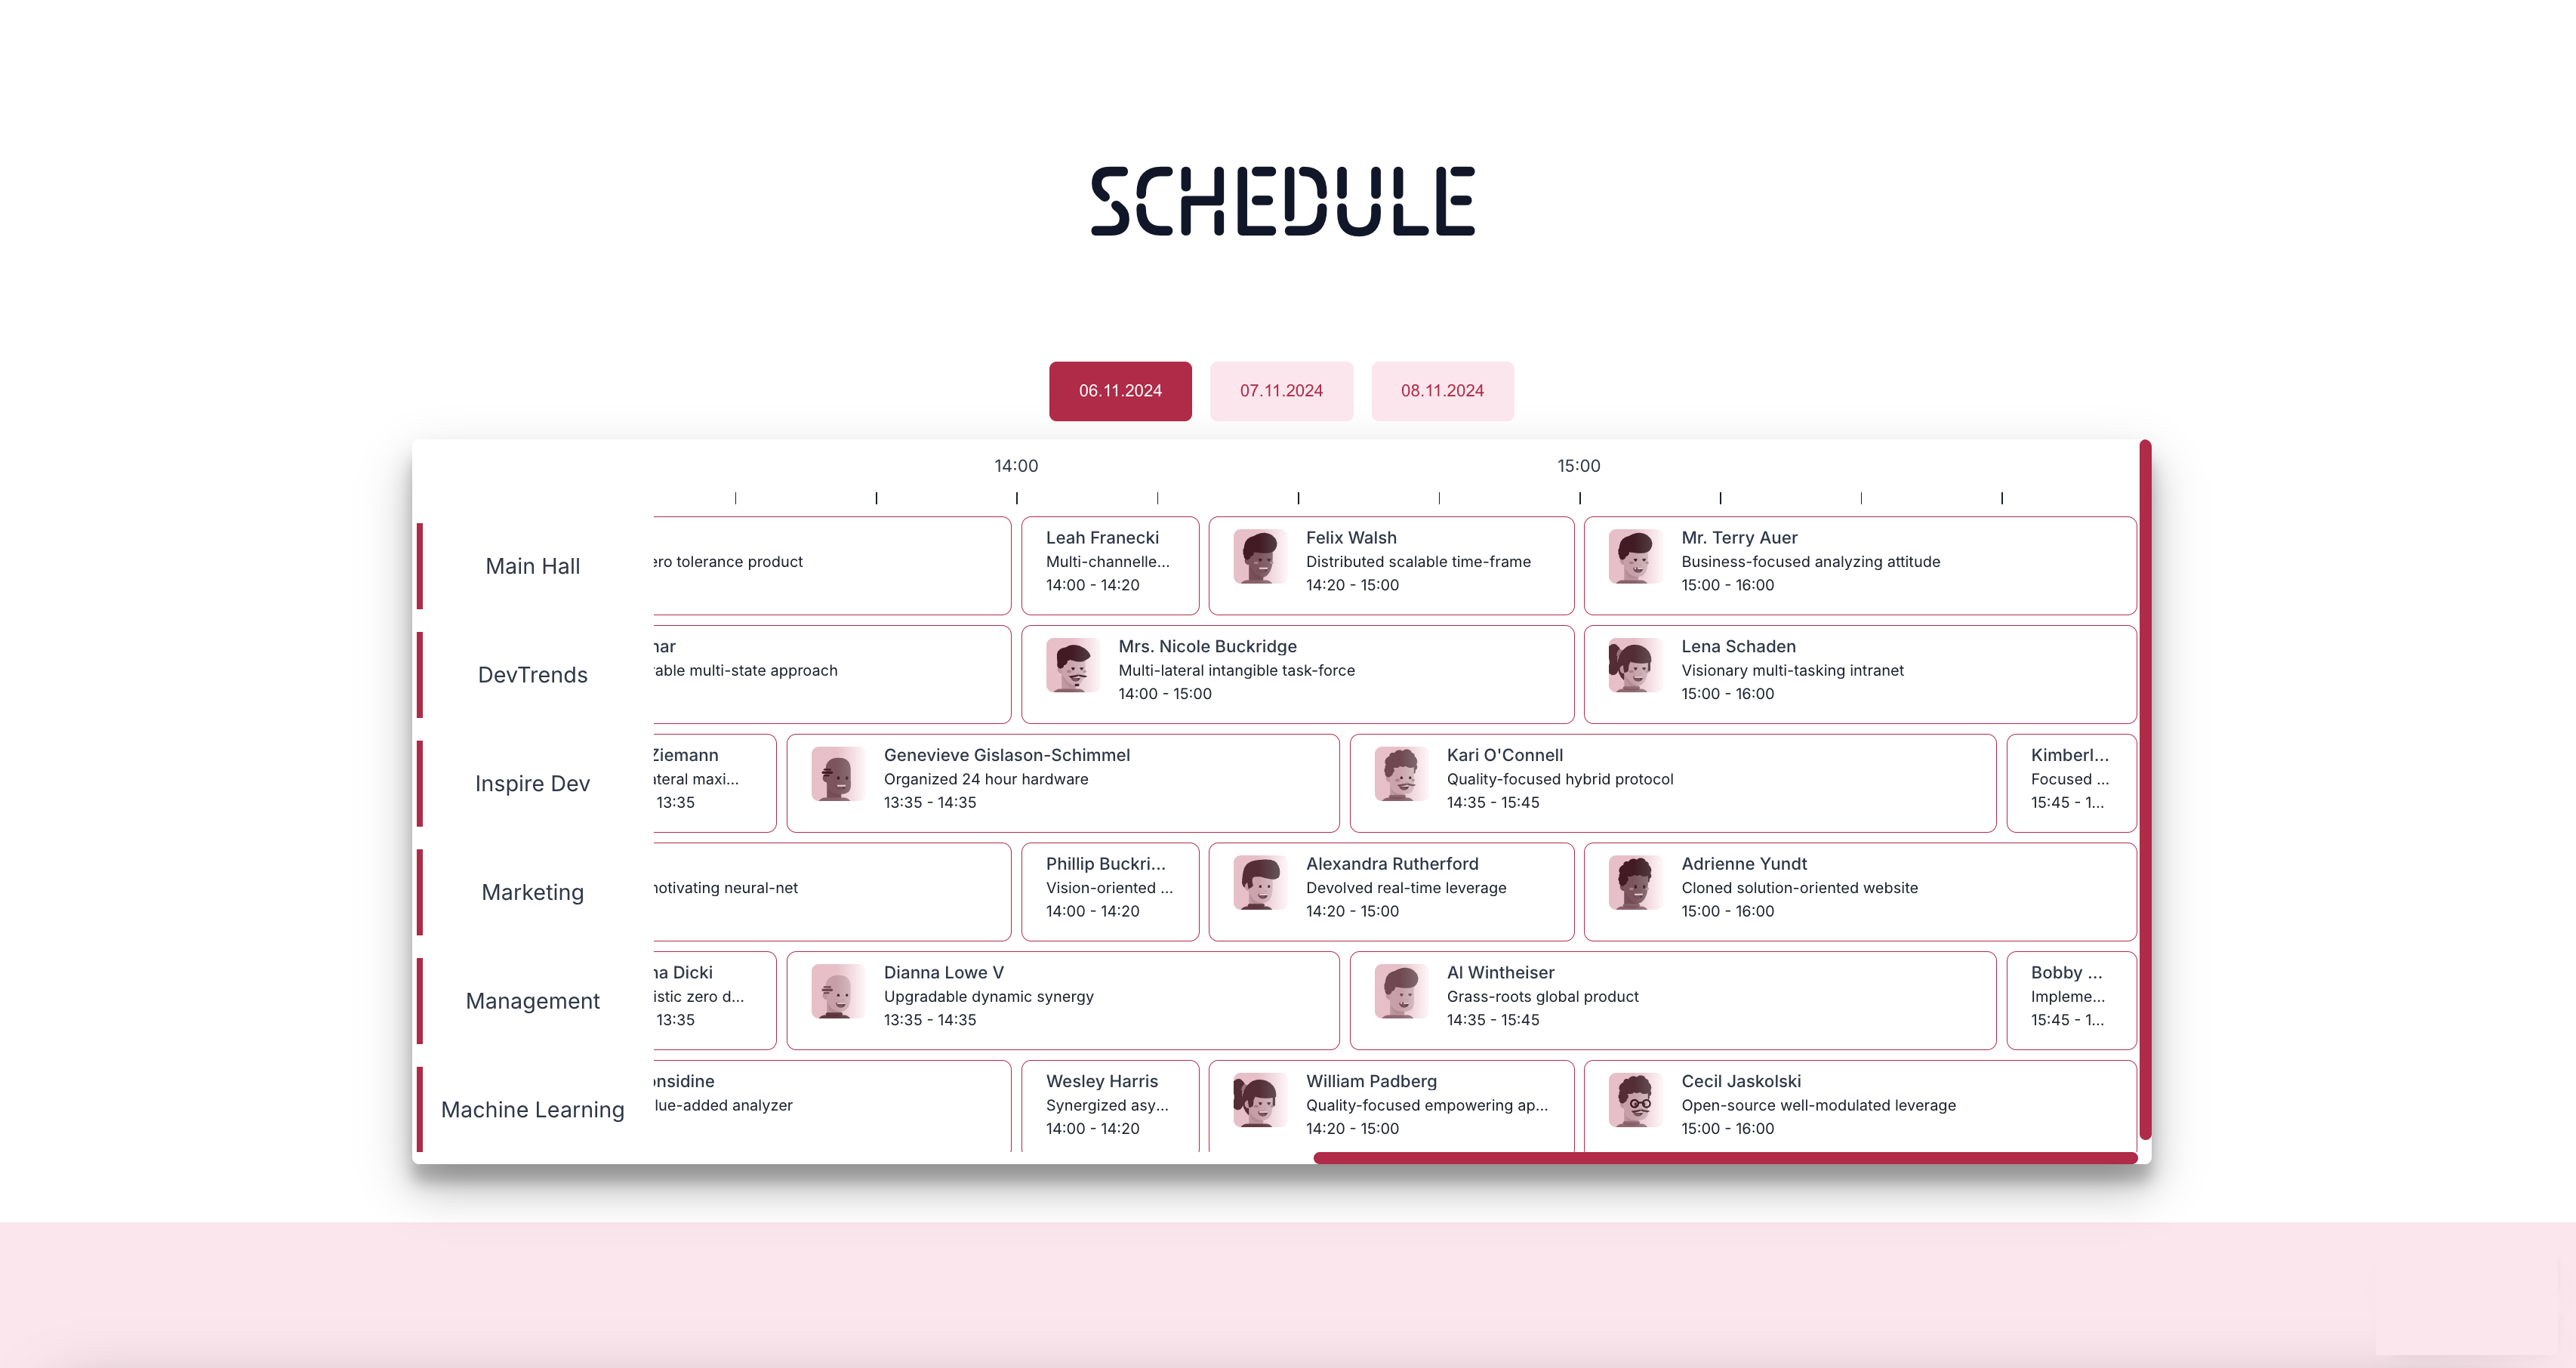
Example website: Now Tech Conf Event
Step 1: Prepare for Publication
Once you’ve added all your data and customized your Schedule/Planner/Calendar application, you’re ready to publish it in Framer.
Step 2: Open Your Framer Project
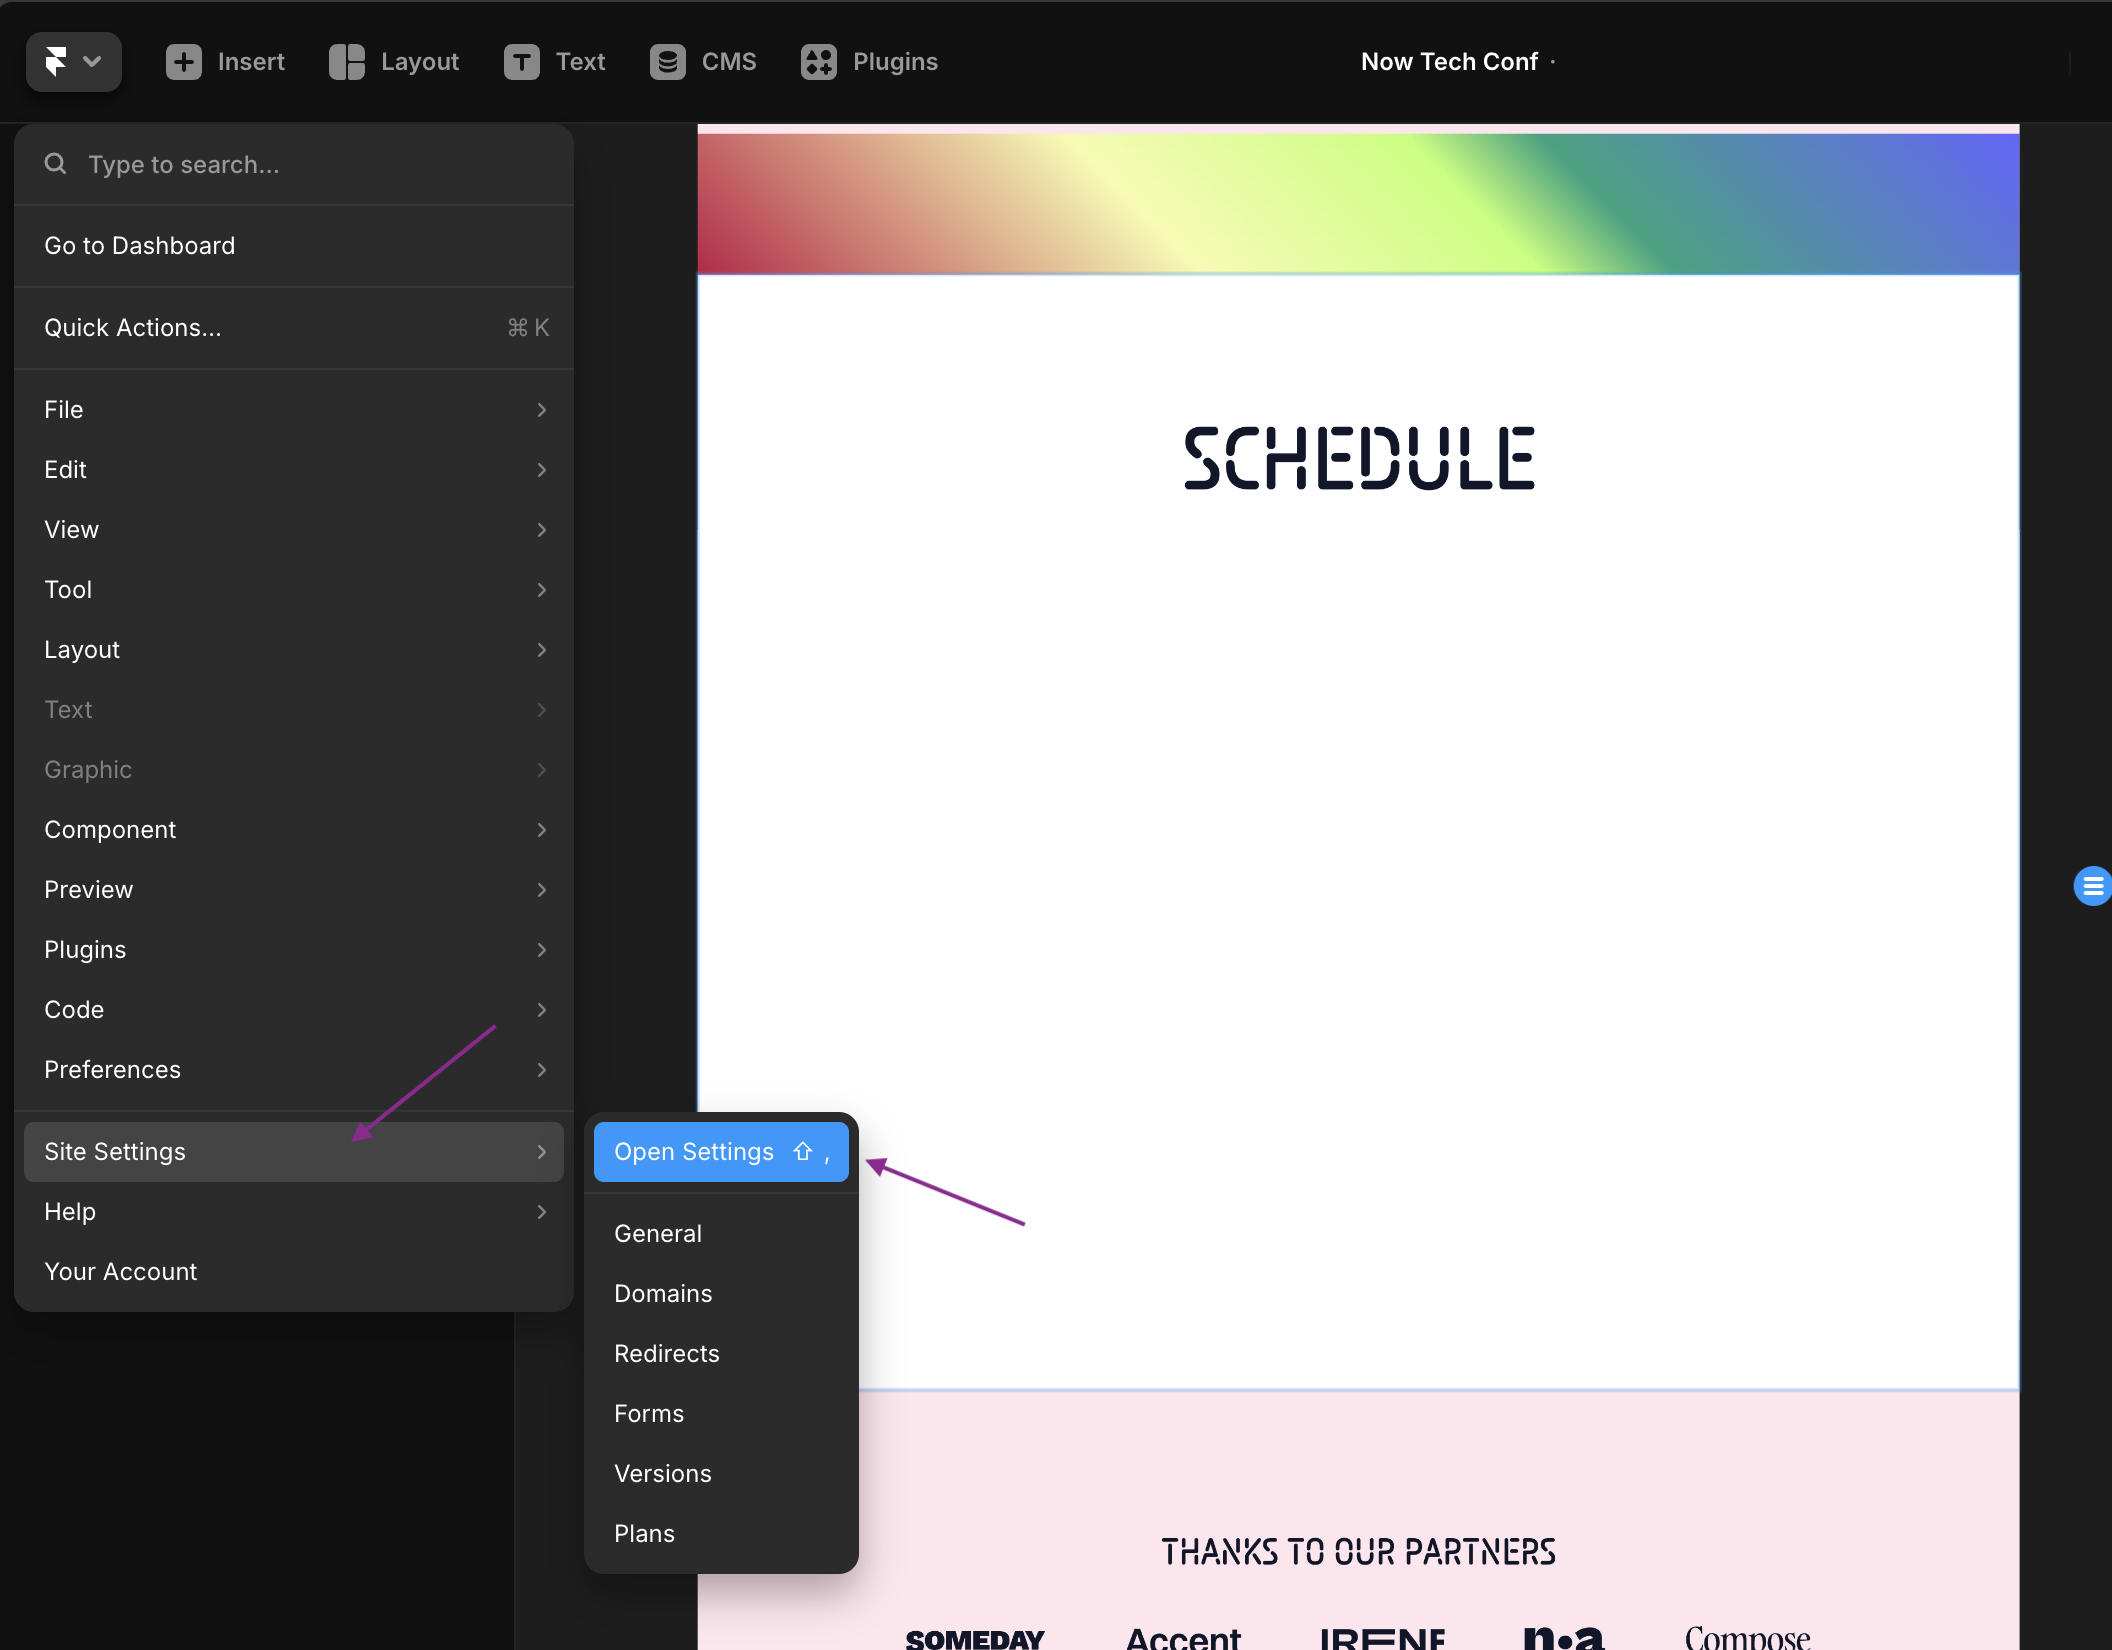
- Open the Framer application and select your project.
- In the top-left corner, click the dropdown menu and choose "Site Settings".
- From the nested menu, select "Open Settings".
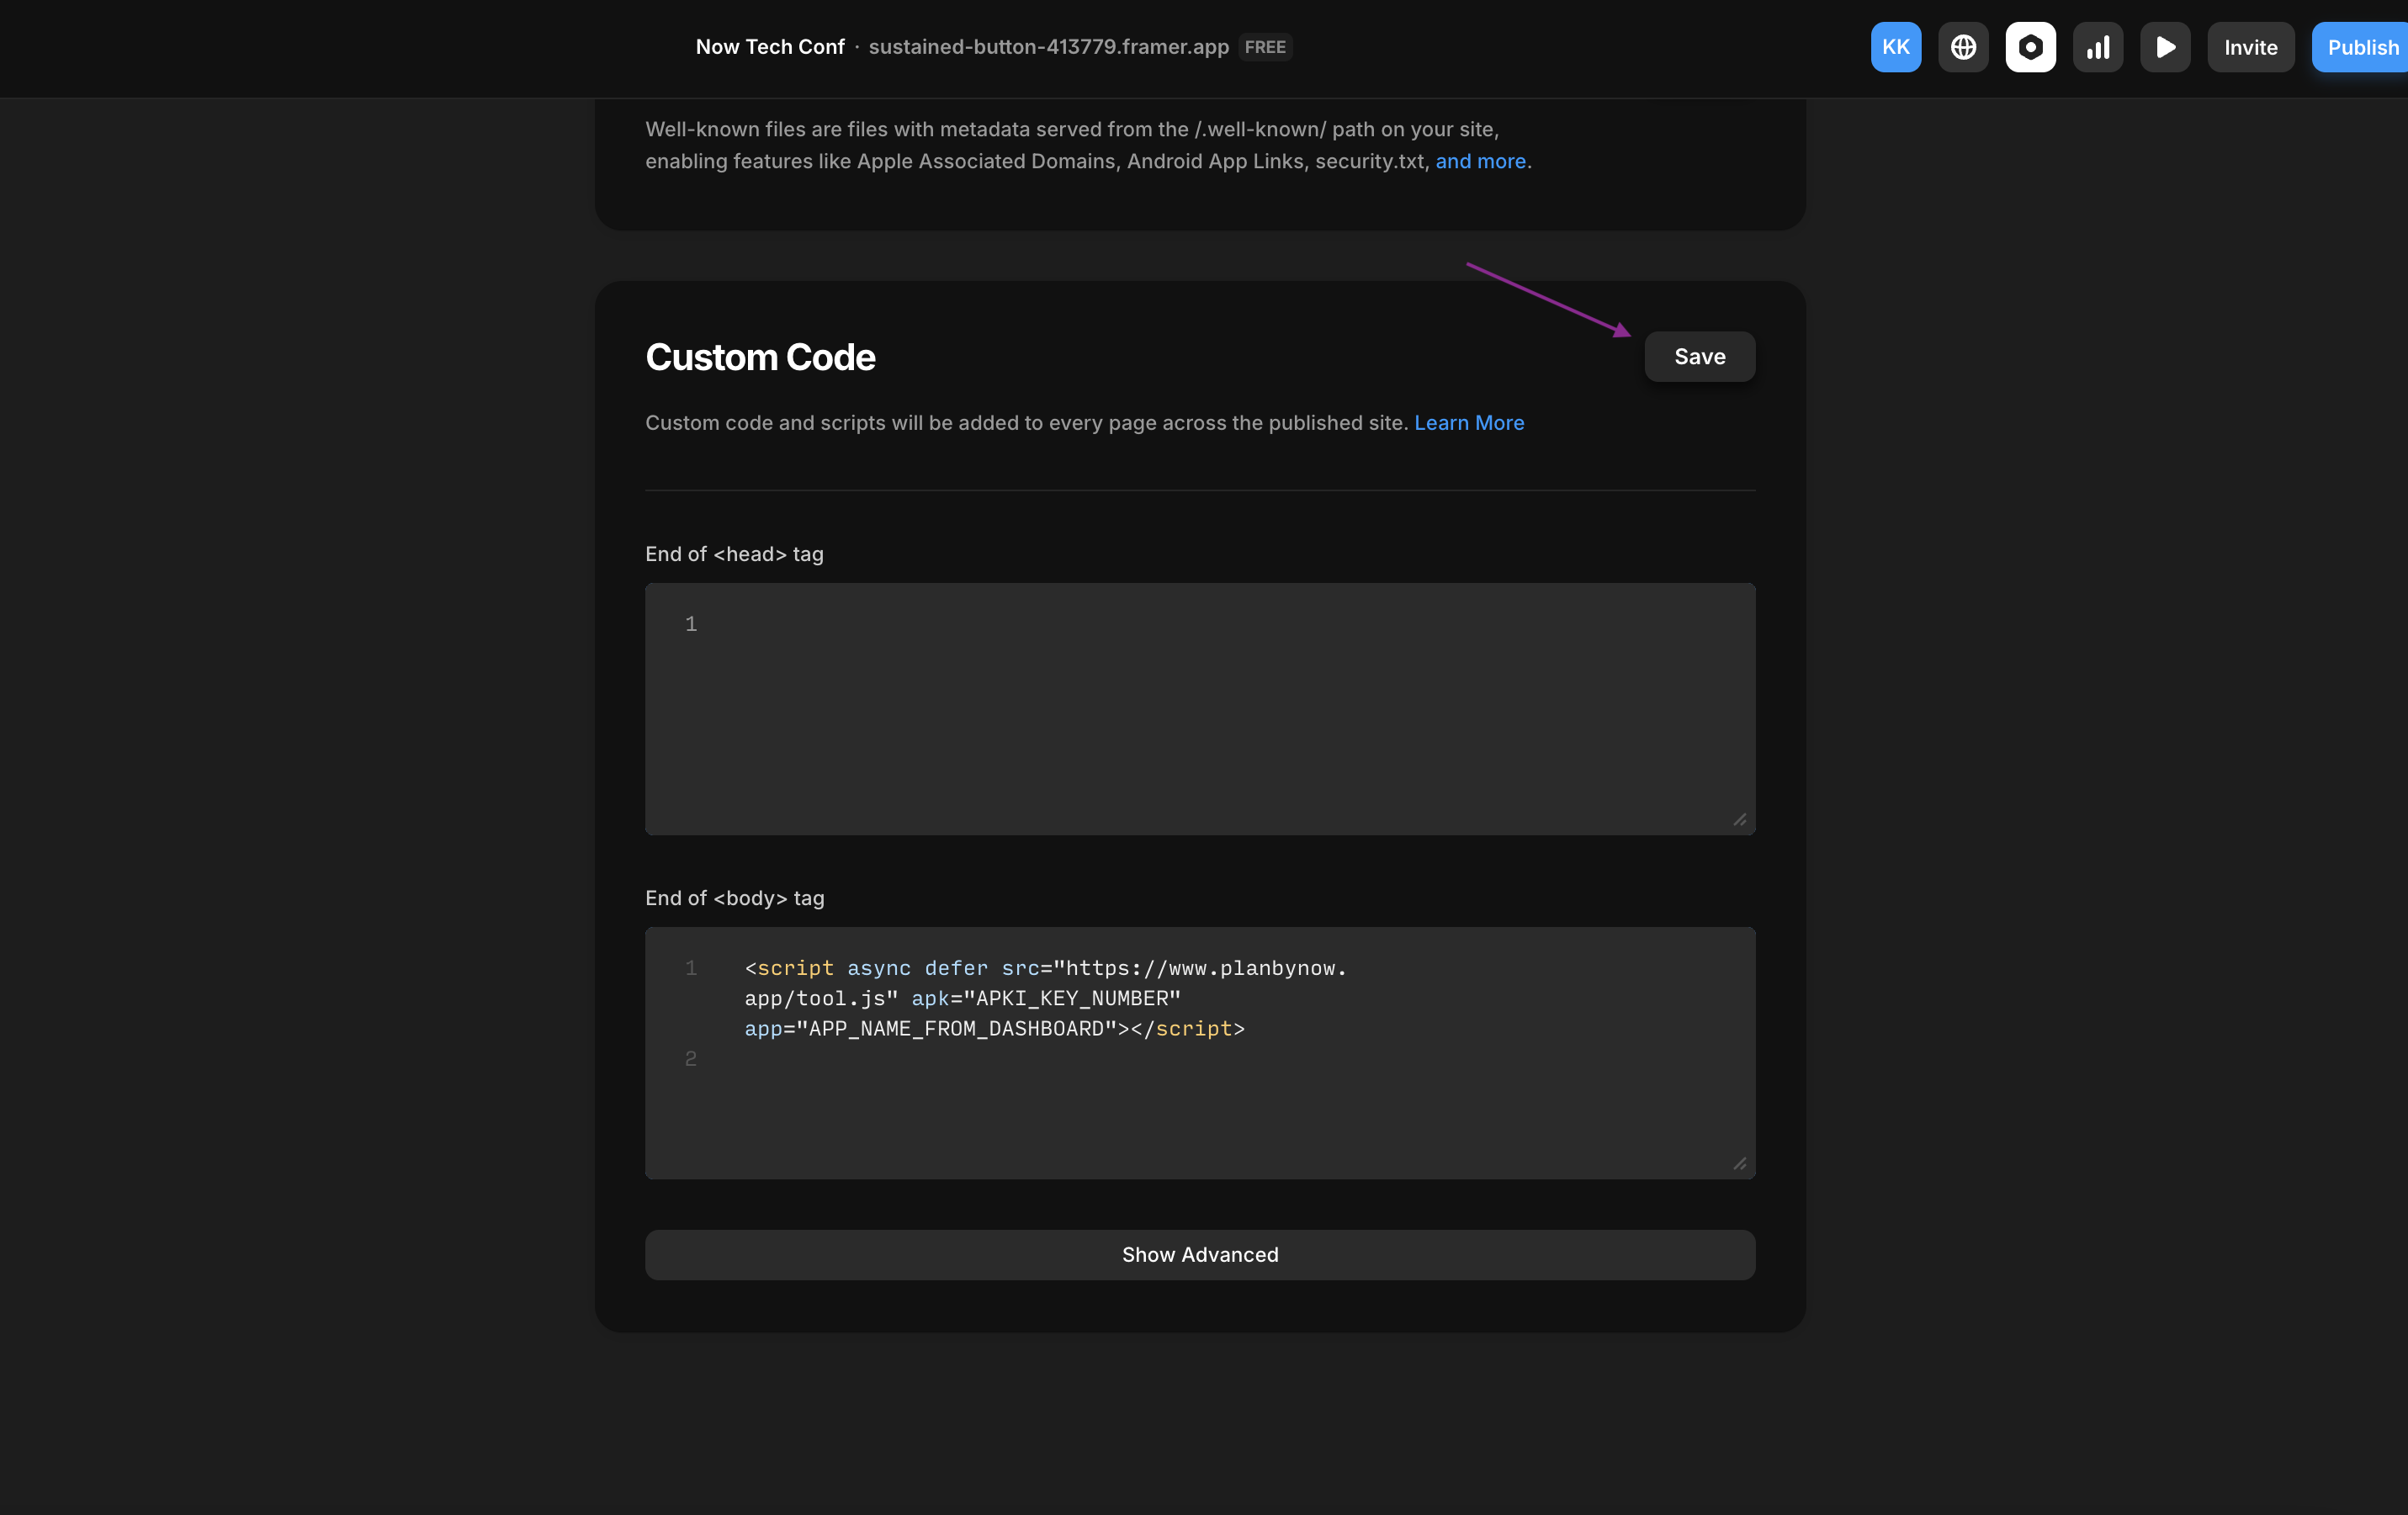
Step 3: Add Custom Code
- Scroll to the bottom of the Settings page until you find the "Custom Code" section.
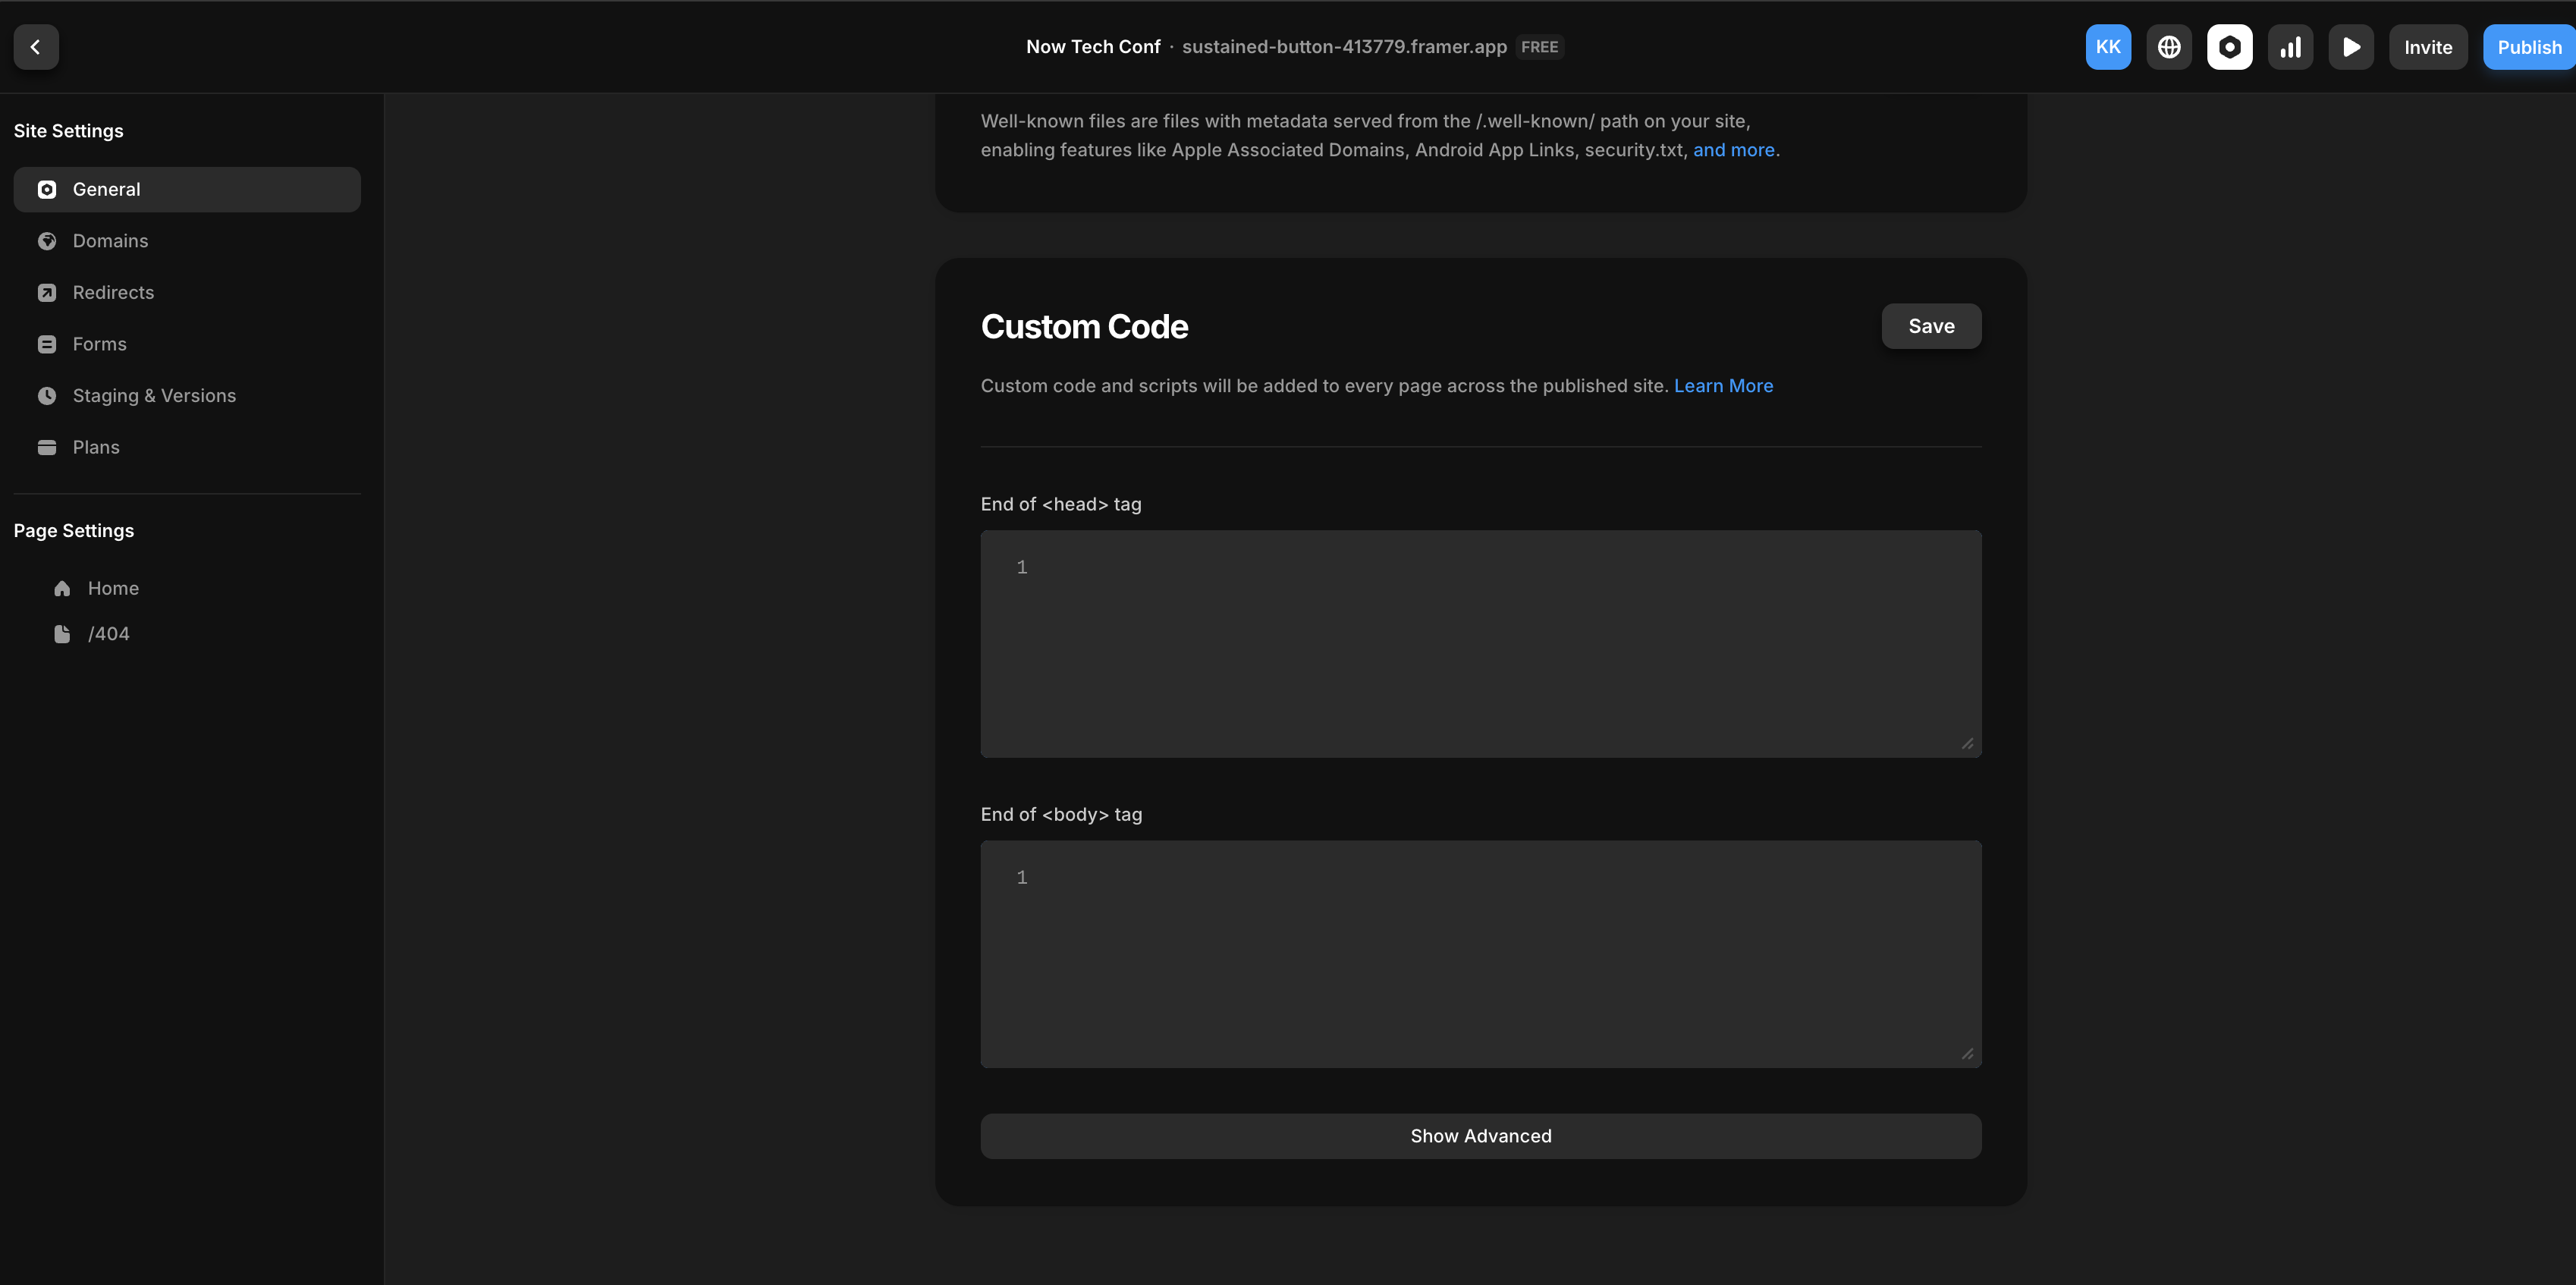
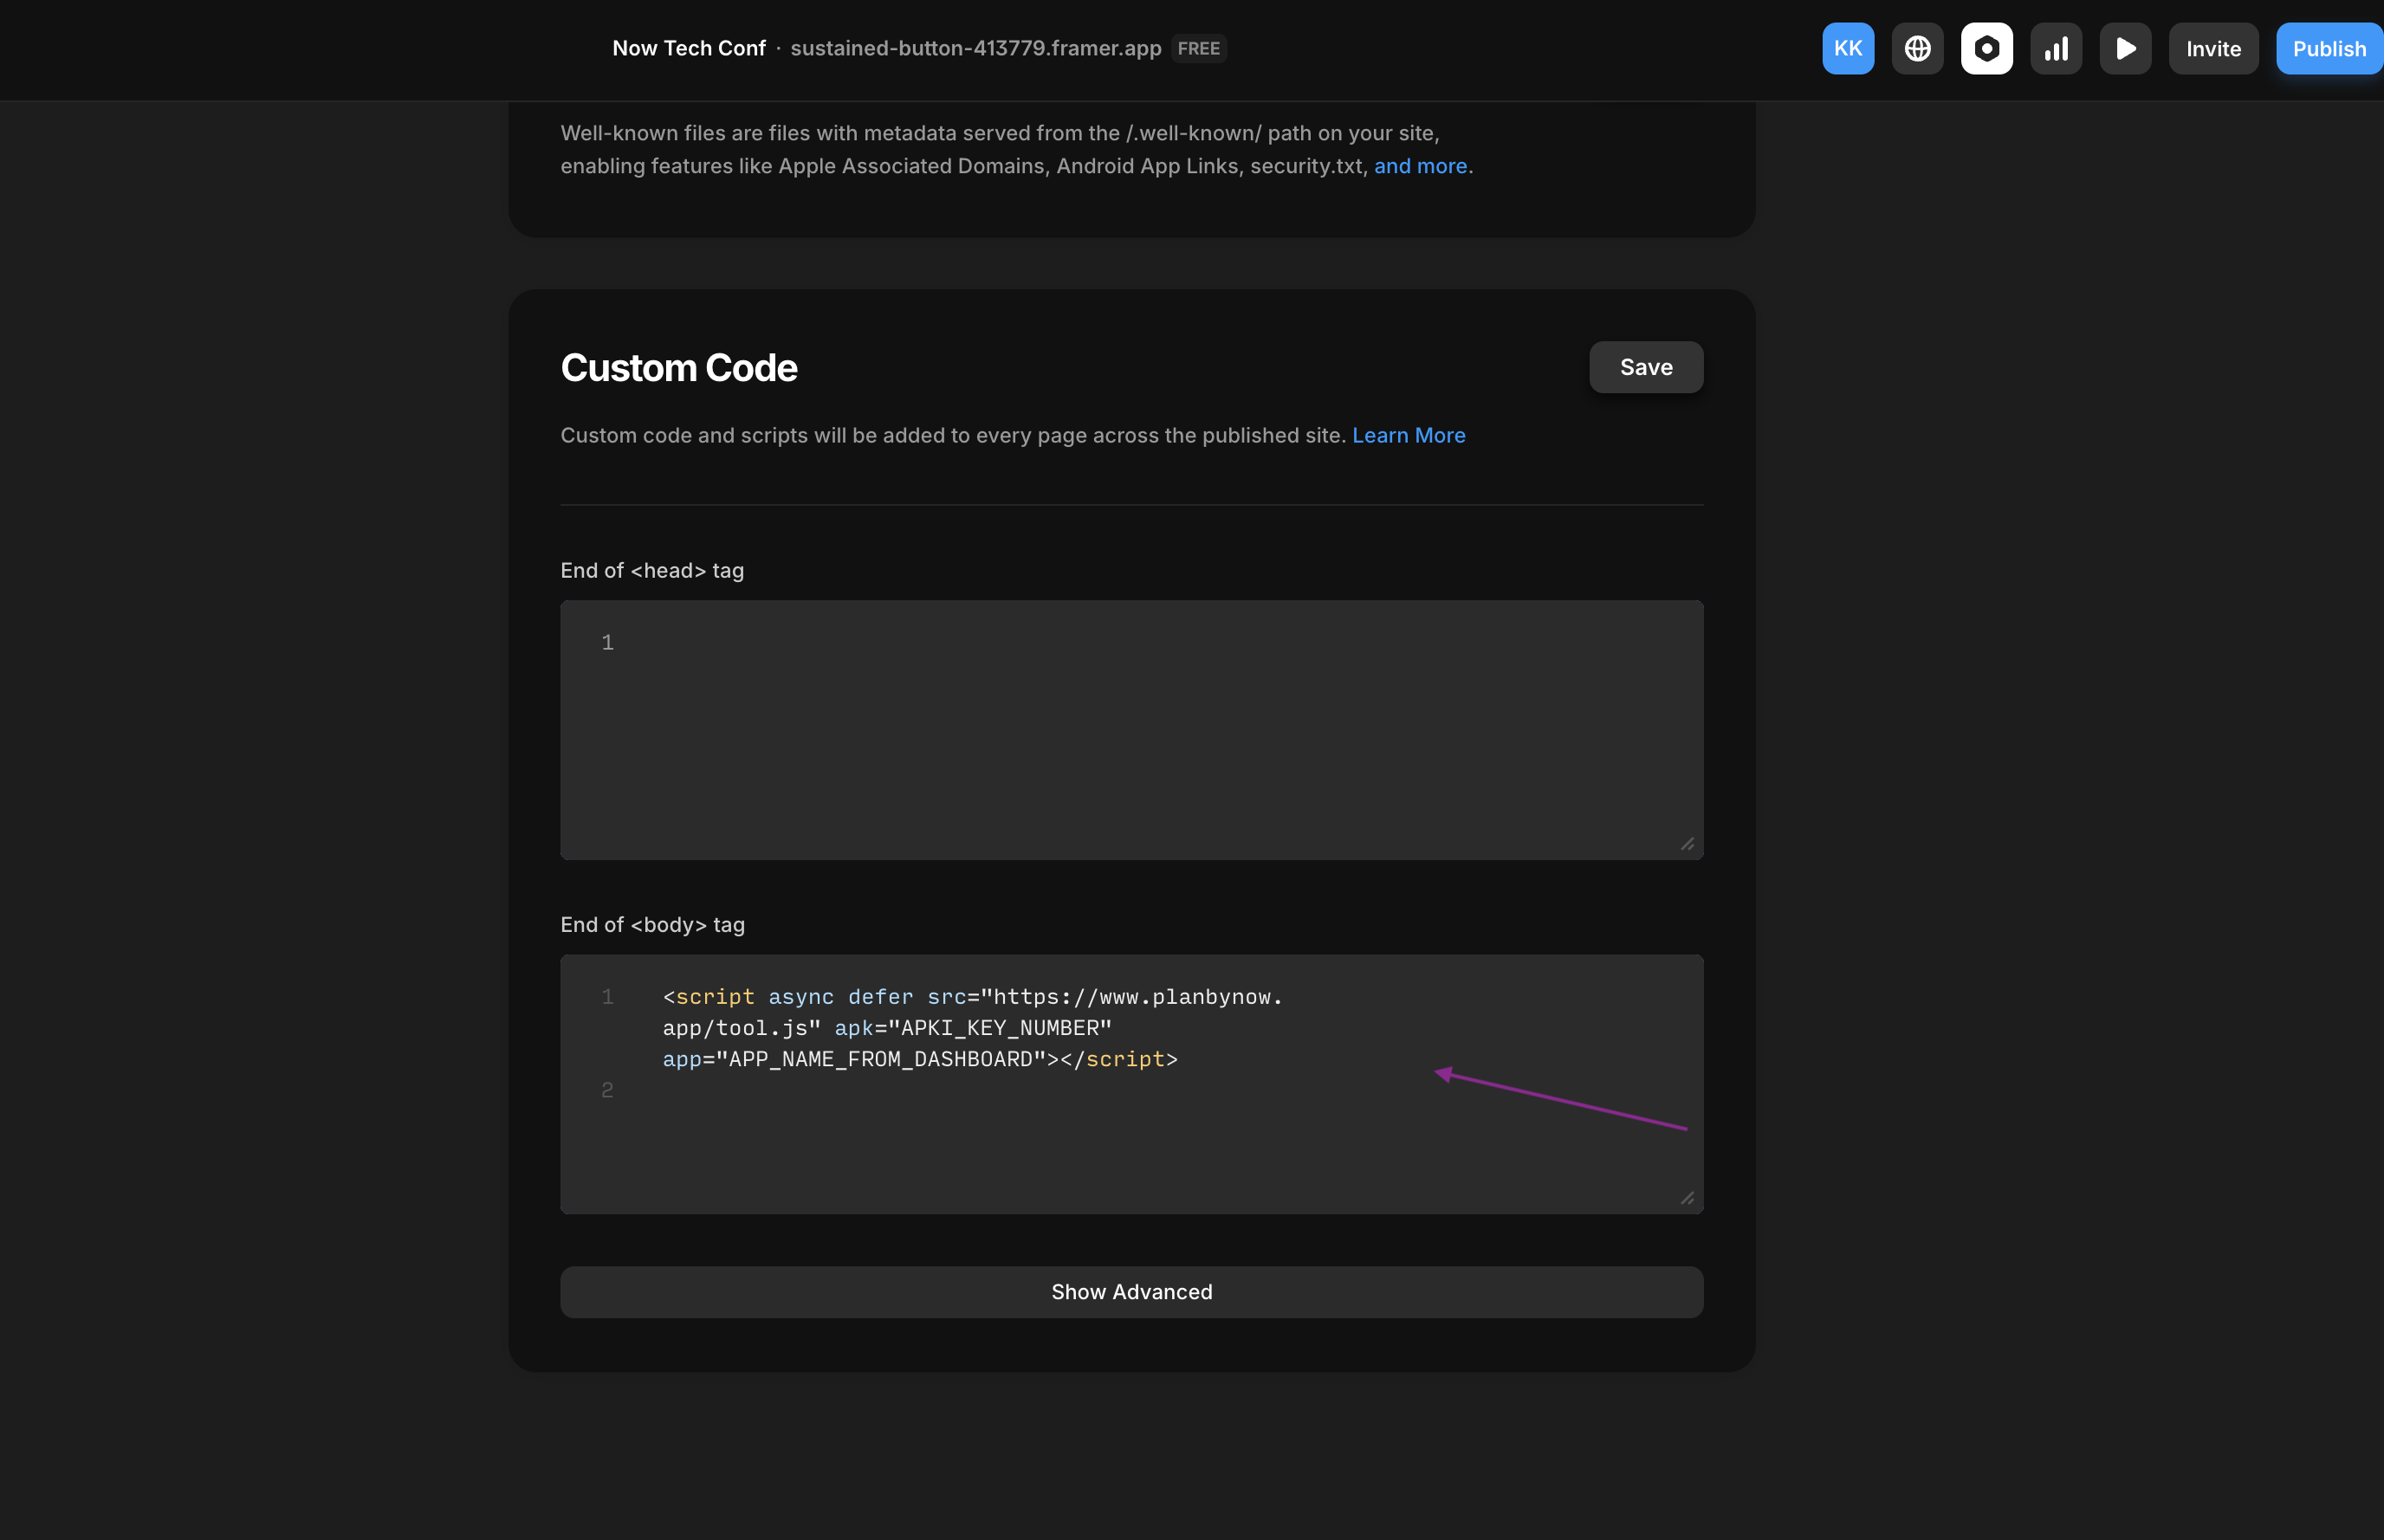
- Go to Planby Now dashboard and copy the embed code from your application’s home page.
- Paste the code into the "End of
<body>tag" field in the Custom Code section.
<script
  async
  defer
  src="https://www.planbynow.app/tool.js"
  apk="YOUR_API_KEY"
  app="YOUR_APP_NAME"
></script>
Step 4: Insert Embed Element in Framer
Return to the Framer editor.
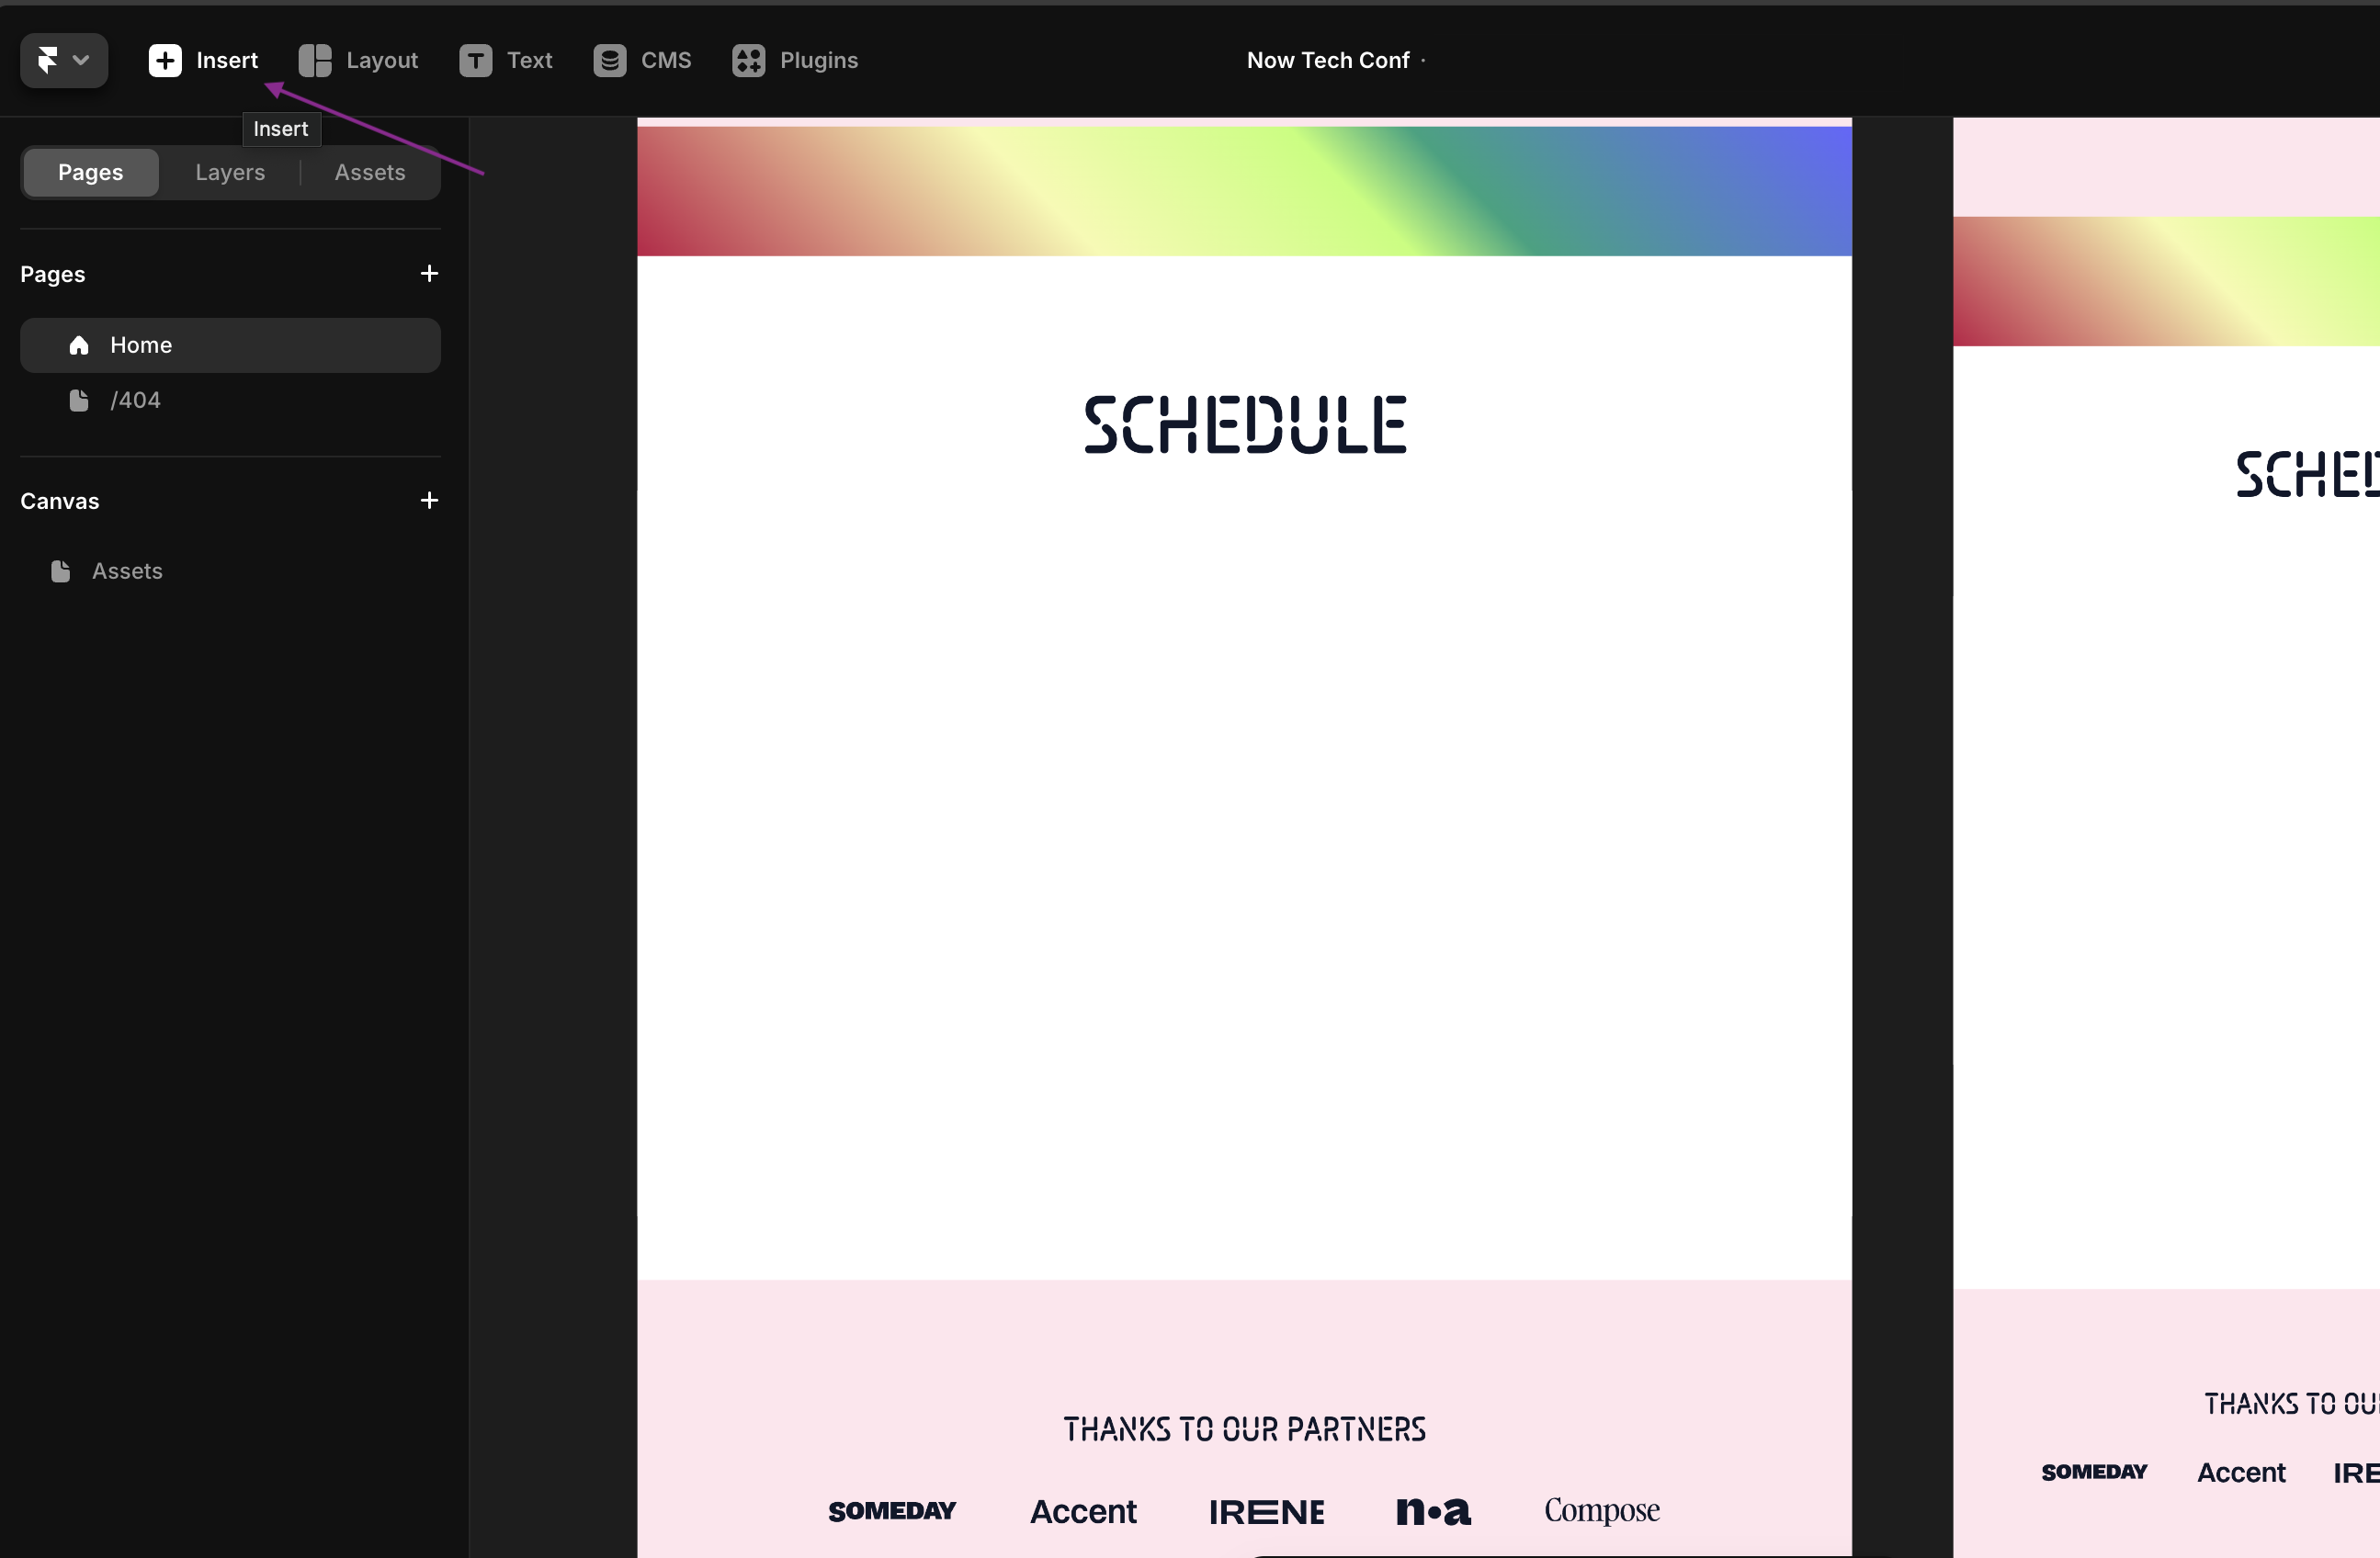
In the editor, click the "Insert" button located in the top-left corner.
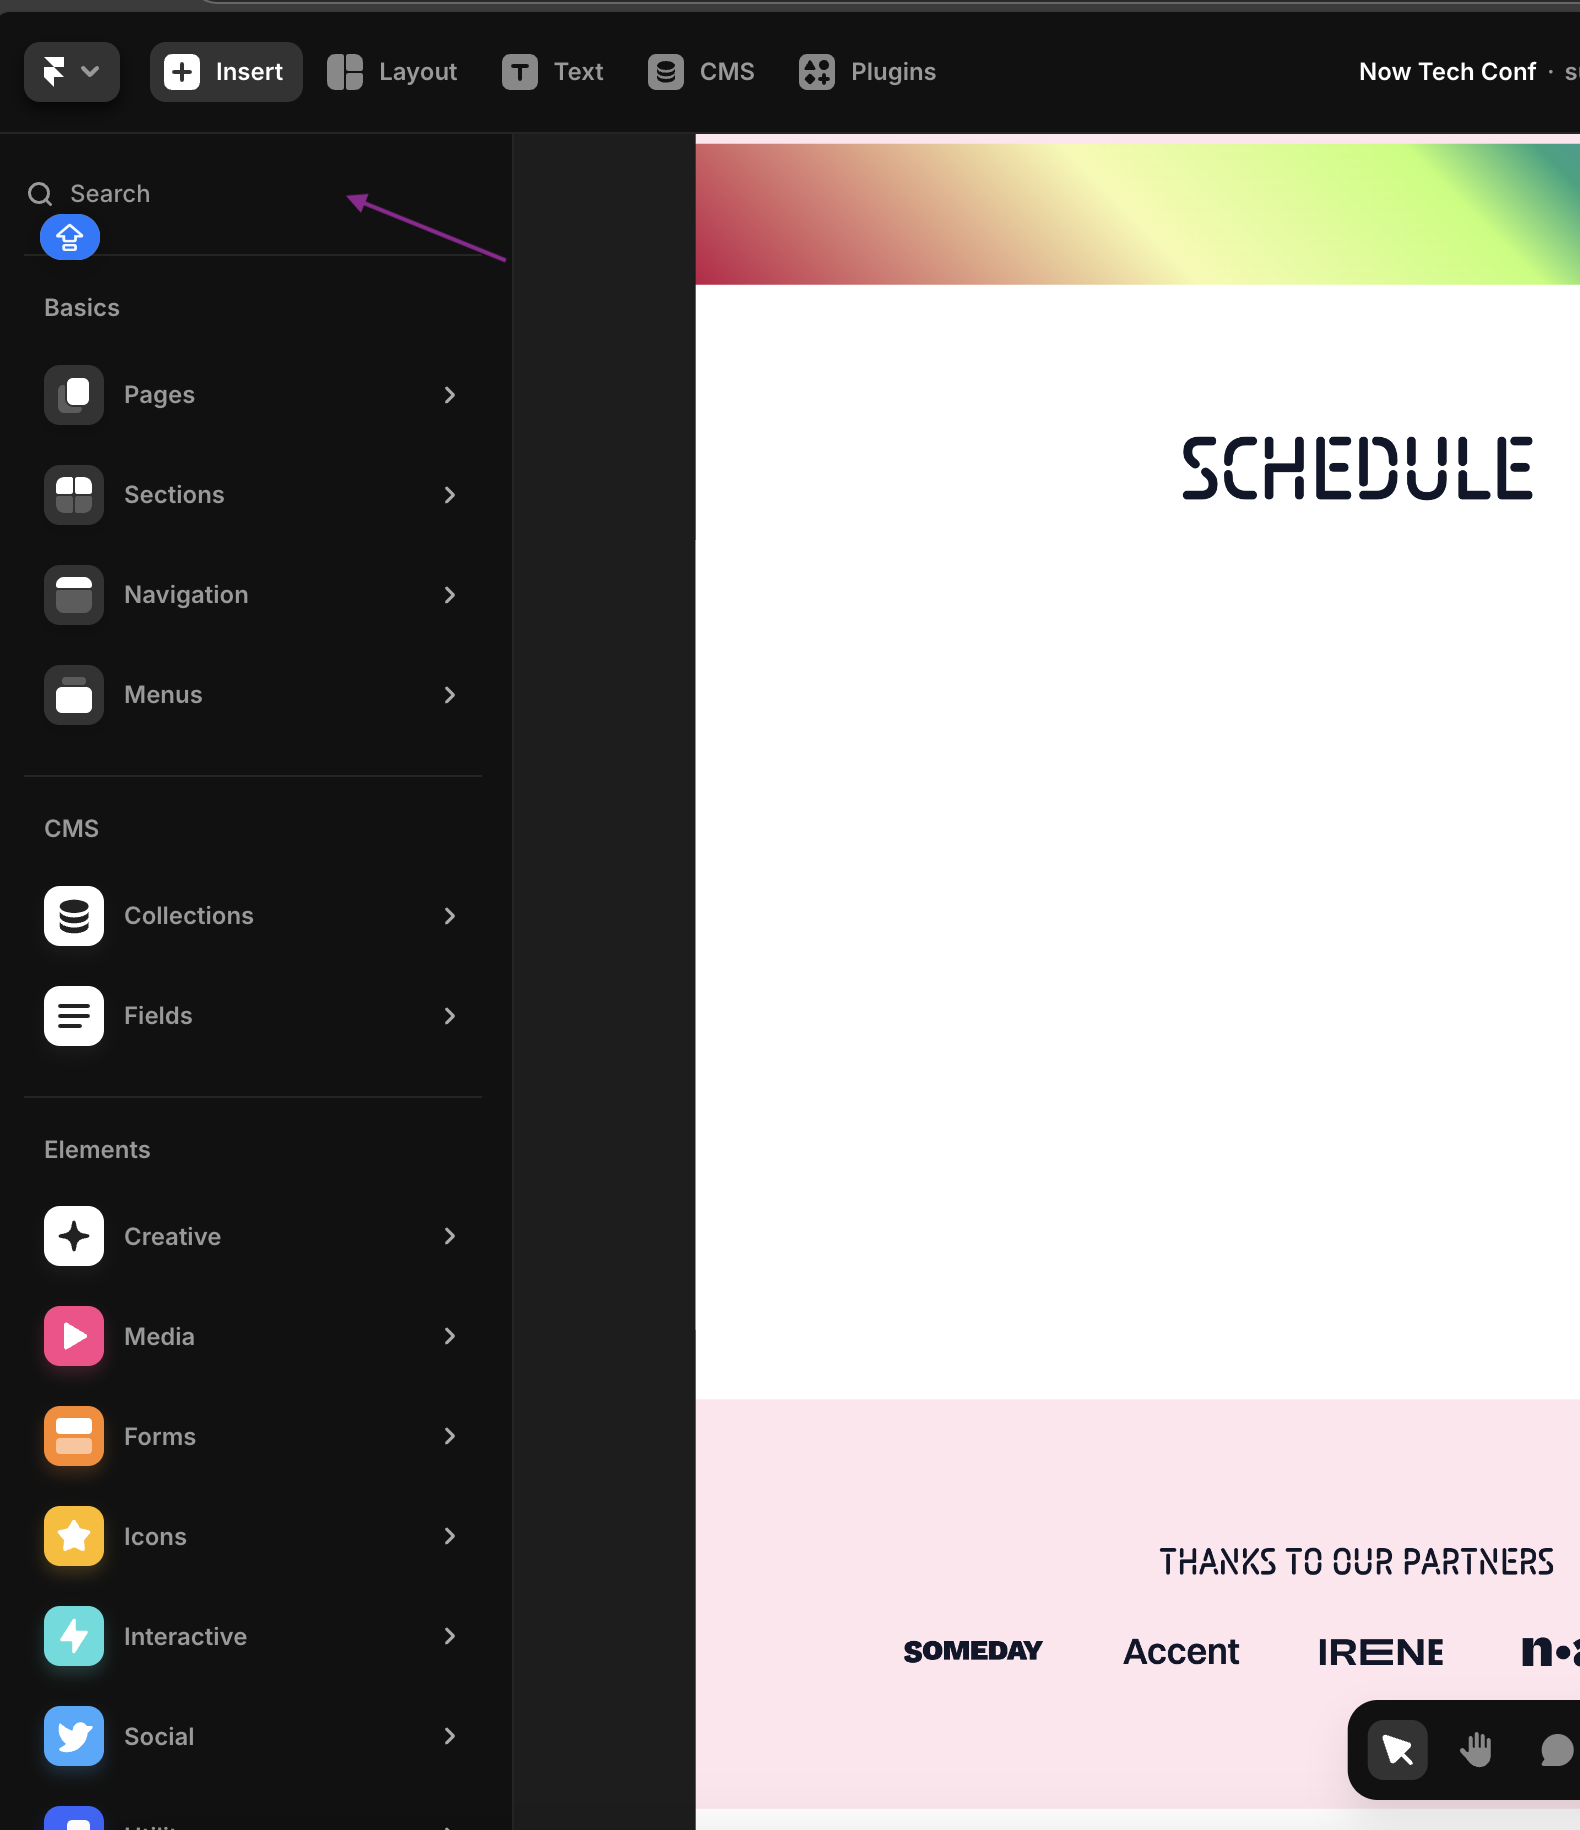
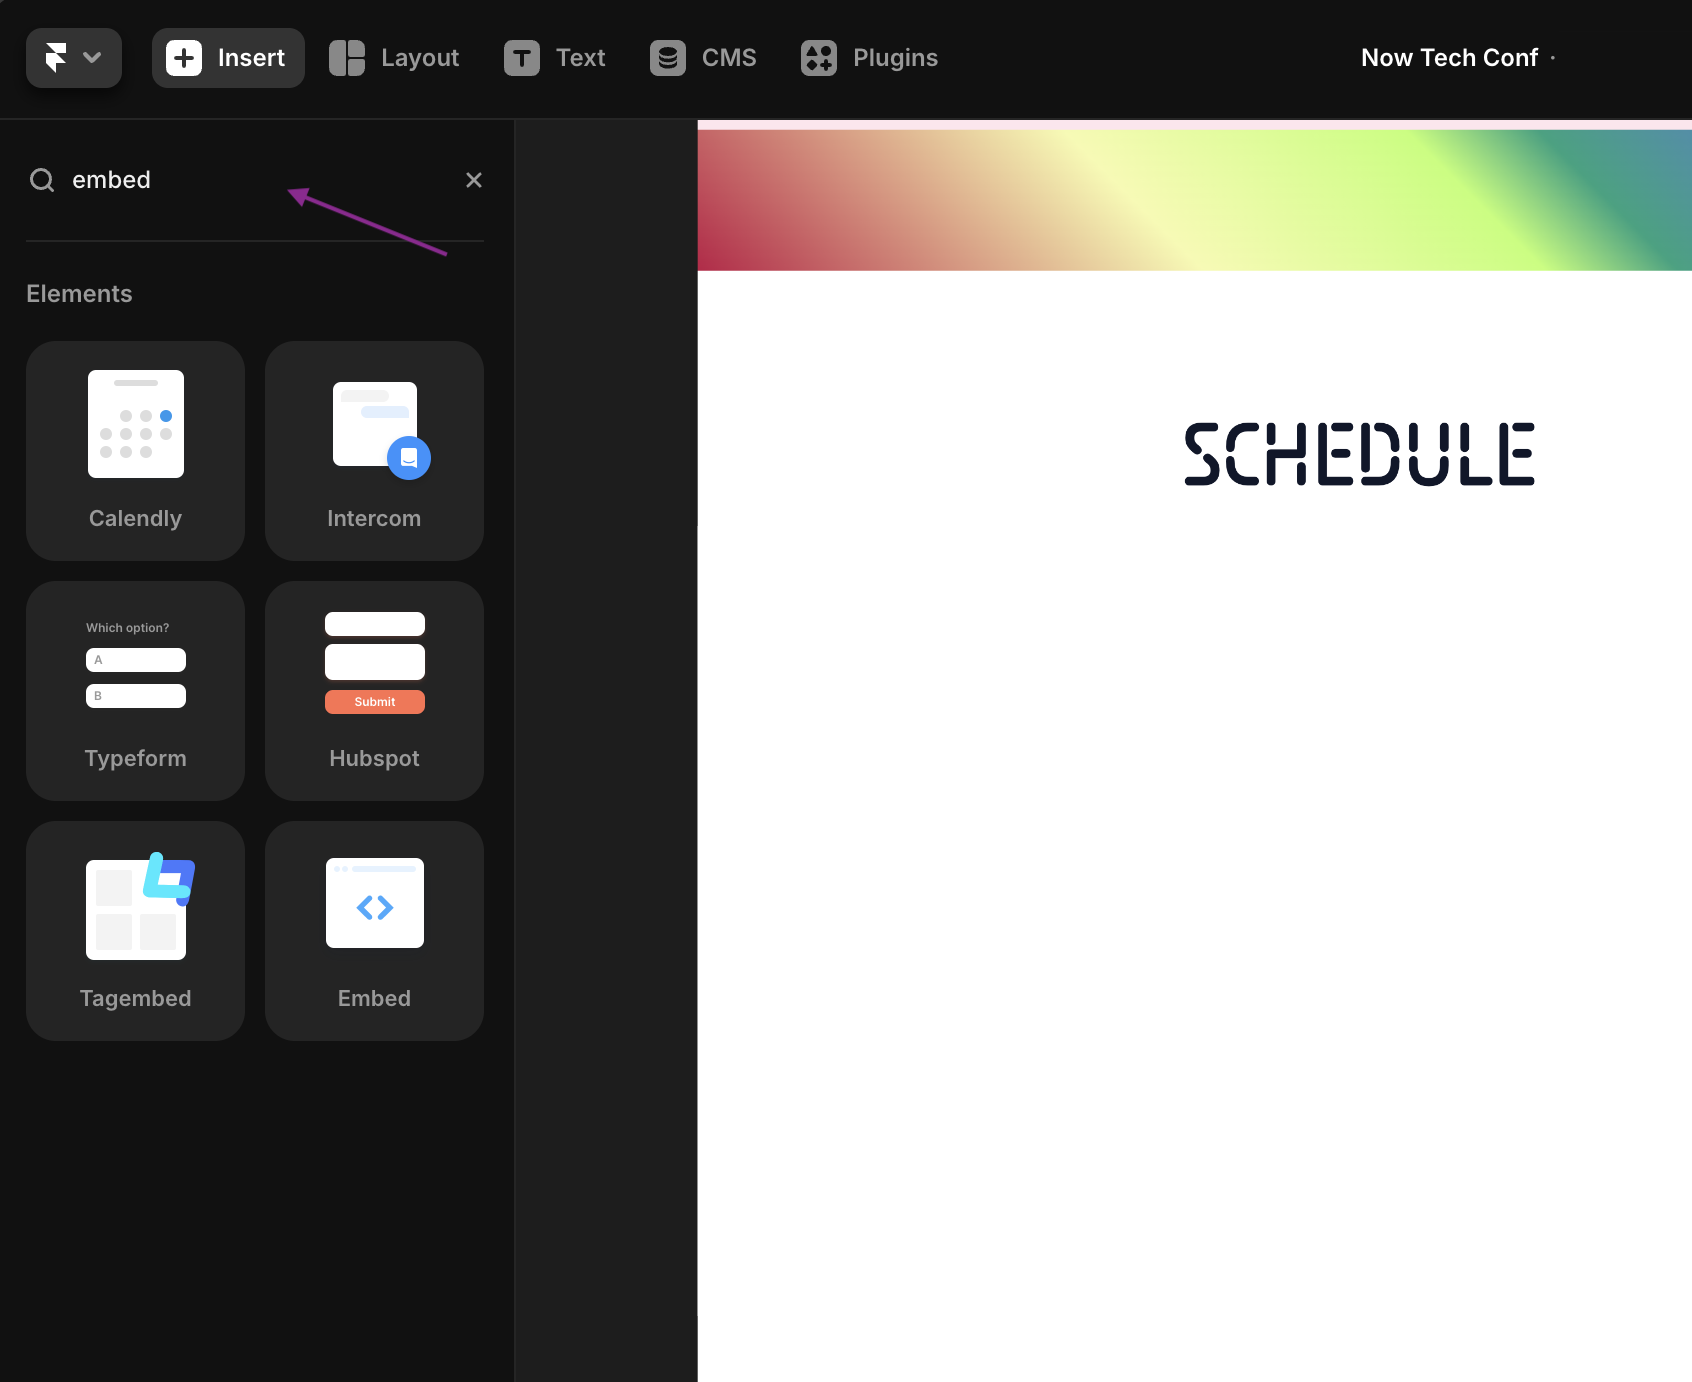
Use the search bar to find "Embed", then select the Embed element and place it on your page.
Step 5: Configure the Embed Element
- Click on the Embed element you added to your page.
- In the menu on the right side, go to the HTML tab.
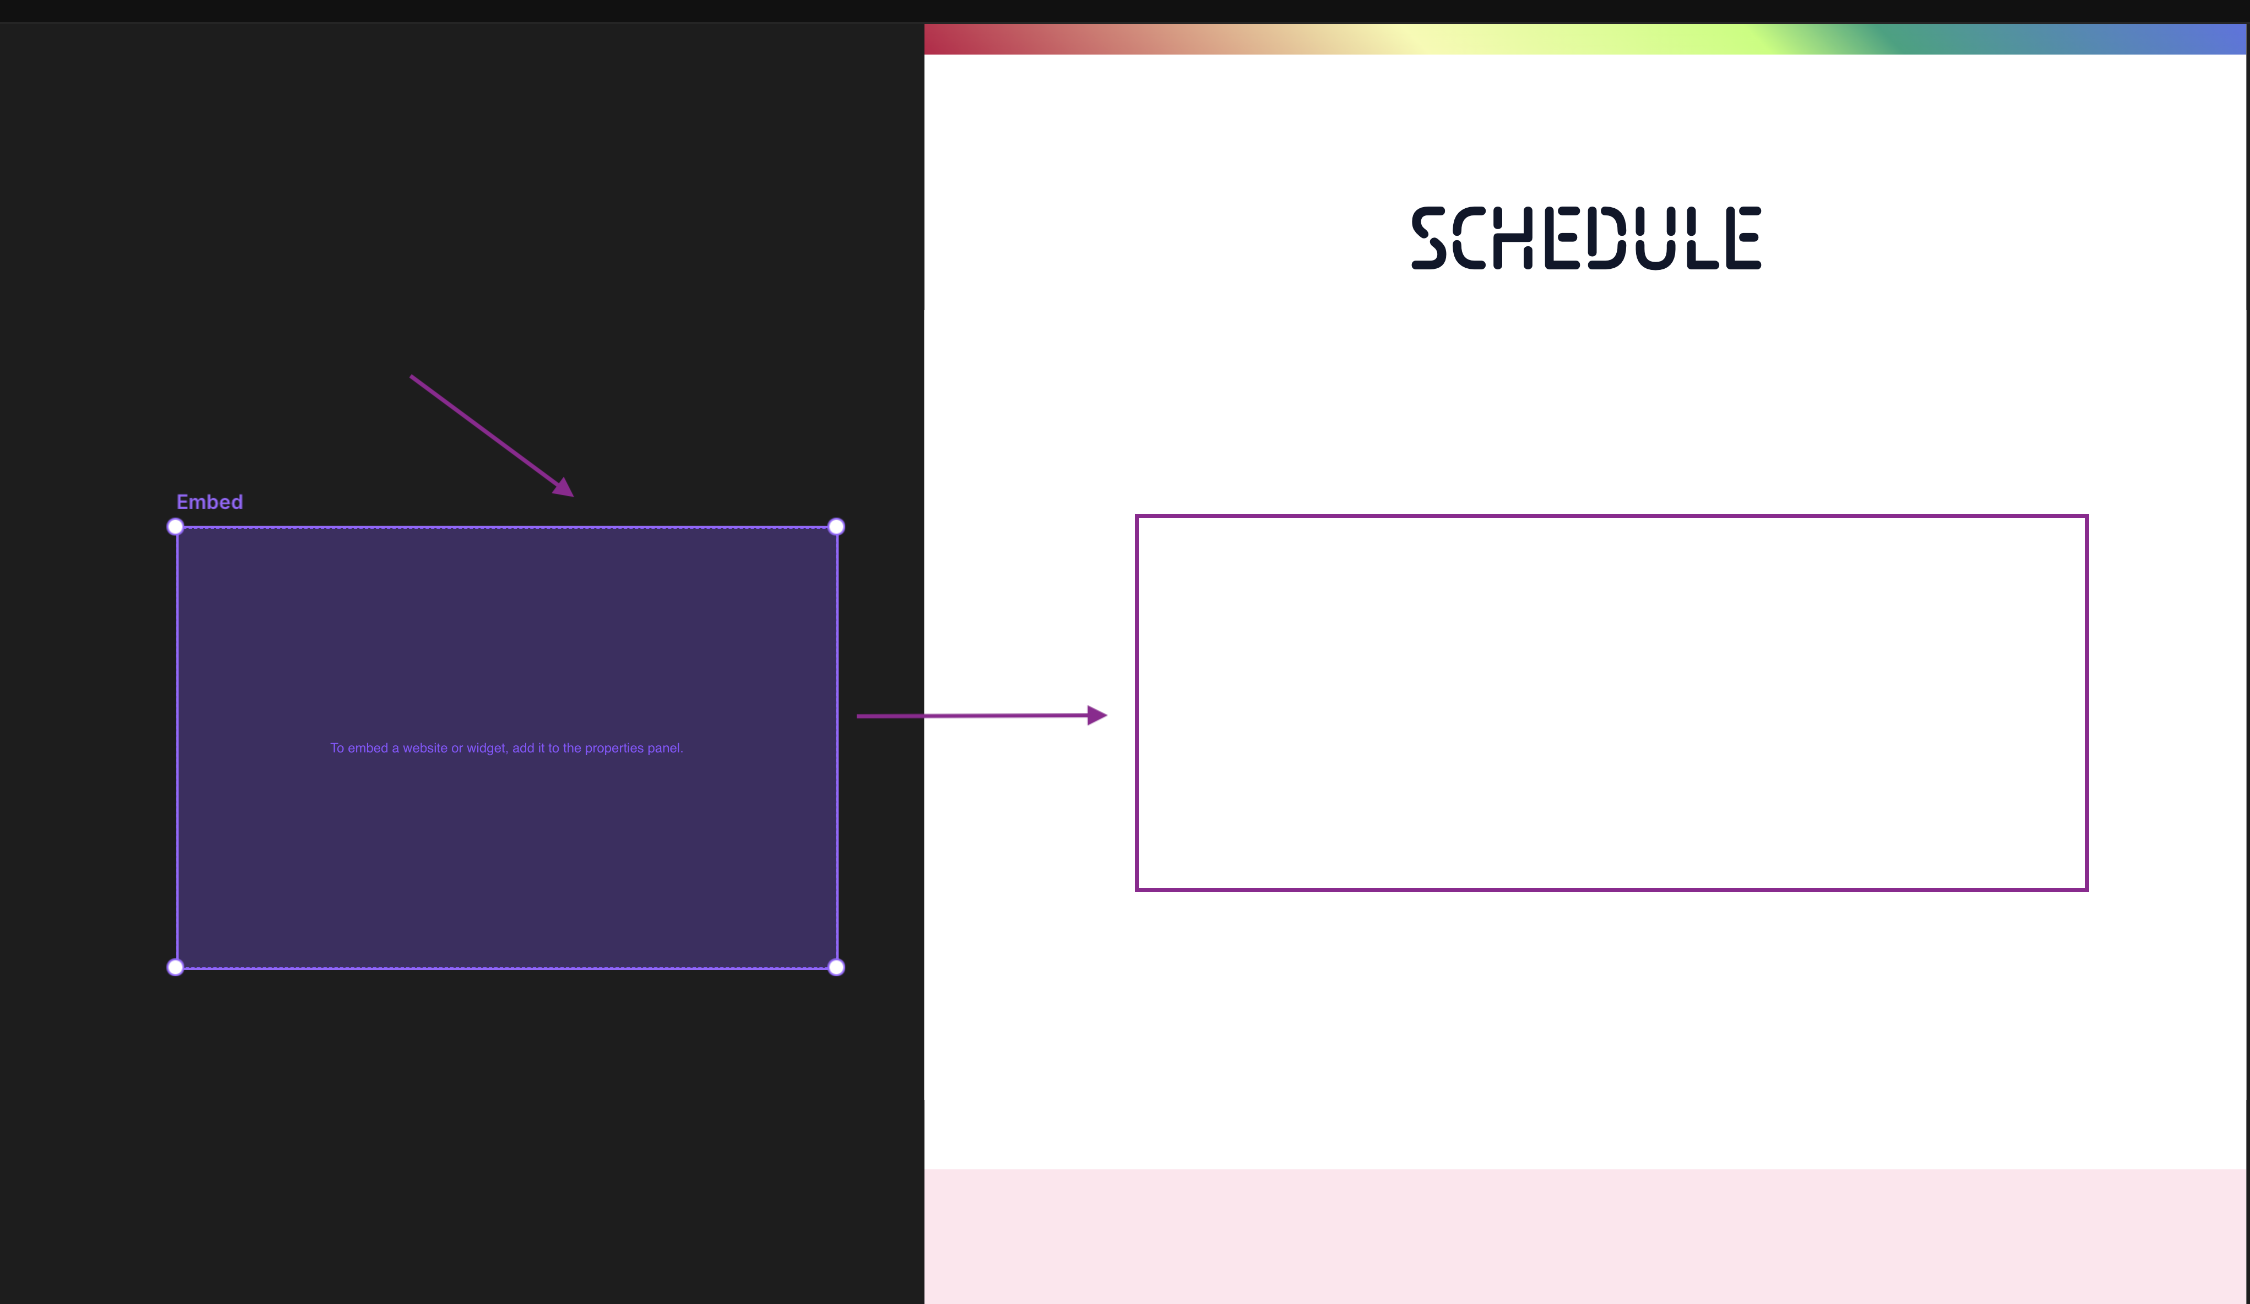
- Paste the embed code from Planby Now dashboard into the HTML field.
<div style="height: 600px; width: 100%">
  <planby-now styles="box-shadow: rgba(0, 0, 0, 0.3) 0px 19px 38px, rgba(0, 0, 0, 0.22) 0px 15px 12px; border-radius: 8px" />
</div>
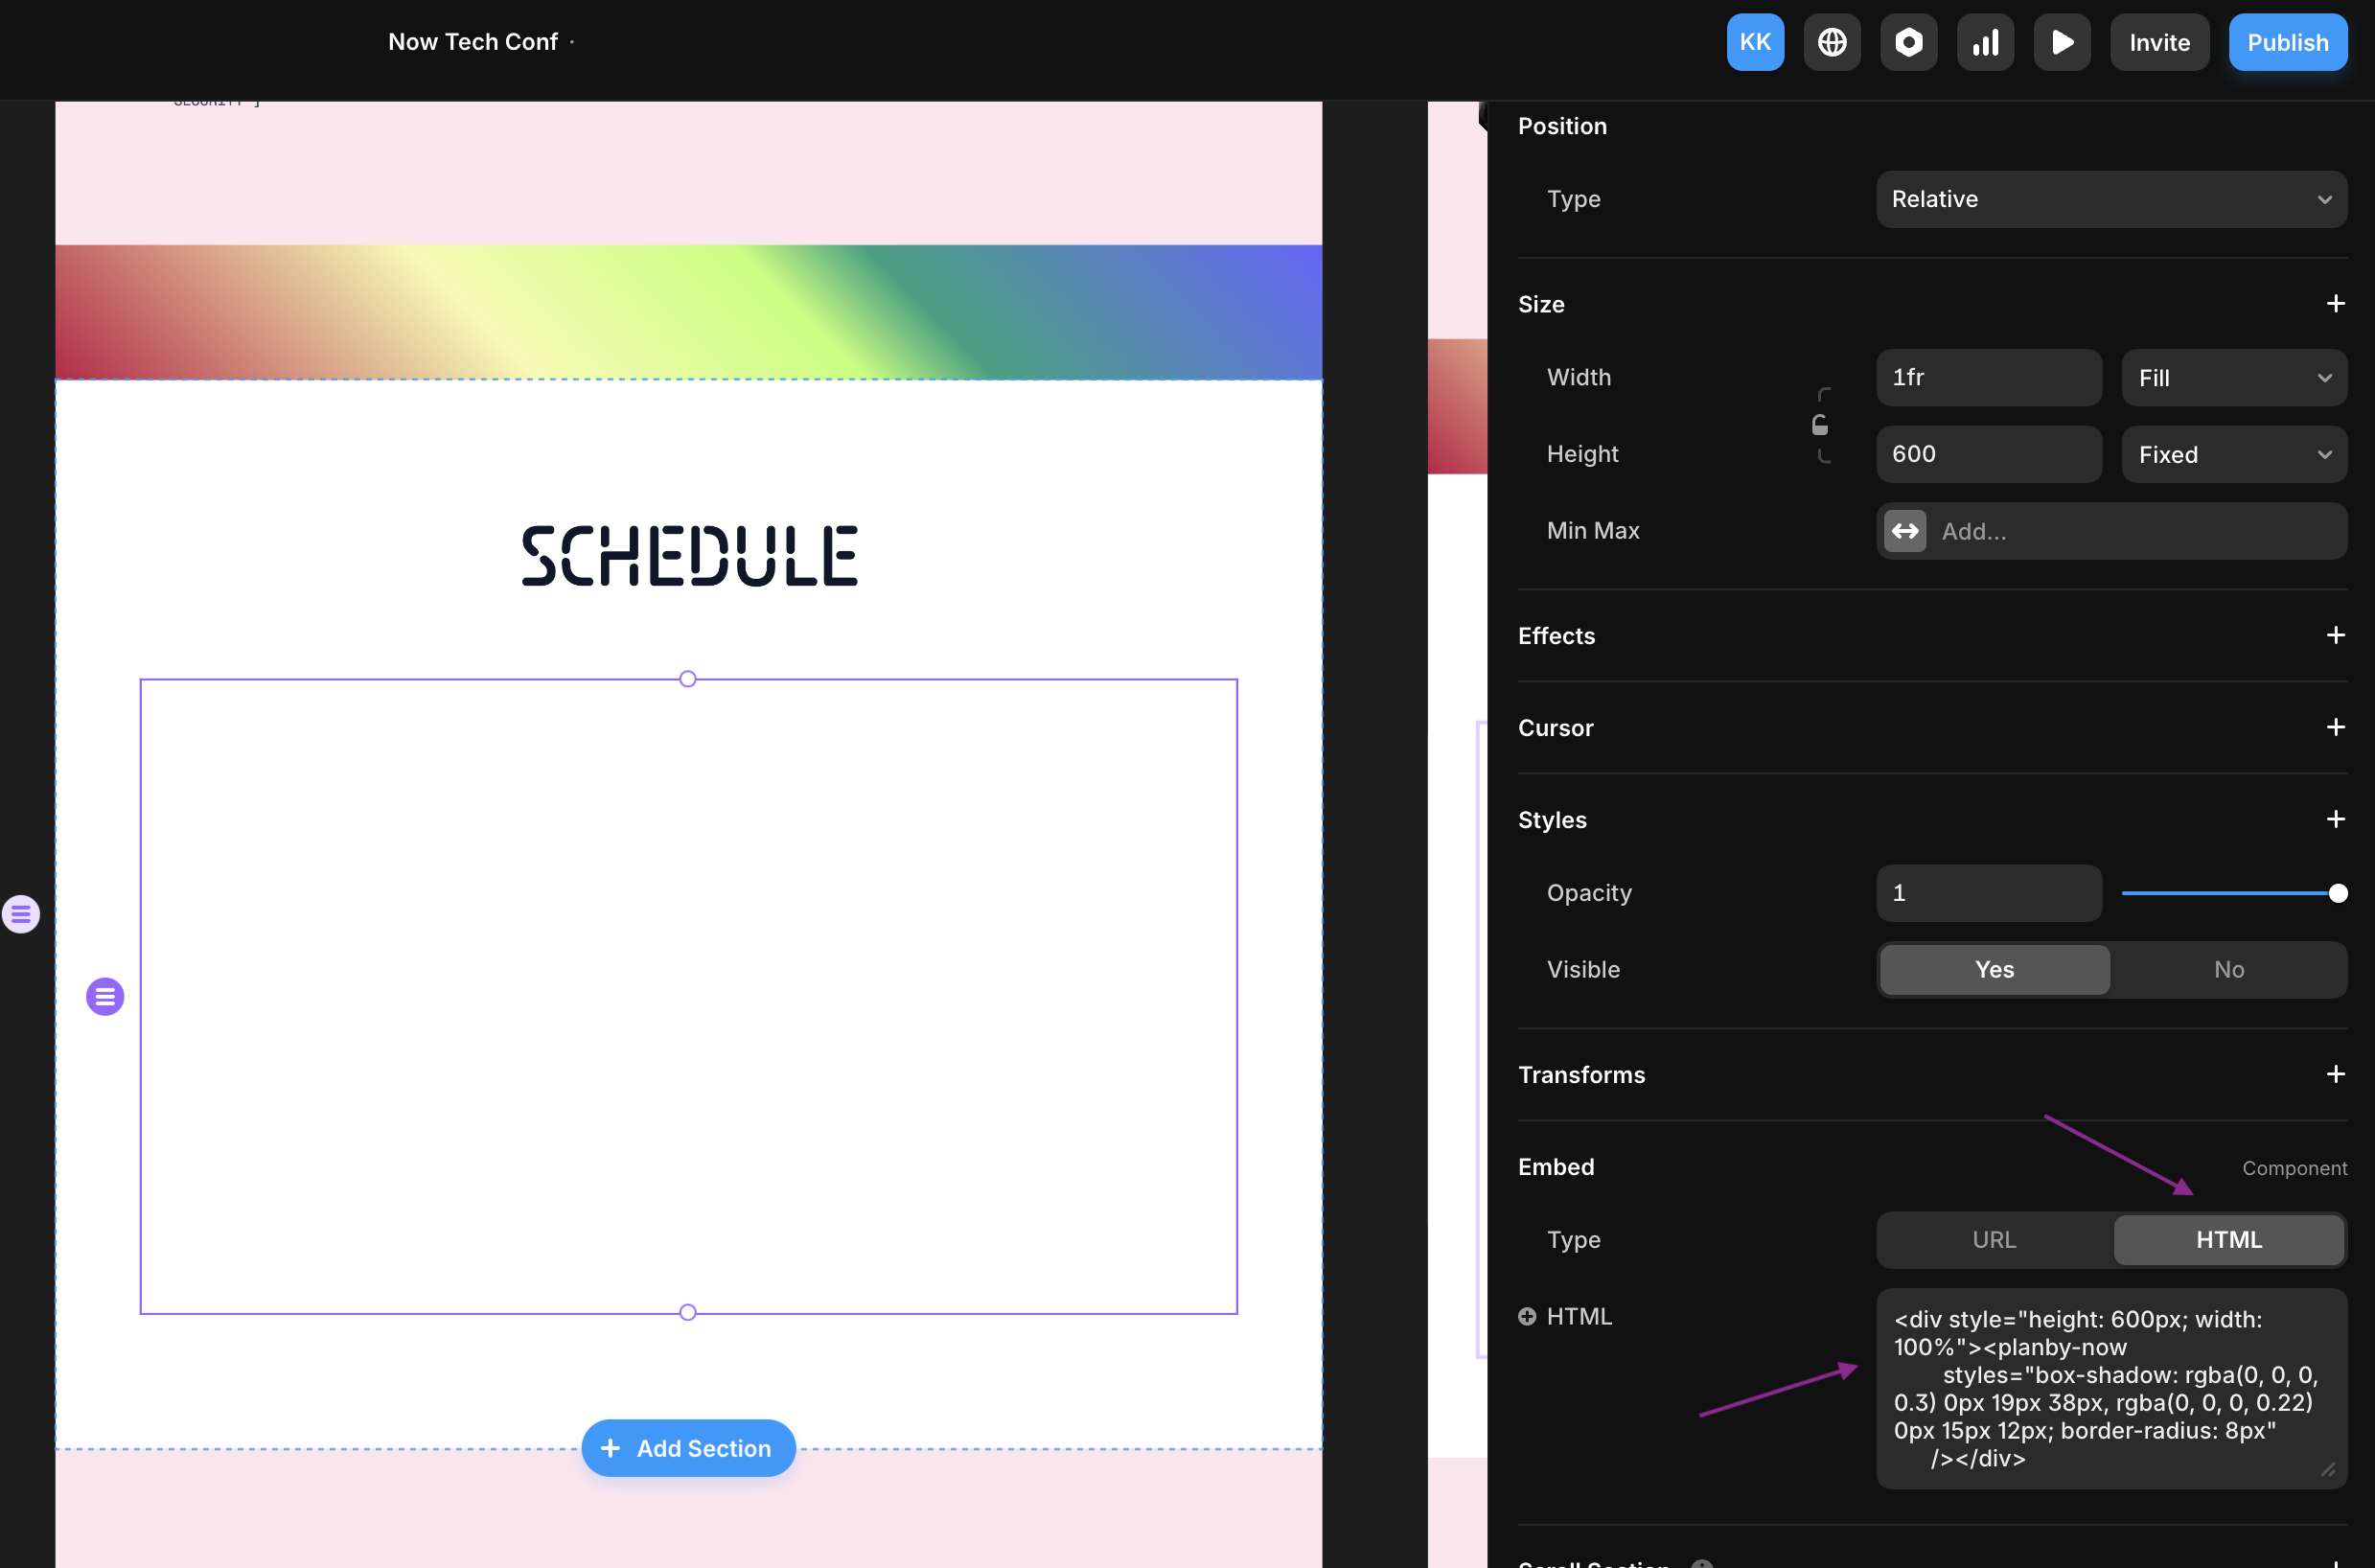
Step 6: Publish Your Project
- Click the "Publish" button in Framer to make your updates live.

Your schedule or application will now be embedded and visible on your website or service.
That’s It! 🚀
You’ve successfully embedded your application into your Framer project. The entire process takes just a few minutes and seamlessly integrates your app into your website.